
Sylvie @kaliscards here with a quick shaker panel, giving you a little sneak peek at some of the new products coming from this amazing new release celebrating Pink and Main 10th birthday!
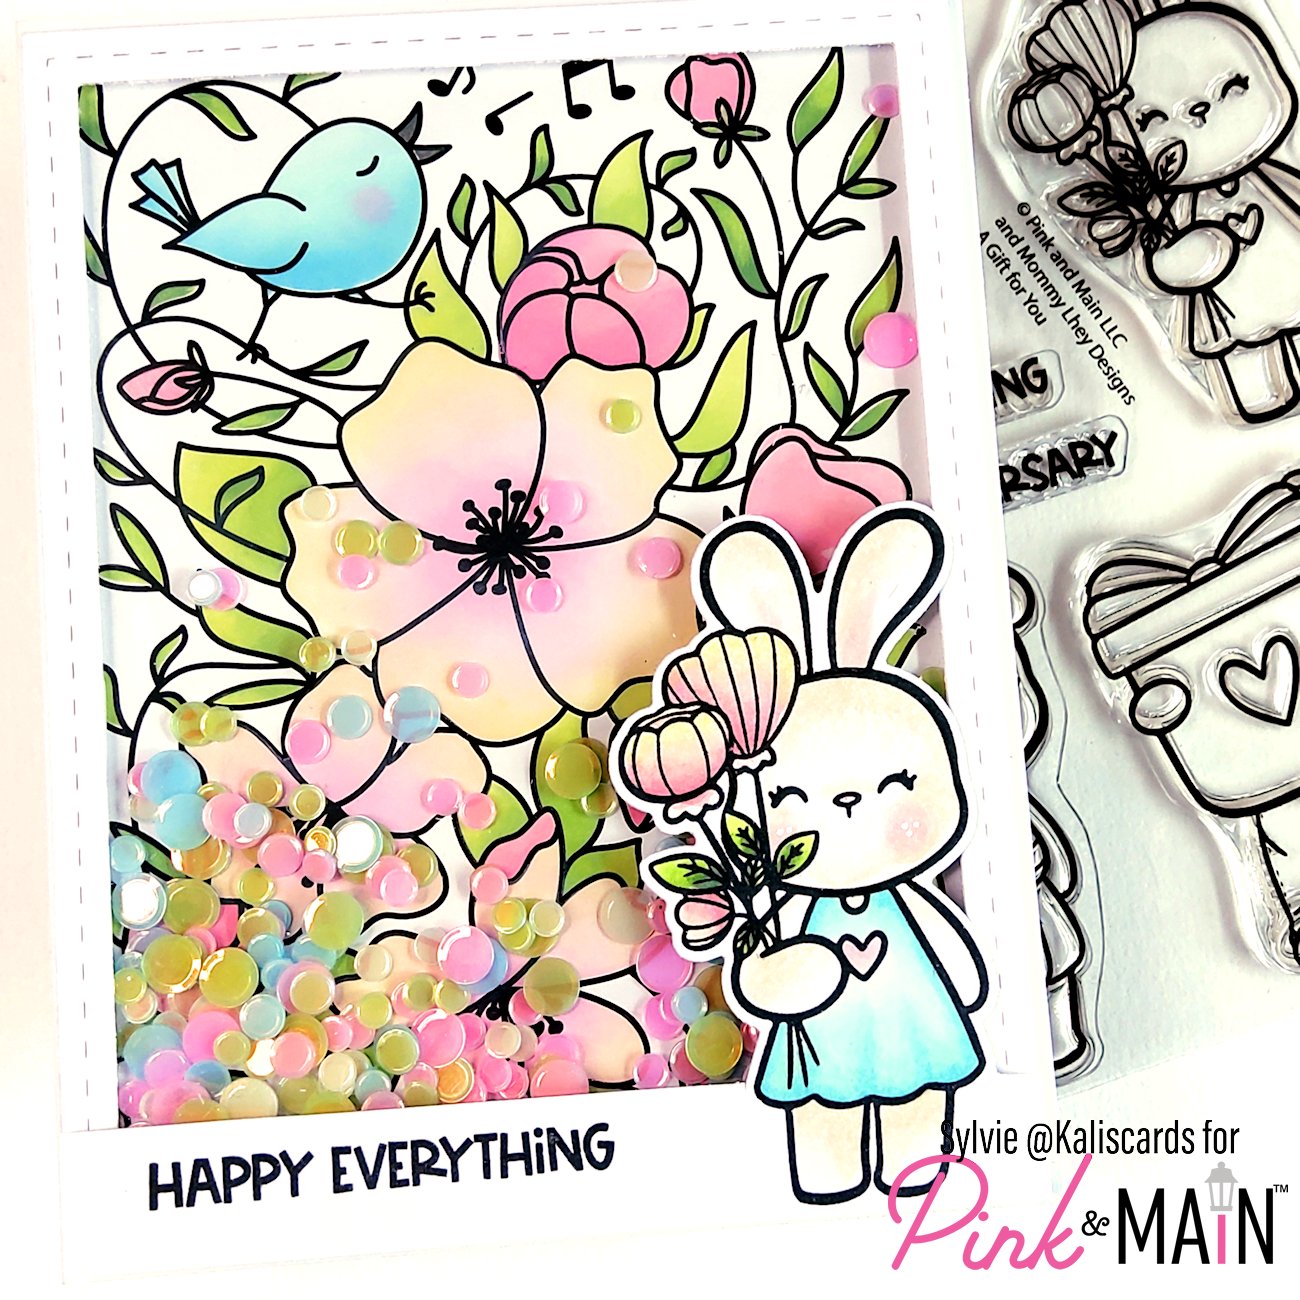
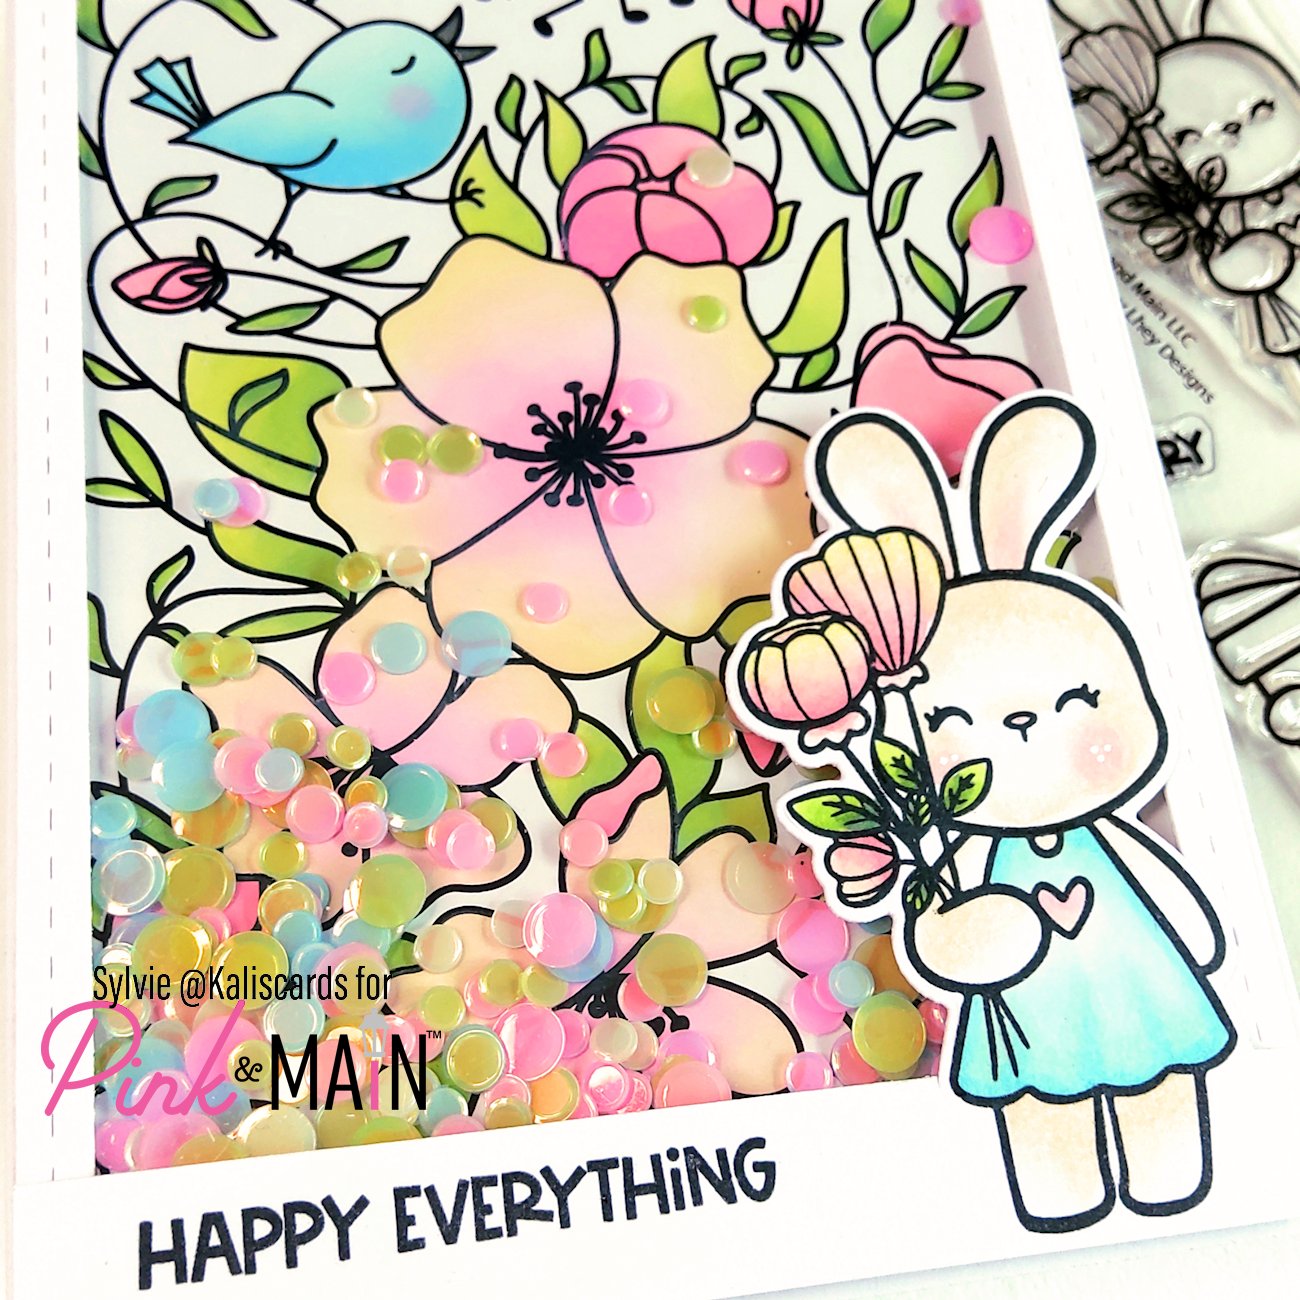
In this project, I have used the new Stitched rectangle frame die which will allow you to create quick borders in many sizes to feature in your cards and also create shaker panels like I did in this project. Hope you are well seated… this release has a range of 28 new confetti pockets. Those are beautiful sequins in a variety of colors and finishes (opaque, iridescent, foiled, etc.). The images on this project are from a brand new set called A gift for you. In the background, I used a Songbird foilable card front and coordinating stencils released last month.
To create this shaker front panel, I used a foilable card front, called Songbird and used the coordinating stencils to quickly color the image. I did not foil the panel as I wanted to keep solid black lines. These front cards are really awesome to quickly blend without tarnishing the lines with inks. Just have to wipe away the excess at the end.
To color the panel, I used many different Distress oxides: Twisted citron, Mowed lawn and Rustic wilderness for the leaves; Salvaged patina, Salty ocean and Black soot for the bird; Spun sugar, Kitsch flamingo and Scattered straw for the lighter flowers; Kitsch flamingo and Picked raspberry for the darker flowers.
I then die cut the frame from white cardstock with the new Stitched rectangle frame dies and used the larger frame for my project. I then cut a background panel the same size and glued the Songbird panel on its center. I adhered a rectangle of acetate at the back of the frame, with double-sided tape and added 3D foam tape. I poured different confettis matching the colors of my back panel: Lemon lime, Oceanside, Eggnog and Poppin pink. I remove the backing of the foam tape and adhered it to the back panel. I then glued the panel onto the cardbase.
Next, I cut a panel of the same width as the front panel and 3.5 inches high. I stamped the cute bunny from the A gift for you set on the right and the sentiment on the left bottom corner, from the same set. I colored the bunny with Copic markers. I then placed the coordinating die and did partial diecutting, stopping right above the sentiment. If you are unfamiliar with partial diecutting, this is super easy and very useful. All you have to do is place the dies as usual, then place your image facing up onto the bottom plate, as usual. However, don’t cover the entire image with the top plate and leave the part you don’t want to cut out free, not covered by the plate, i.e., the limit of your plate must be exactly where you want to stop cutting. Then run it through your diecutting machine, holding the plates in position until they are well engaged.
To finish the cut, I used a craft knife and ruler to cut on the sides of the image. Finally, I adhered the image and sentiment with 3D foam onto the front panel.
I hope this inspires you to use foilable card fronts and coordinating stencils to create quick panels and frame dies to quickly turn them into interactive shakers!
Thank you for stopping by and have a wonderful crafty time!
Sylvie