
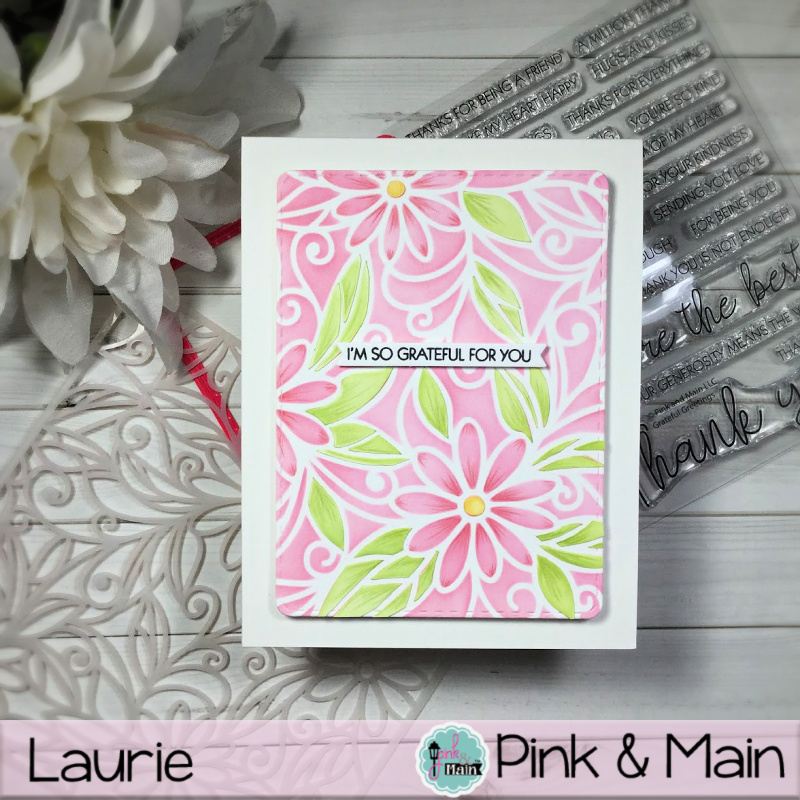
Hello and welcome back! As the title suggests, I’ve made one of the fussiest cards ever!! This is definitely not quick and requires a bit of patience. But I had an idea in my head and I just had to see it through until the end!
Have you ever had a brilliant idea that you can see perfectly executed in your mind? And then went to make your vision a reality only to find that maybe this idea wasn’t as brilliant as you thought? That’s this card, right here!
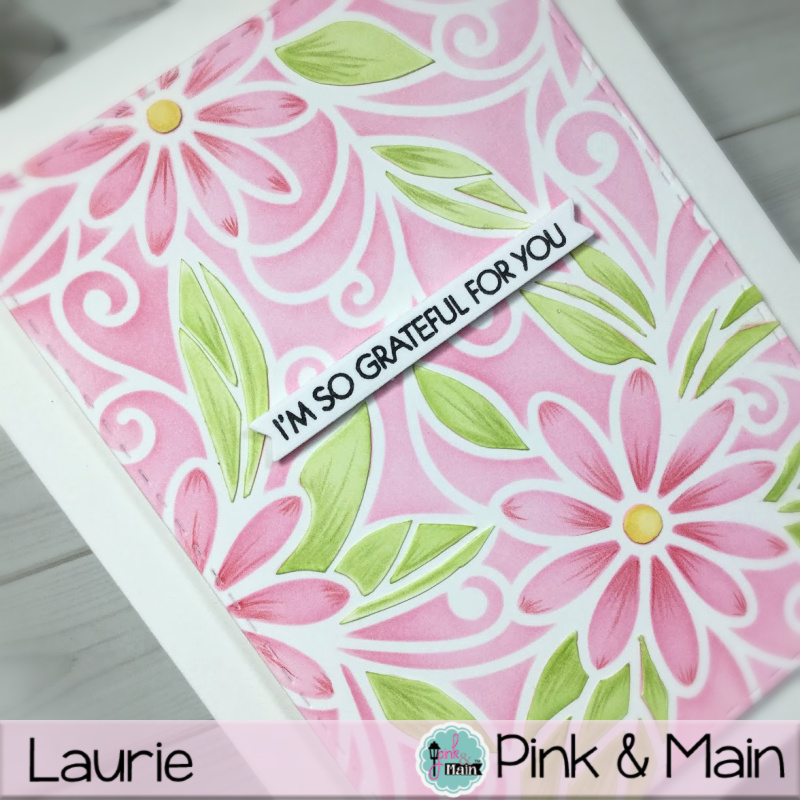
I thought it would be fun and easy to use the Daisies Stencil is a slightly different way. I wanted to add green leaves but didn’t want to take the time to mask each area. Mostly because I thought it would take too much time, hahaha! Insert 2 hours later…
I started by inking up the stencil twice. Once in green, once in pink. I used the Ergonomic Blending Brush which made it quick and easy.
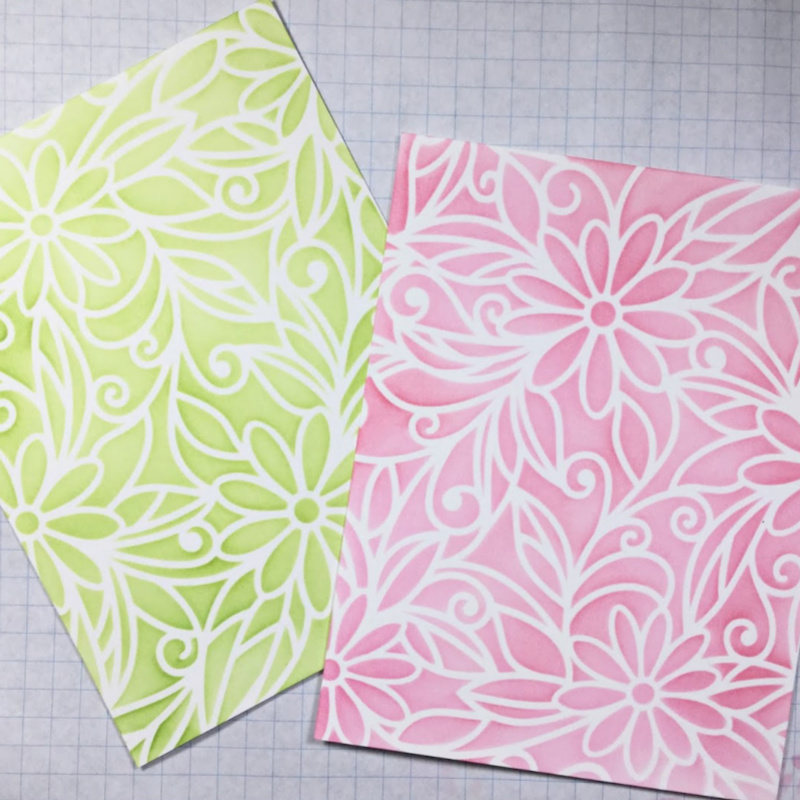
To add a little detail, I used a pink and green pencil to add some flicks of colour on the flowers and leaves.

I cut down the pink panel with the second largest of the Stitched Rounded Rectangle dies ( I made a booboo that had to be cut off). I only chose certain leaves, not all of them.
This is where the tedious job of fussy cutting each leaf portion starts. I learned a couple of lessons. I’ll share just in case you want to re-create. I started by cutting right up to the green, don’t do this. Leave a little white space and just blend the same green ink around the edges. Because the pieces are so tiny, it’s easy to cut off too much. This results in a bit of pink showing when you glue the leaves onto the pink panel.
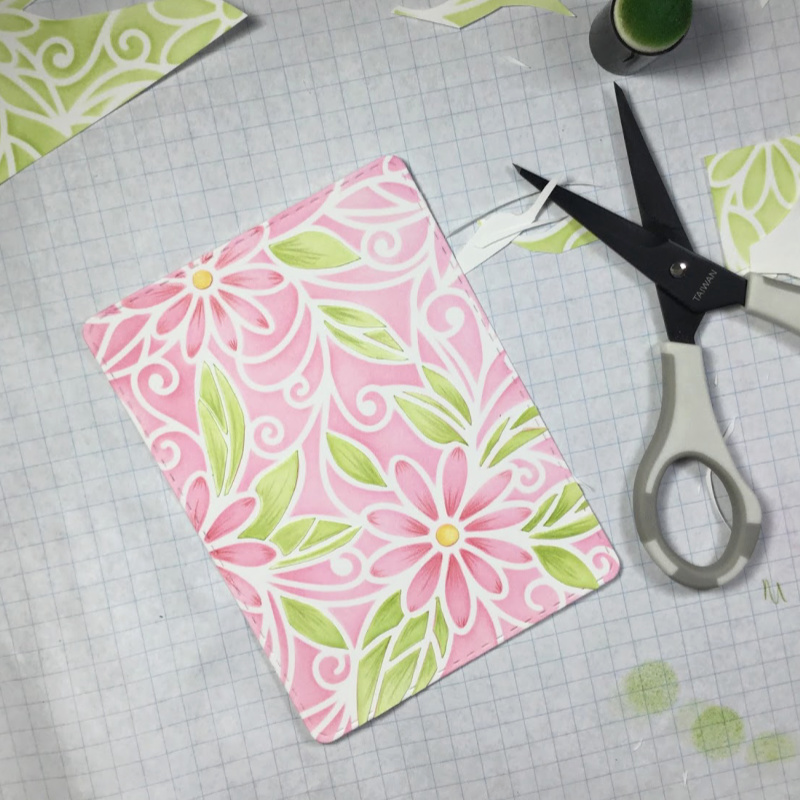
I started in the bottom right corner. You can see some pink showing. By the top of the card, I had a good system.
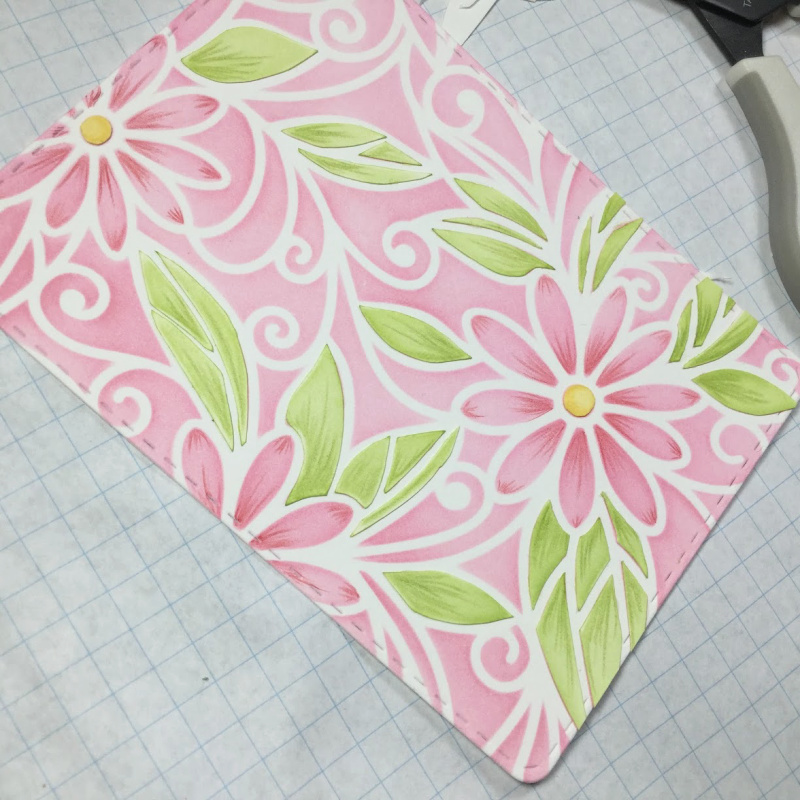
I even added some yellow centres to the flowers. The technique did provide some dimension which looks kind of cool.
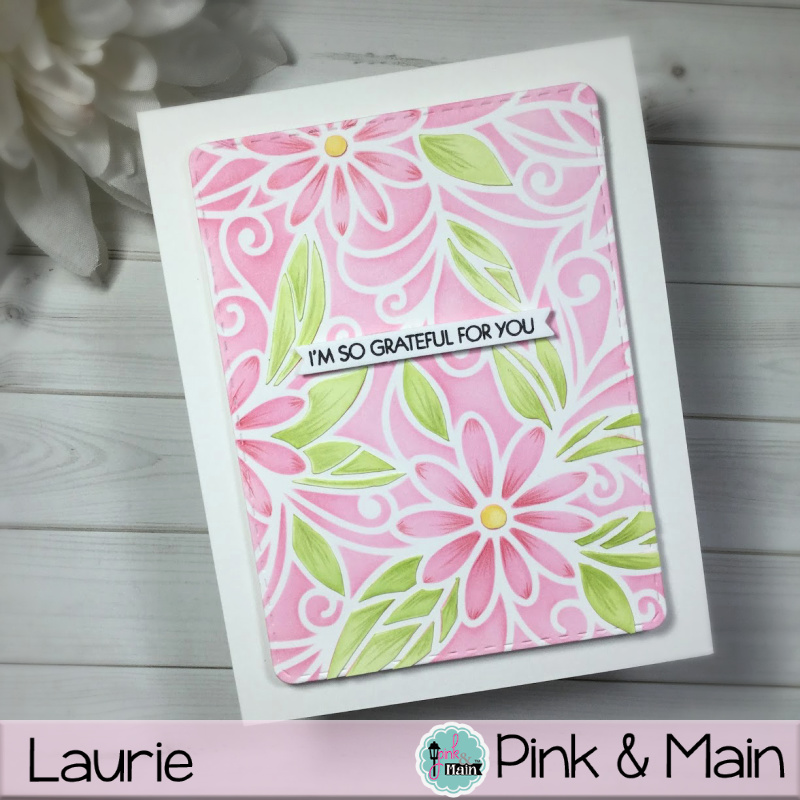
I finished off by adding a small sentiment from the Grateful Greetings Stamp Set which I cut out using one of the Sentiment Strip Dies.
I foam mounted both the sentiment and the panel onto a white card base. It was at this point that I decided not to add any bling and let all my fussy cutting stand for itself, hahaa!
Thanks for handing in there with me today! I hope you enjoyed this tutorial. If you try to recreate…good luck and have fun 🙂
See you soon! Be well!
Laurie