
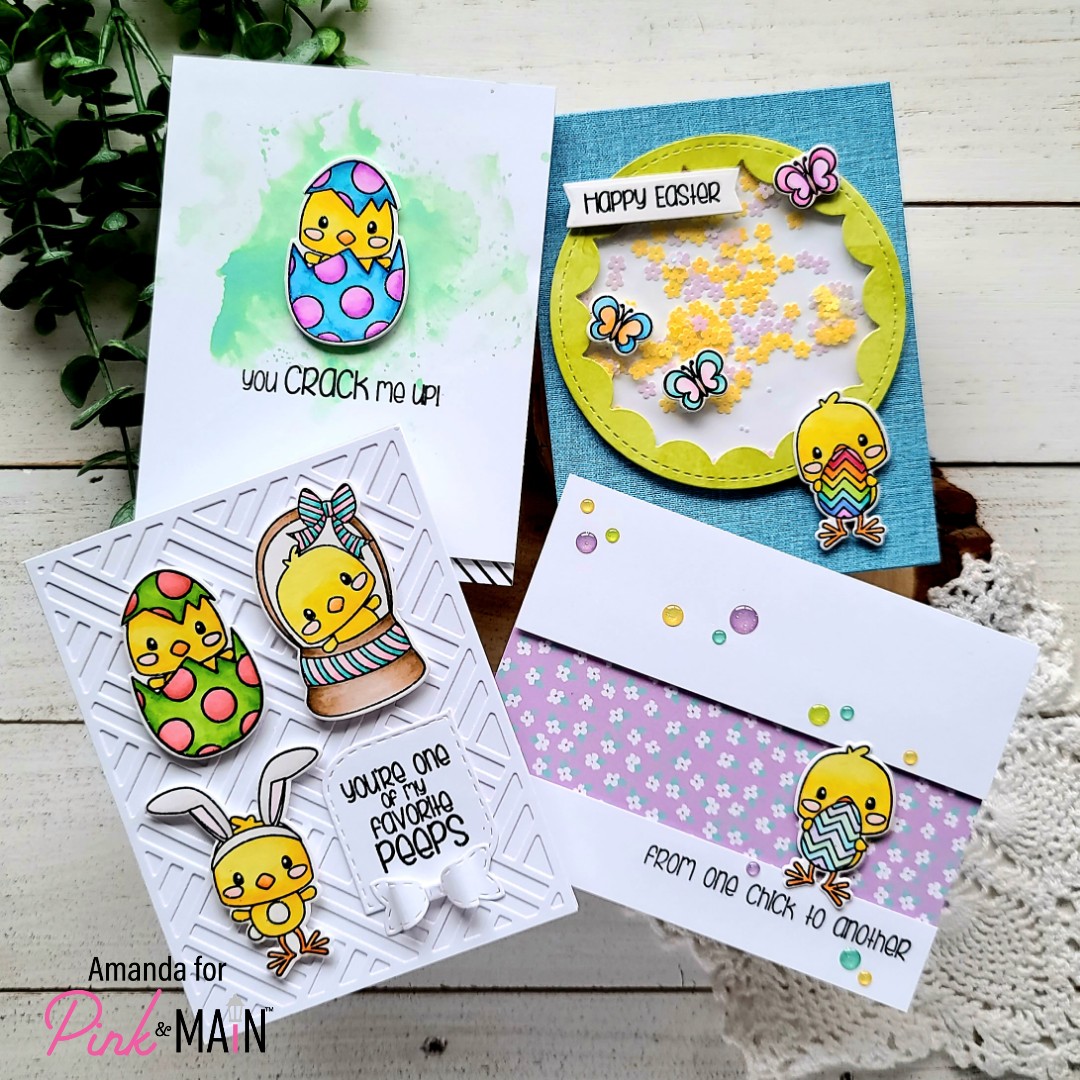
Happy Friday everyone!!! I hope you all had a wonderful week and are ready for a great weekend ahead! It’s Amanda from Twiddler’s Nook today, sharing this set of 4 Easter cards featuring the Easter Peeps stamp set, coordinating dies and some other goodies too! Let’s dive in and I’ll give a little explanation of each one.
Actually, first…I had no direction when I started these cards, just an itch to watercolor these cute chicks so I stamped and heat embossed a bunch of them on a piece of Bristol Smooth cardstock and colored them with my Zig markers and a waterbrush pen. Then…
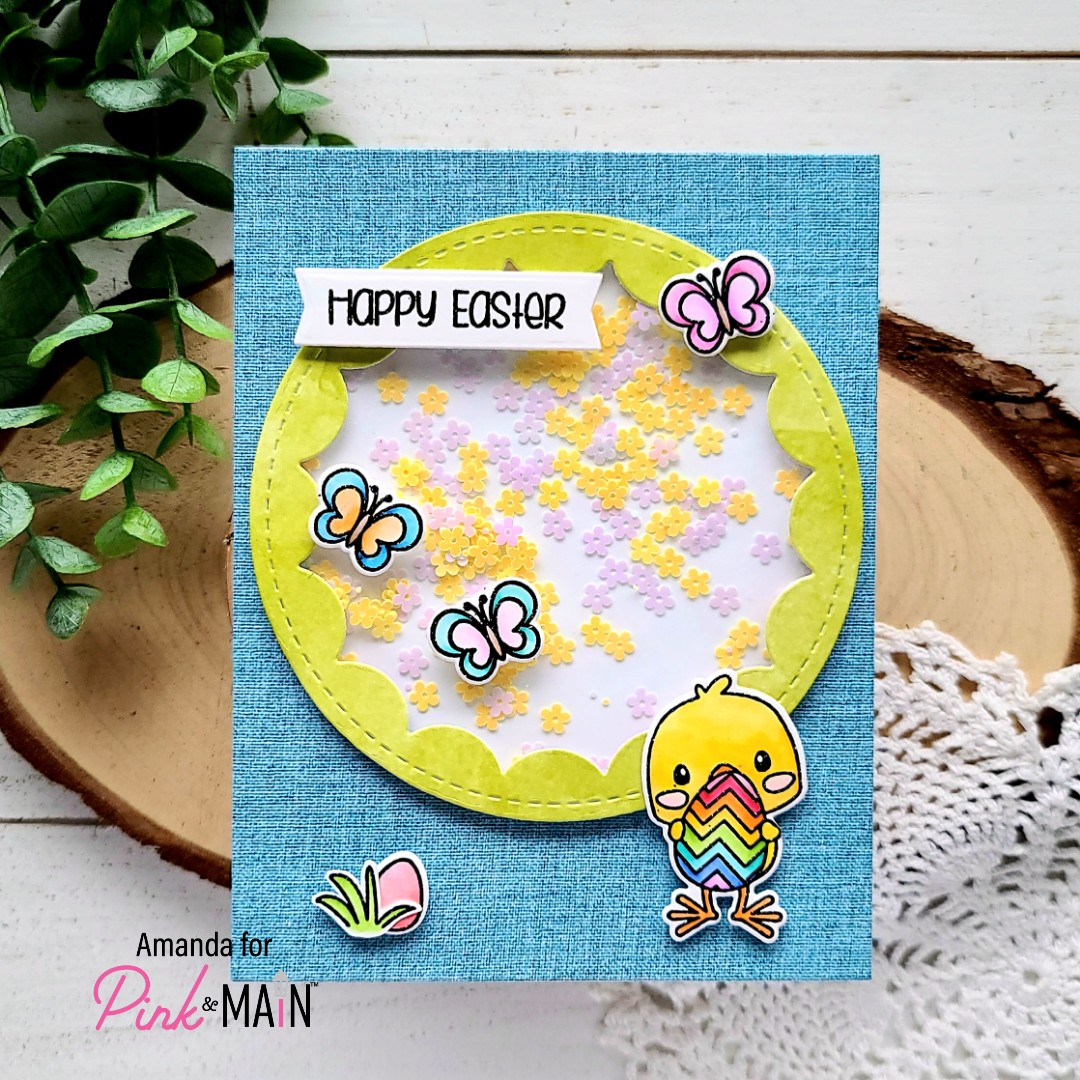
For this first card, I pulled out the new Happy paper pad and the largest Stackable A2 rectangle dies to create my background. I cut a white circle and, using the green watercolor paper from the same pad, a reverse scalloped circle. I created a shaker mechanism adding some fun flower confetti bits inside. I adhered the background to a card base with liquid glue and the shaker mechanism on that the same way. Then I added foam tape to the back of my images and popped them in place. I stamped a sentiment from the stamp set and die cut it with a large sentiment strip and popped it up as well.
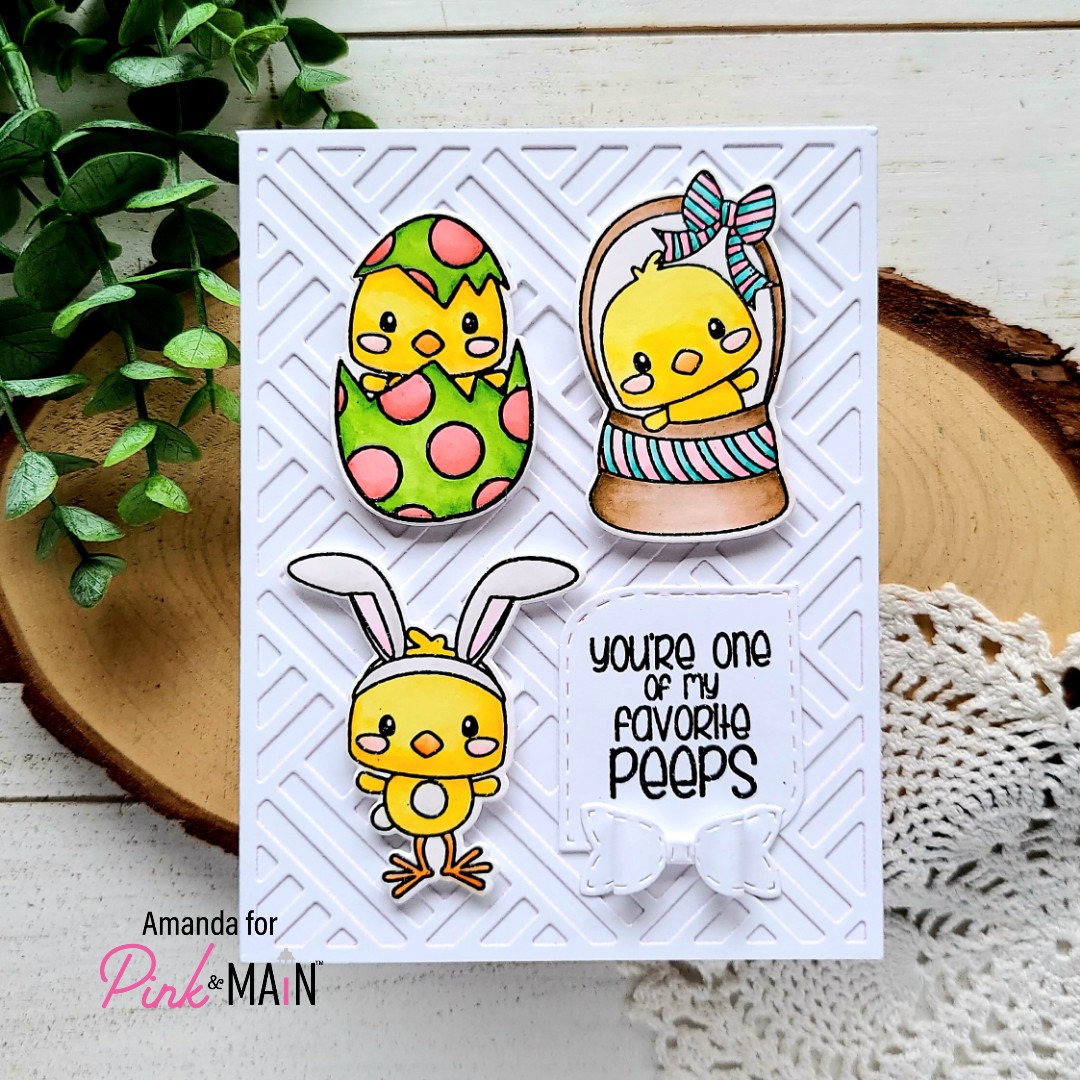
I knew that I wanted to make a card with the basket cover die as my background so I pulled that out next and cut it from white. I used liquid glue to adhere it down and added foam squares to the back of my images. For the sentiment, I stamped and heat embossed it black so it matches the images and did partial die cutting with one of the mod stitched rectangles to create a custom size. Then, to finish this card off I made the smallest stitched bow and added it below the sentiment.
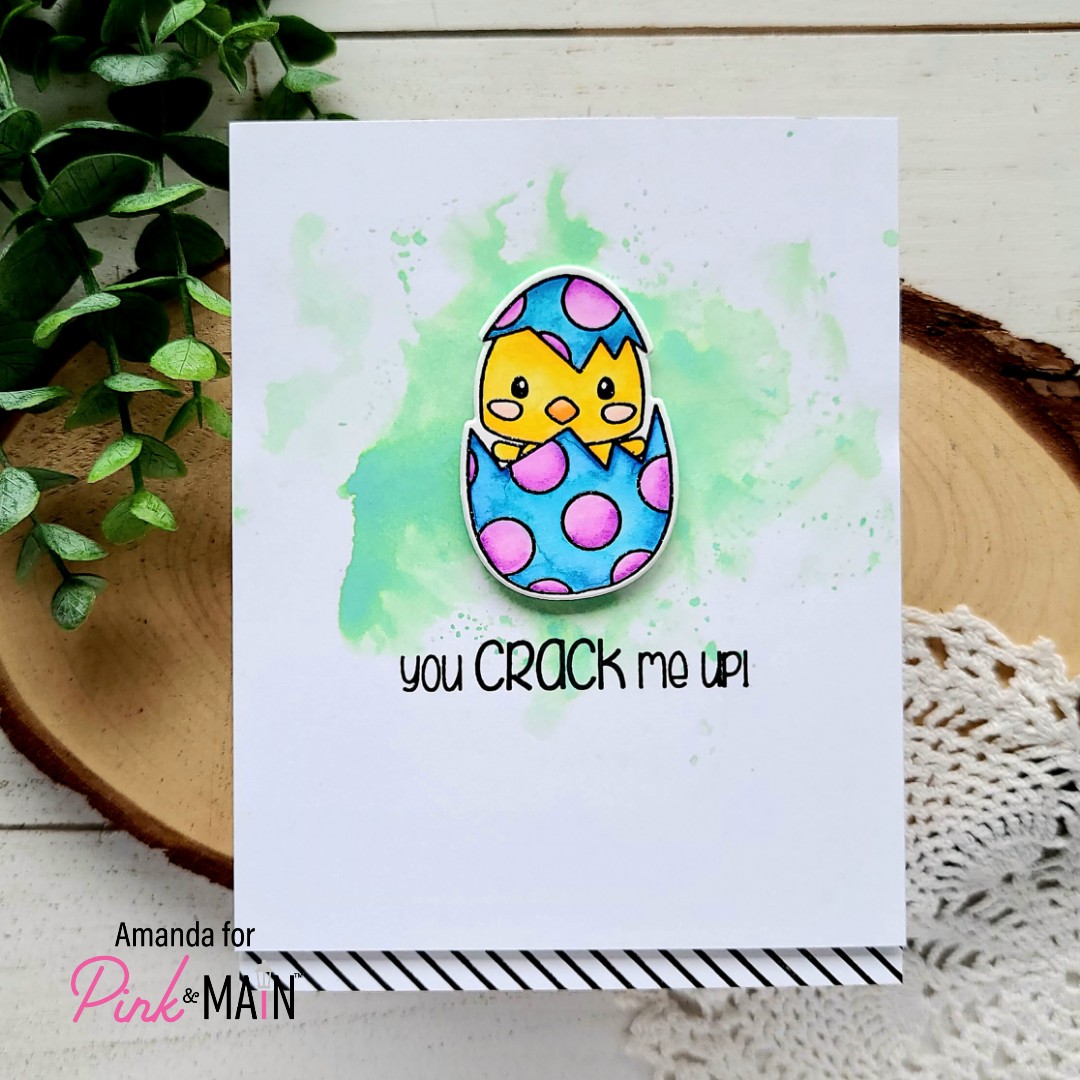
I only had 2 images left at this point so I made a couple of fun clean and simple cards with them. This one, I did some ink smooshing with cracked pistachio distress oxide ink on a white panel, popped my image up with foam squares and stamped the sentiment below it. I trimmed 1/2 inch off the bottom of the panel and added foam tape to the back. Then I stamped a striped background with black ink on a card base and added my panel. This card might be my favorite of all…
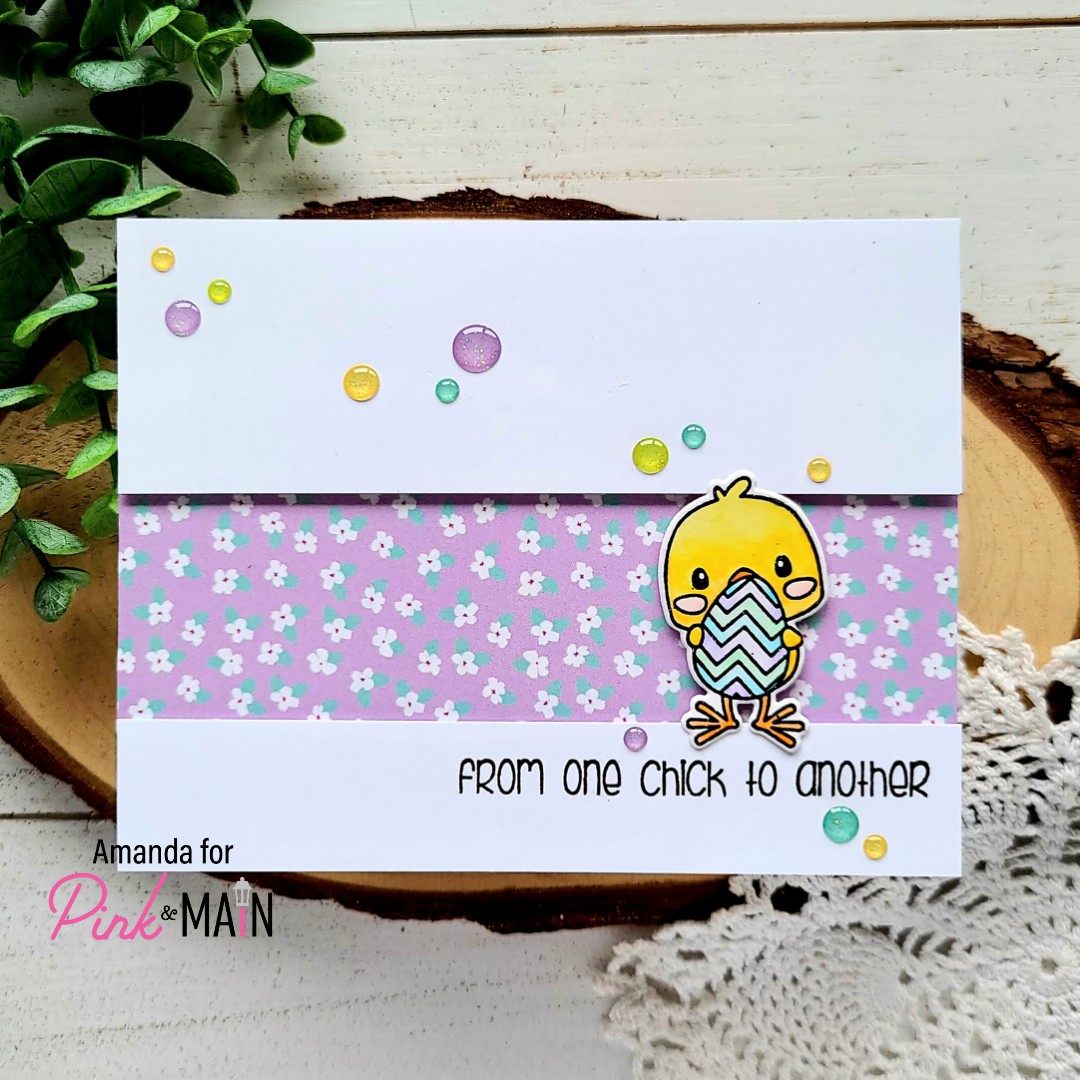
For this final card, I trimmed another piece of paper from the Happy paper pad and adhered it to a card base. Then I trimmed a piece of white cardstock to 2 strips and popped them up with foam tape. Using my MISTI, I stamped my sentiment and then using a combo of foam tape and liquid glue to adhere my little chickie. I decided to finish this card off with some super cute Happy Mail glitter enamel dots scattered across the card.
I know this was a long post and I’m glad you stuck with me to the end. Did you have a favorite card from the bunch?
I appreciate you sharing your time with me. Have a fabulous day!
These are darling