
This post uses affiliate links at no additional cost to you! By clicking the links in this post, I earn a small commission should you make a purchase. Thank you in advance!
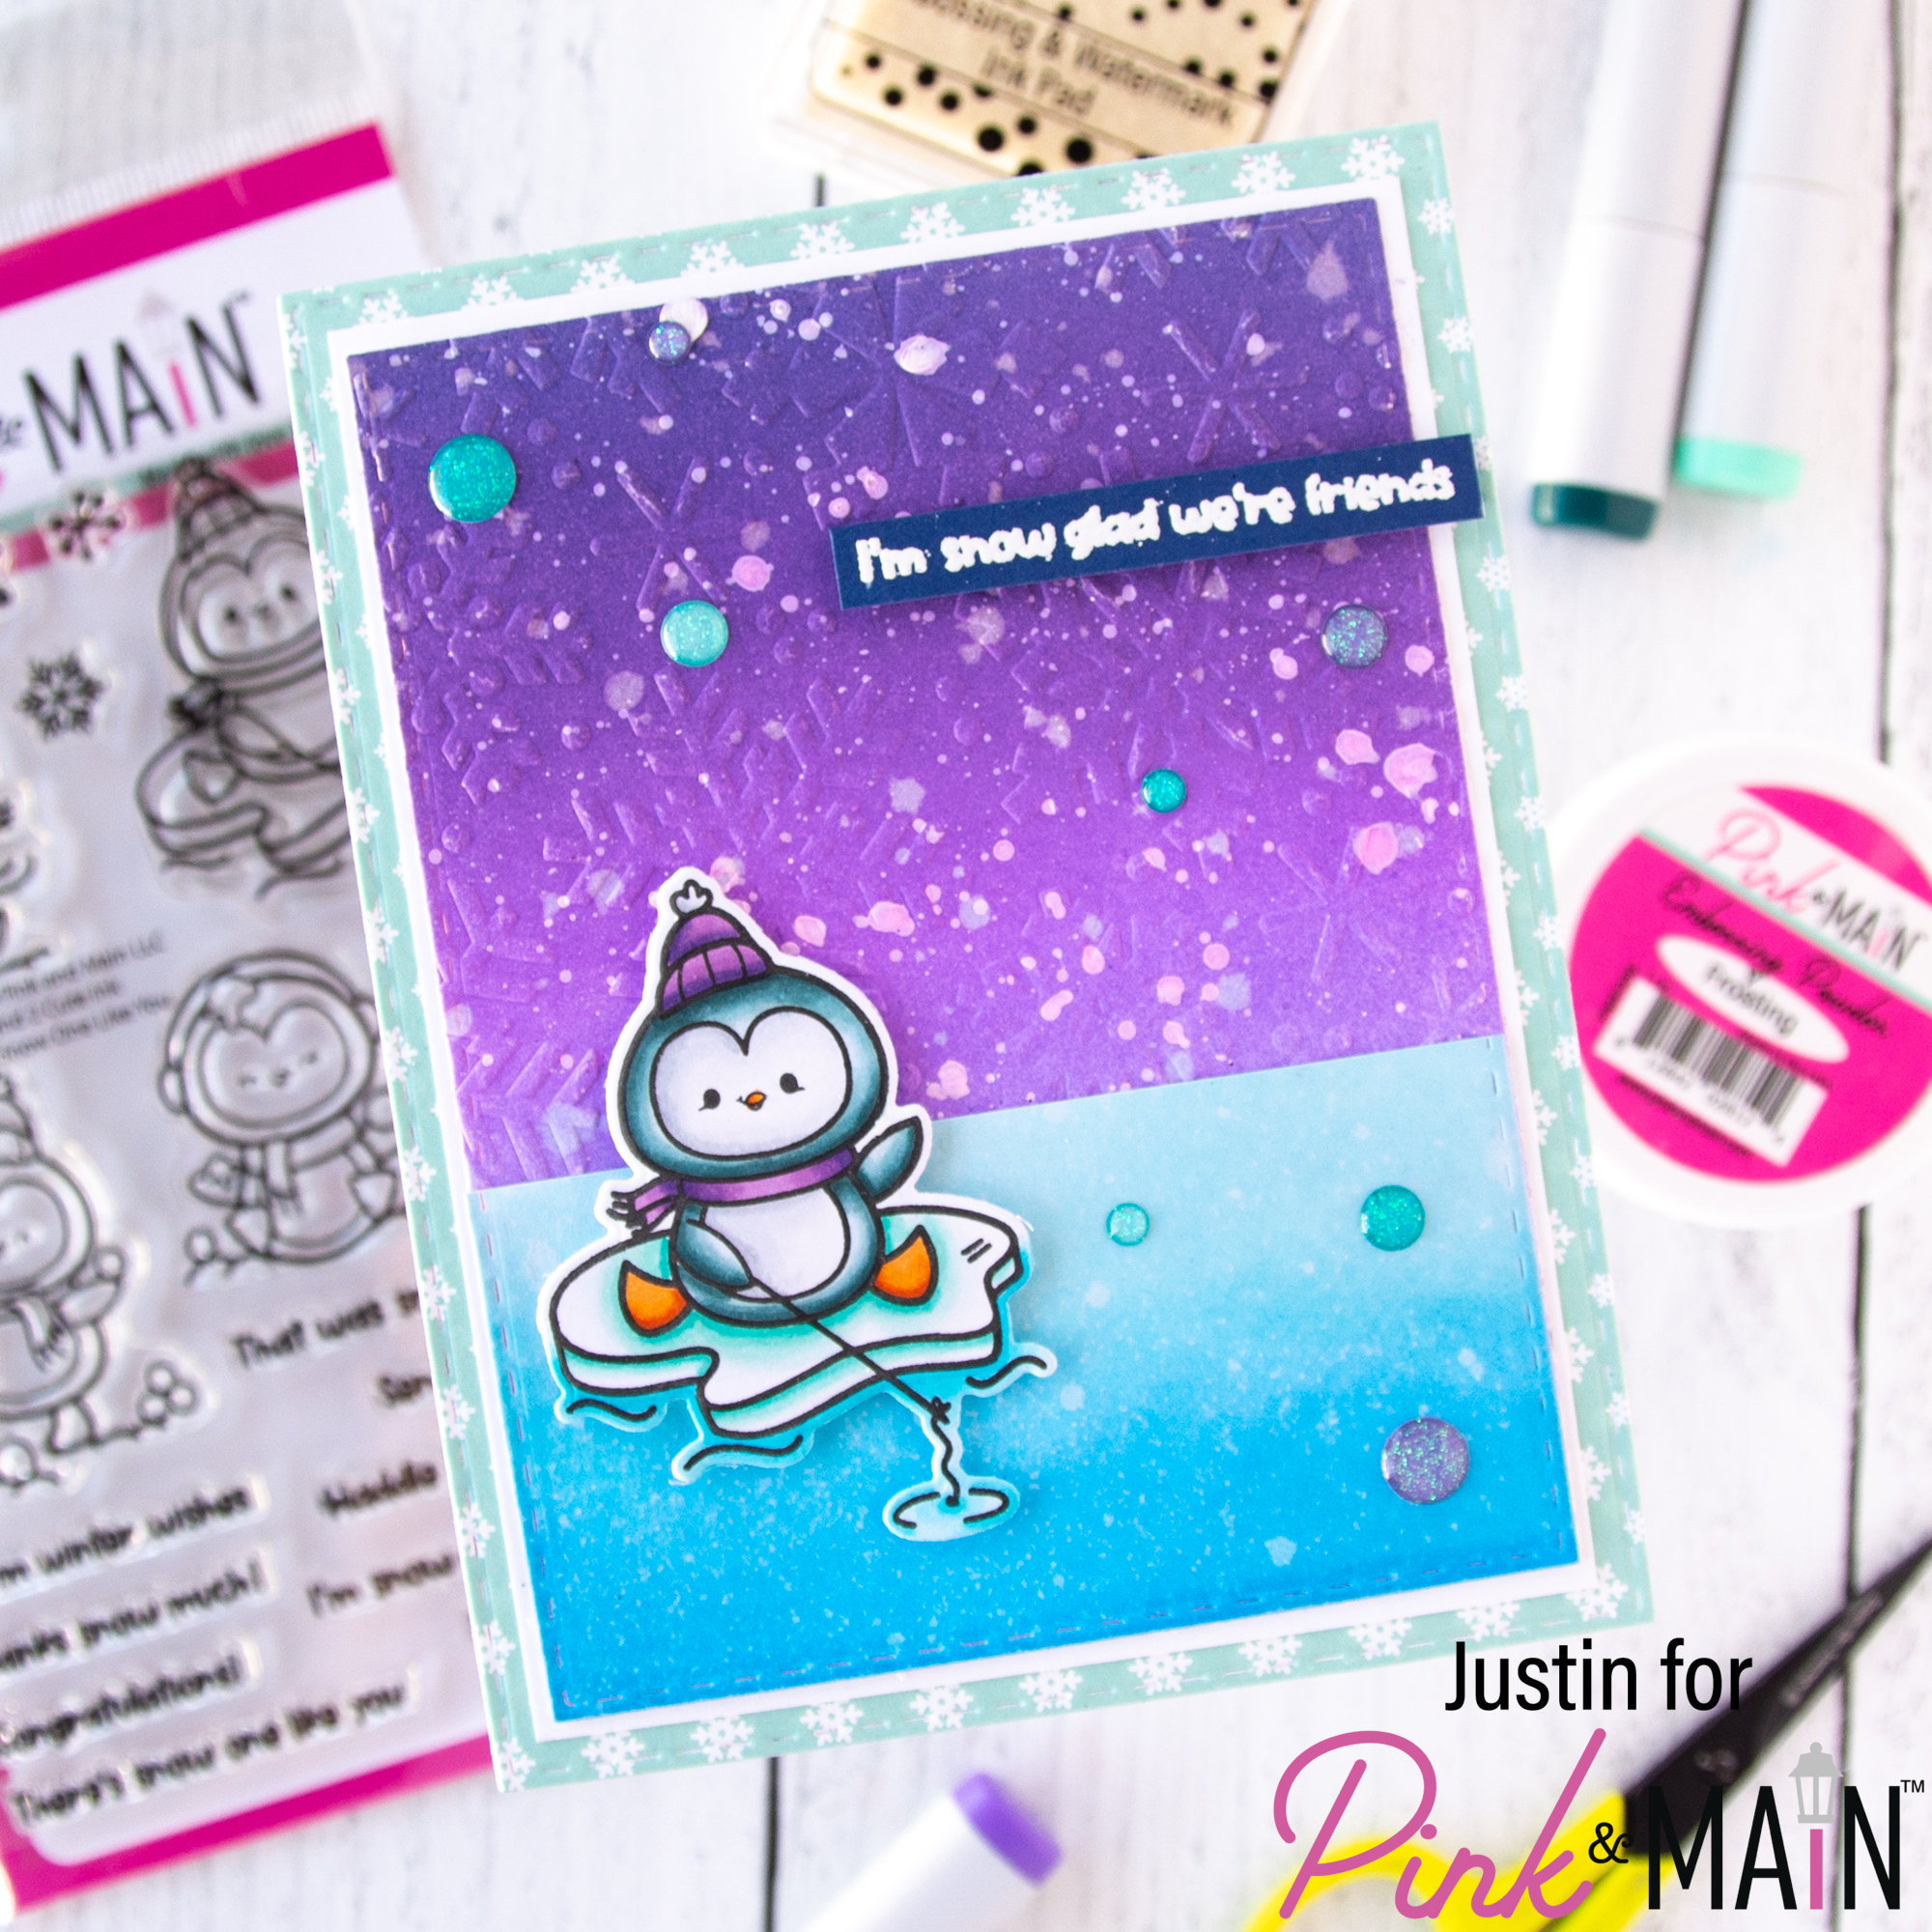
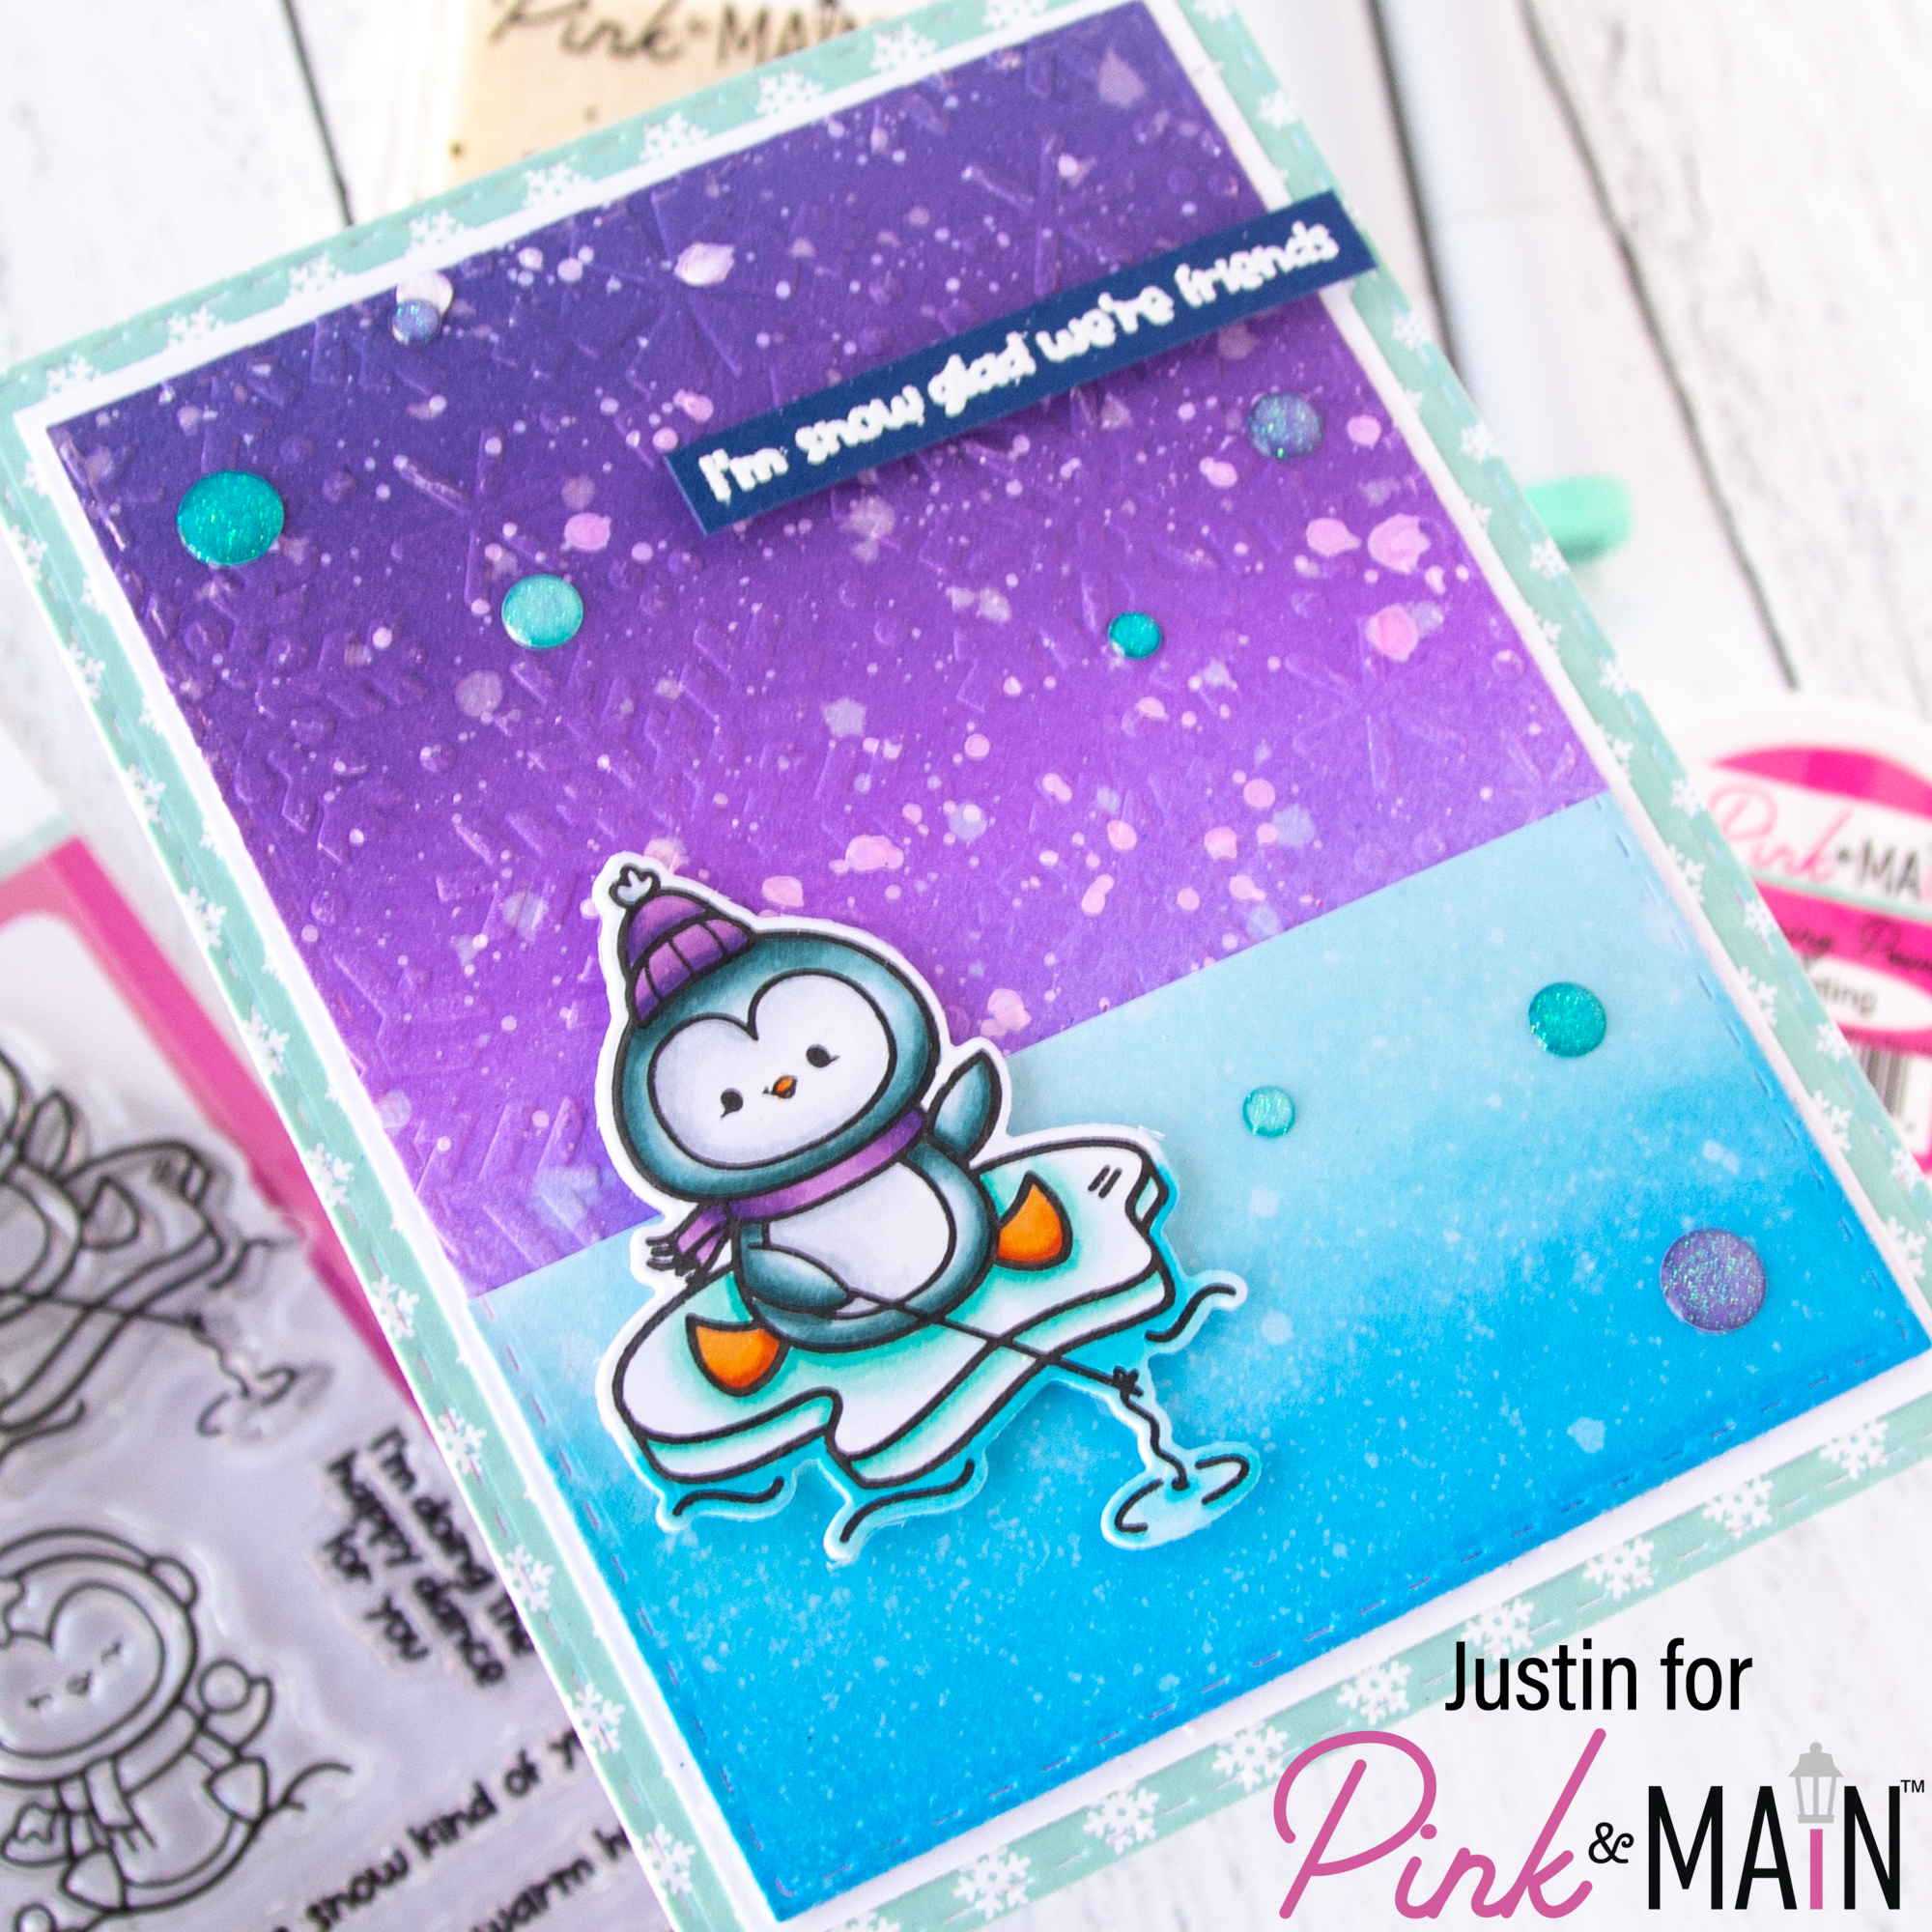
Hi friends! Justin here, and today I am super excited to be sharing with you a closer look at the December Stamp of the Month: Snow One Like You! This too cute 4″x6″ stamp set has a handful of adorable penguins, and some fantastic sentiments to use with them as well! I am also showing a sneak peek of the new Snowy Day Embossing Folder, which makers for a really fun background!
Below is a list of products used to create this card:
Pink & Main Products Used:
Snow One Like You Stamp Set
Snow One Like You Coordinating Dies
Snowy Day Embossing Folder
Stitched Rectangle Dies Set #1
Embossing & Watermark Ink Pad
Frosting Embossing Powder
Magic Anti-Static Brush
Snowy Day Sparkle Enamel Dots
Winter Wonderland 6″x6″ Paper Pad
Barbershop Cardstock
Other Key Products Used:
Copic Markers
Blending Cardstock
Distress Inks: Tumbled Glass & Salty Ocean
Distress Oxide Inks: Shaded Lilac, Wilted Violet, Villainous Potion & Chipped Sapphire
White Acrylic Paint
Alright, let’s get to how I put this card together!
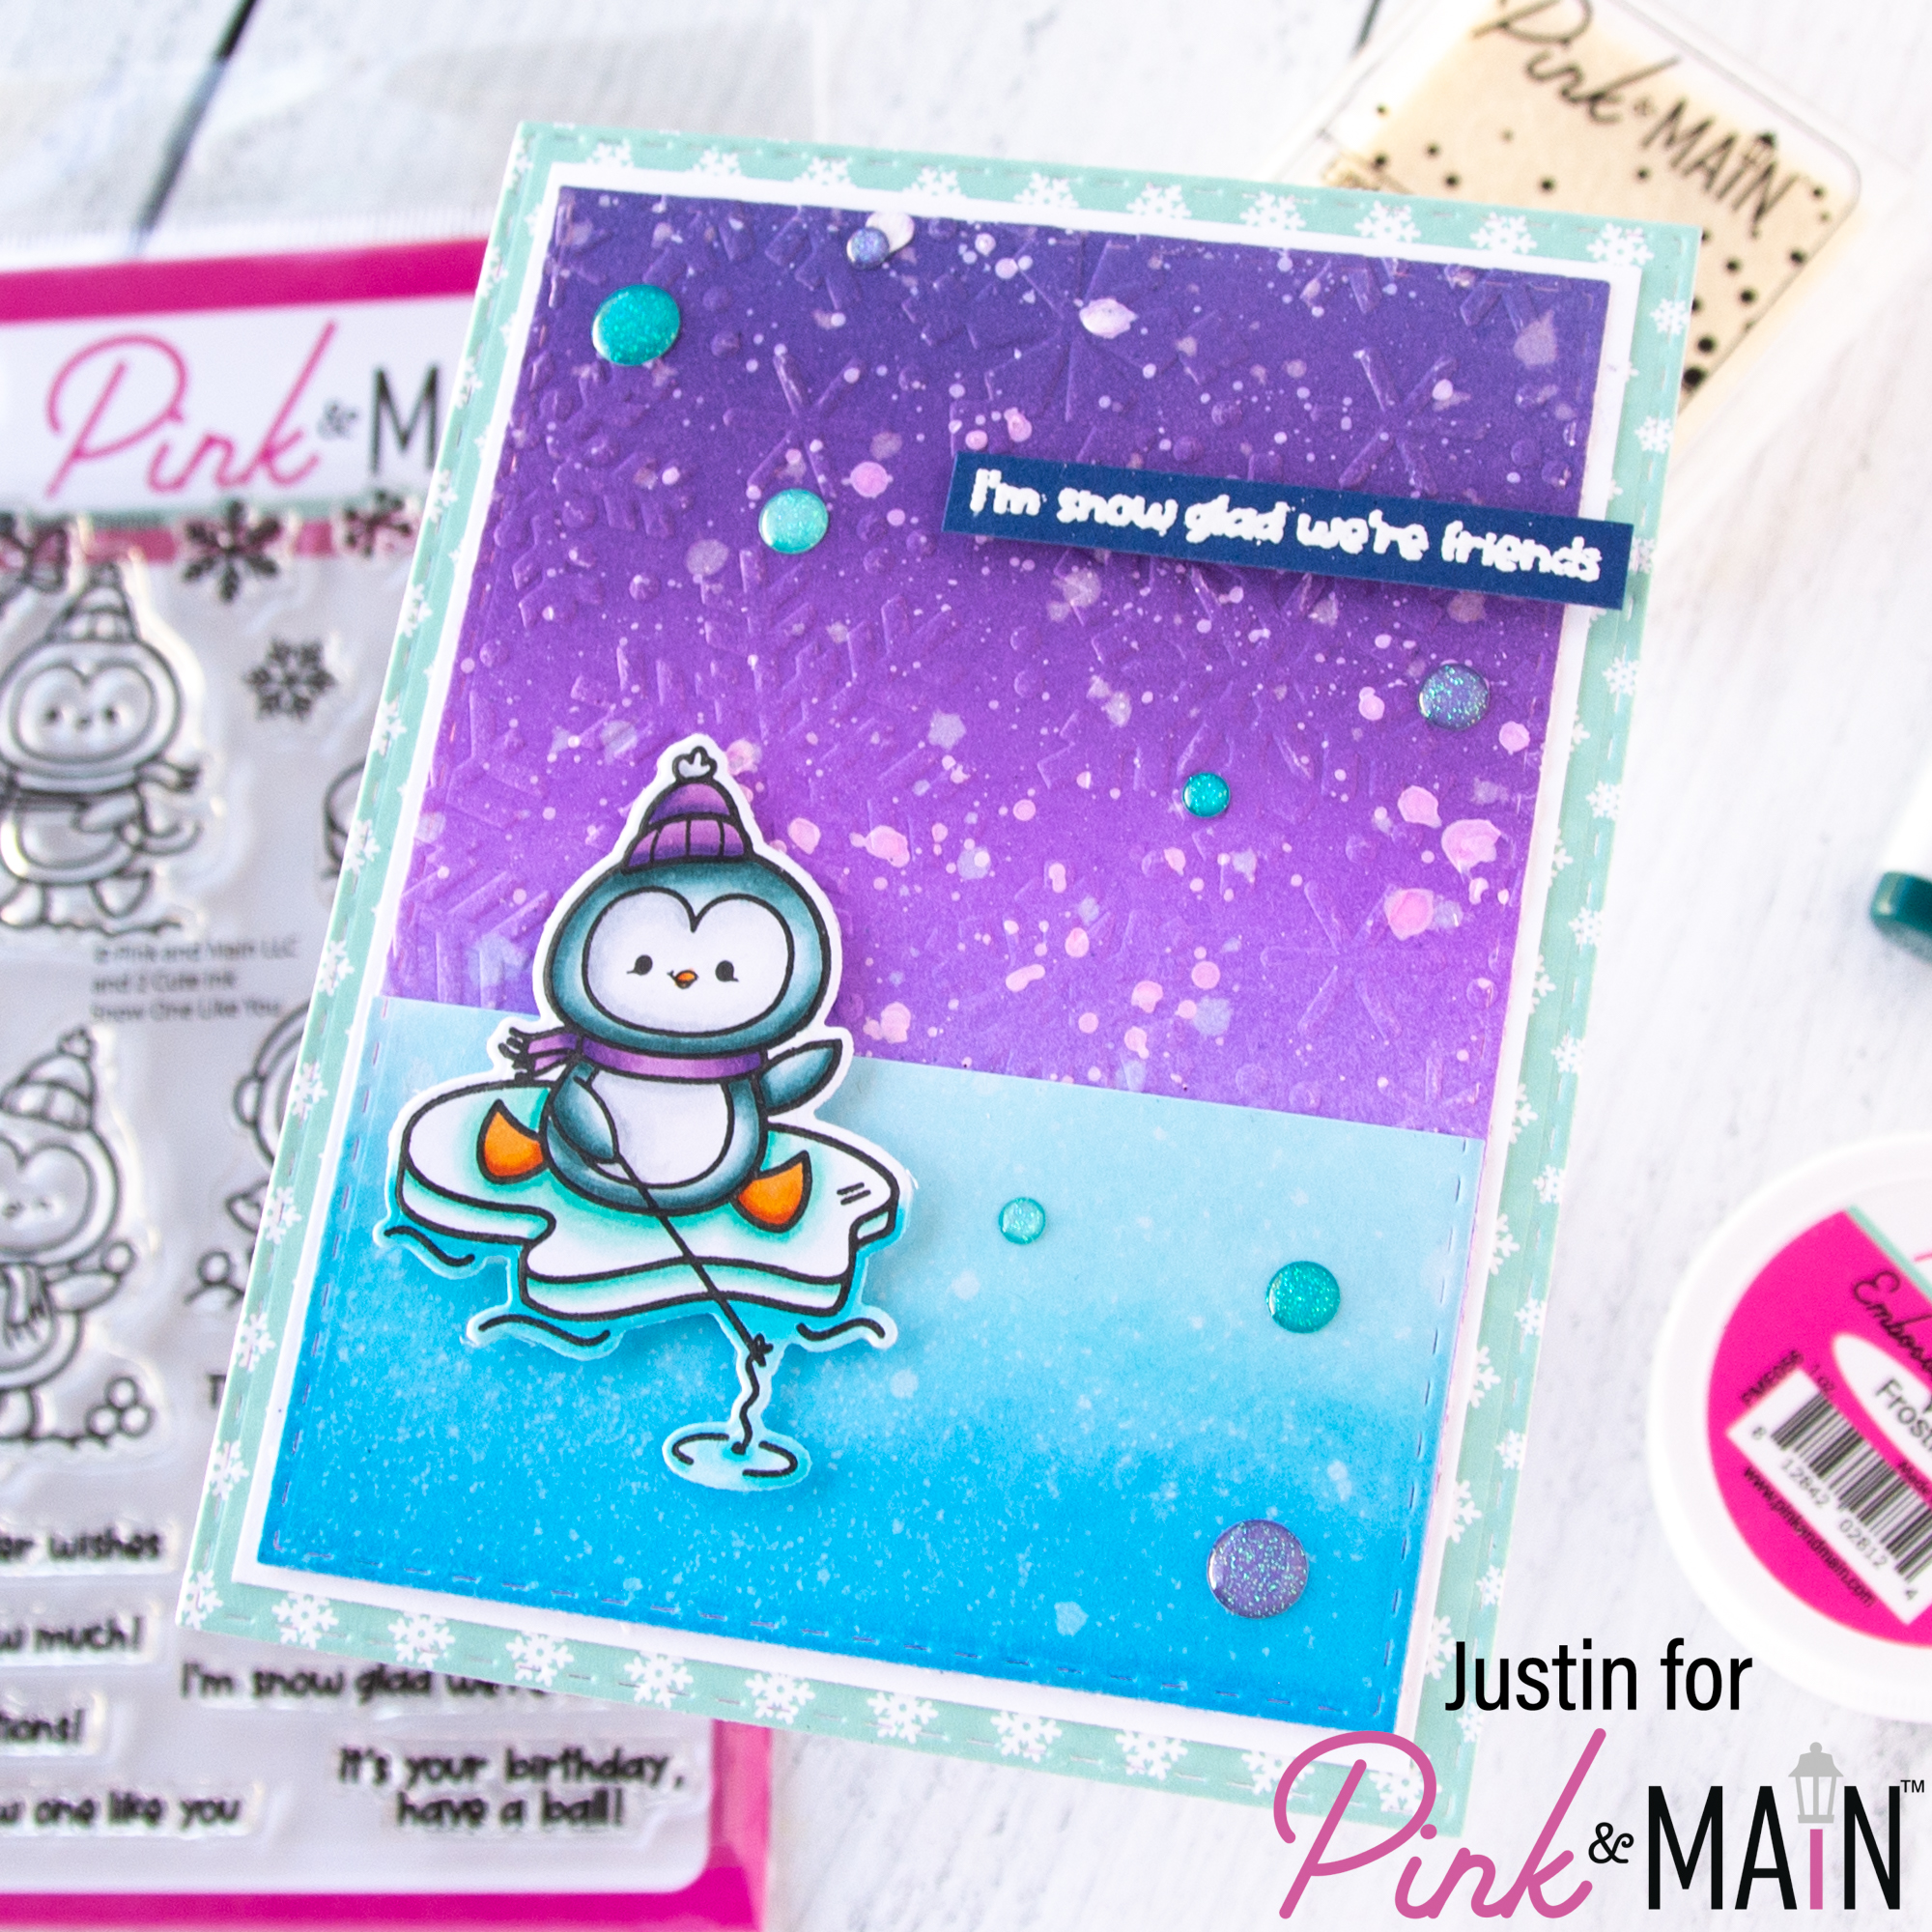
I started by coloring my image from Snow One Like You with Copic Markers, and then cutting it out using the coordinating dies. i set the image aside for later.
Using the largest die from the Stitched Rectangles Die Set #1, I die cut the Turquoise Background with Snowflakes print from the Winter Wonderland Paper Pad. Using the 2nd largest die, I die cut (2) panels of blending cardstock. On one panel, I blended it, from top to bottom, in the following Distress Oxide Inks: Shaded Lilac, Wilted Violet, Villainous Potion and Chipped Sapphire. I spritzed this panel with water, for bleach spots, dried them, misted the panel with water, and processed it through my die cutting machine inside of the Snowy Day Embossing Folder. I then splattered the panel with white acrylic paint and let it dry.
Note: the white acrylic paint ended up taking on a lot of the purple ink from the background. This wasn’t my intention, but I did enjoy how it turned out! So YAY for happy accidents!
For the 2nd panel, I ink blended the bottom portion with Tumbled Glass & Salty Ocean Distress Ink. I spritzed with water for bleach marks, dried it, and then cut the panel where I stopped ink blending. I adhered this layer directly on top of the Snowy Day embossed background. I then adhered this entire unit to a slightly larger piece of white cardstock to get a frame. I finalized my layers by then adhering the framed unit on to the Winter Wonderland Paper Stitched Die Cut, and adhering the final unit to an A2-sized card base.
Using the Frosting Embossing Powder, I heat embossed the sentiment “I’m snow glad were friends” on Barbershop Cardstock, and trimmed it down to sentiment strip.
I used foam tape to adhere my image and sentiment strip to my panel, and then finished off the card with some Snowy Day Glitter Enamel Dots!
Thank you so very much for stopping by and checking out my card! I hope this card leaves you excited to see what else the Design Team has in store for you for our December Release!
For more crafty inspiration, please follow me on Instagram and check out my personal blog as well!
Thank you again for stopping by! Happy Crafting!
Justin