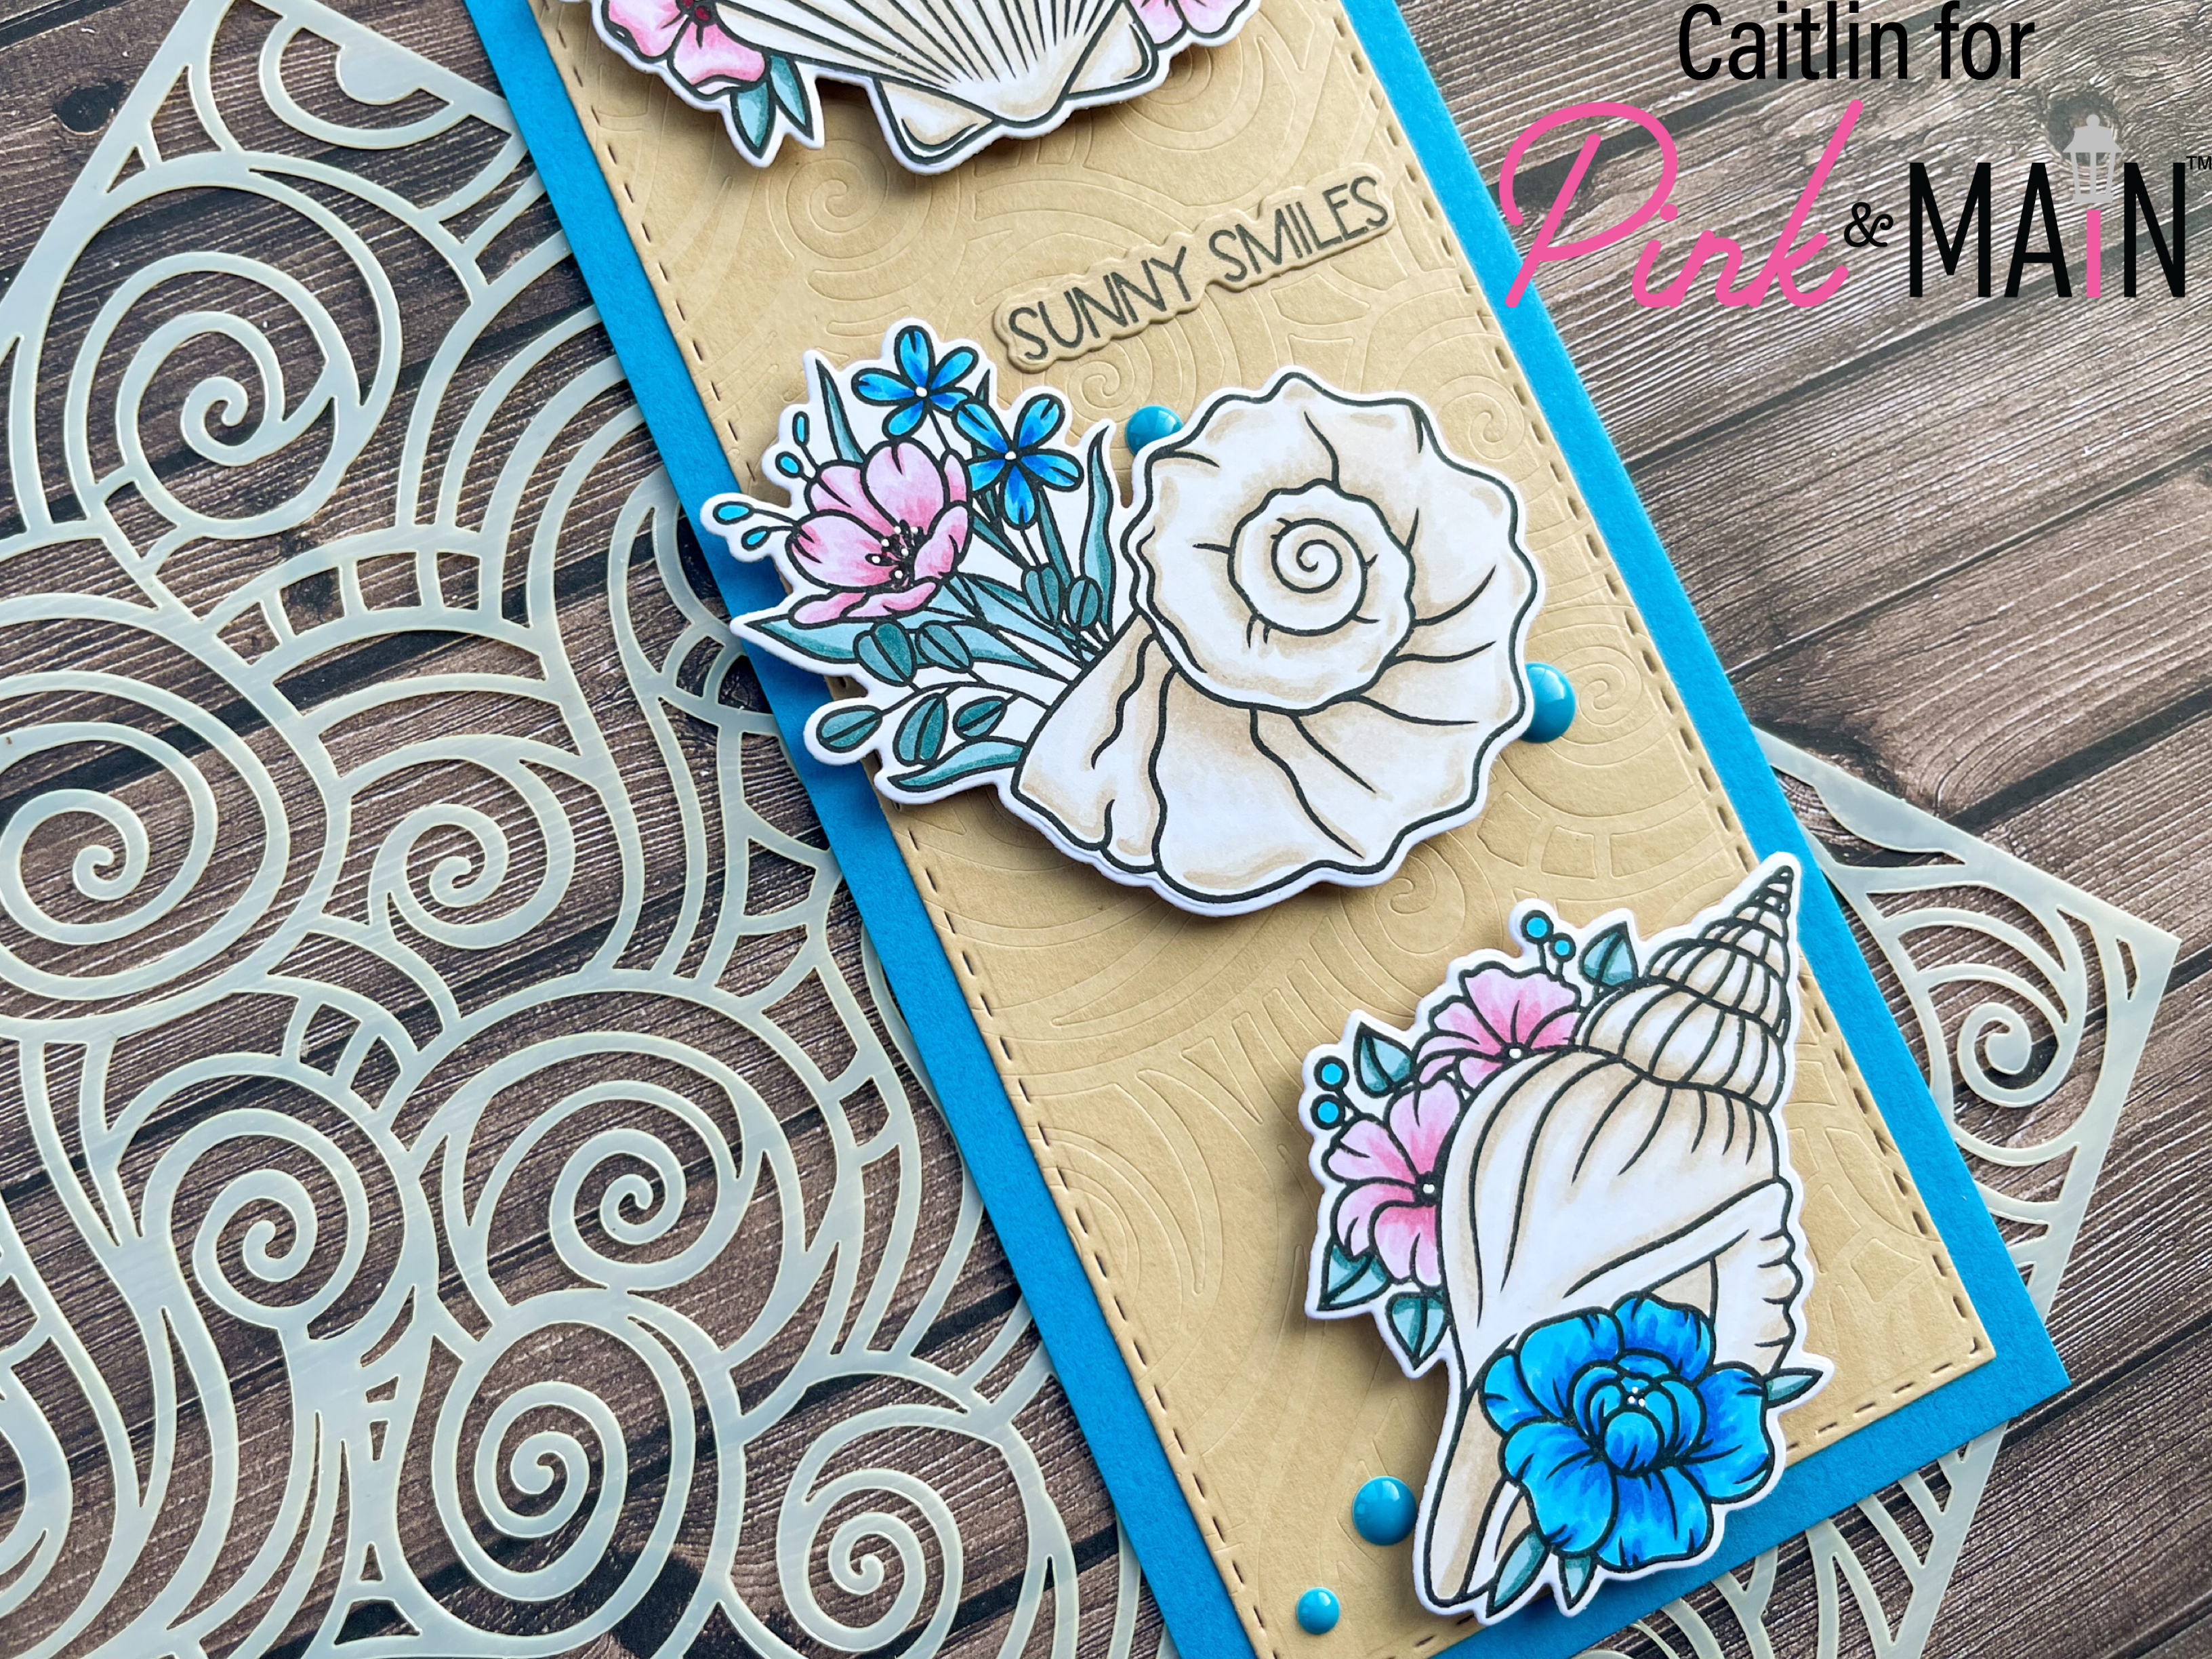
It’s Release Day!!! The new June collection is out today and these are some of the most beautiful summer stamps/stencils/dies I have ever seen. If you are ready for some sunshine and sea breeze, this is the release for you! I was immediately inspired by the Floral Shell Stamp Set, which has 4 beautiful shells with simple little floral accents and I knew I wanted to use as many as I could, so I decided to go slimline for this card.
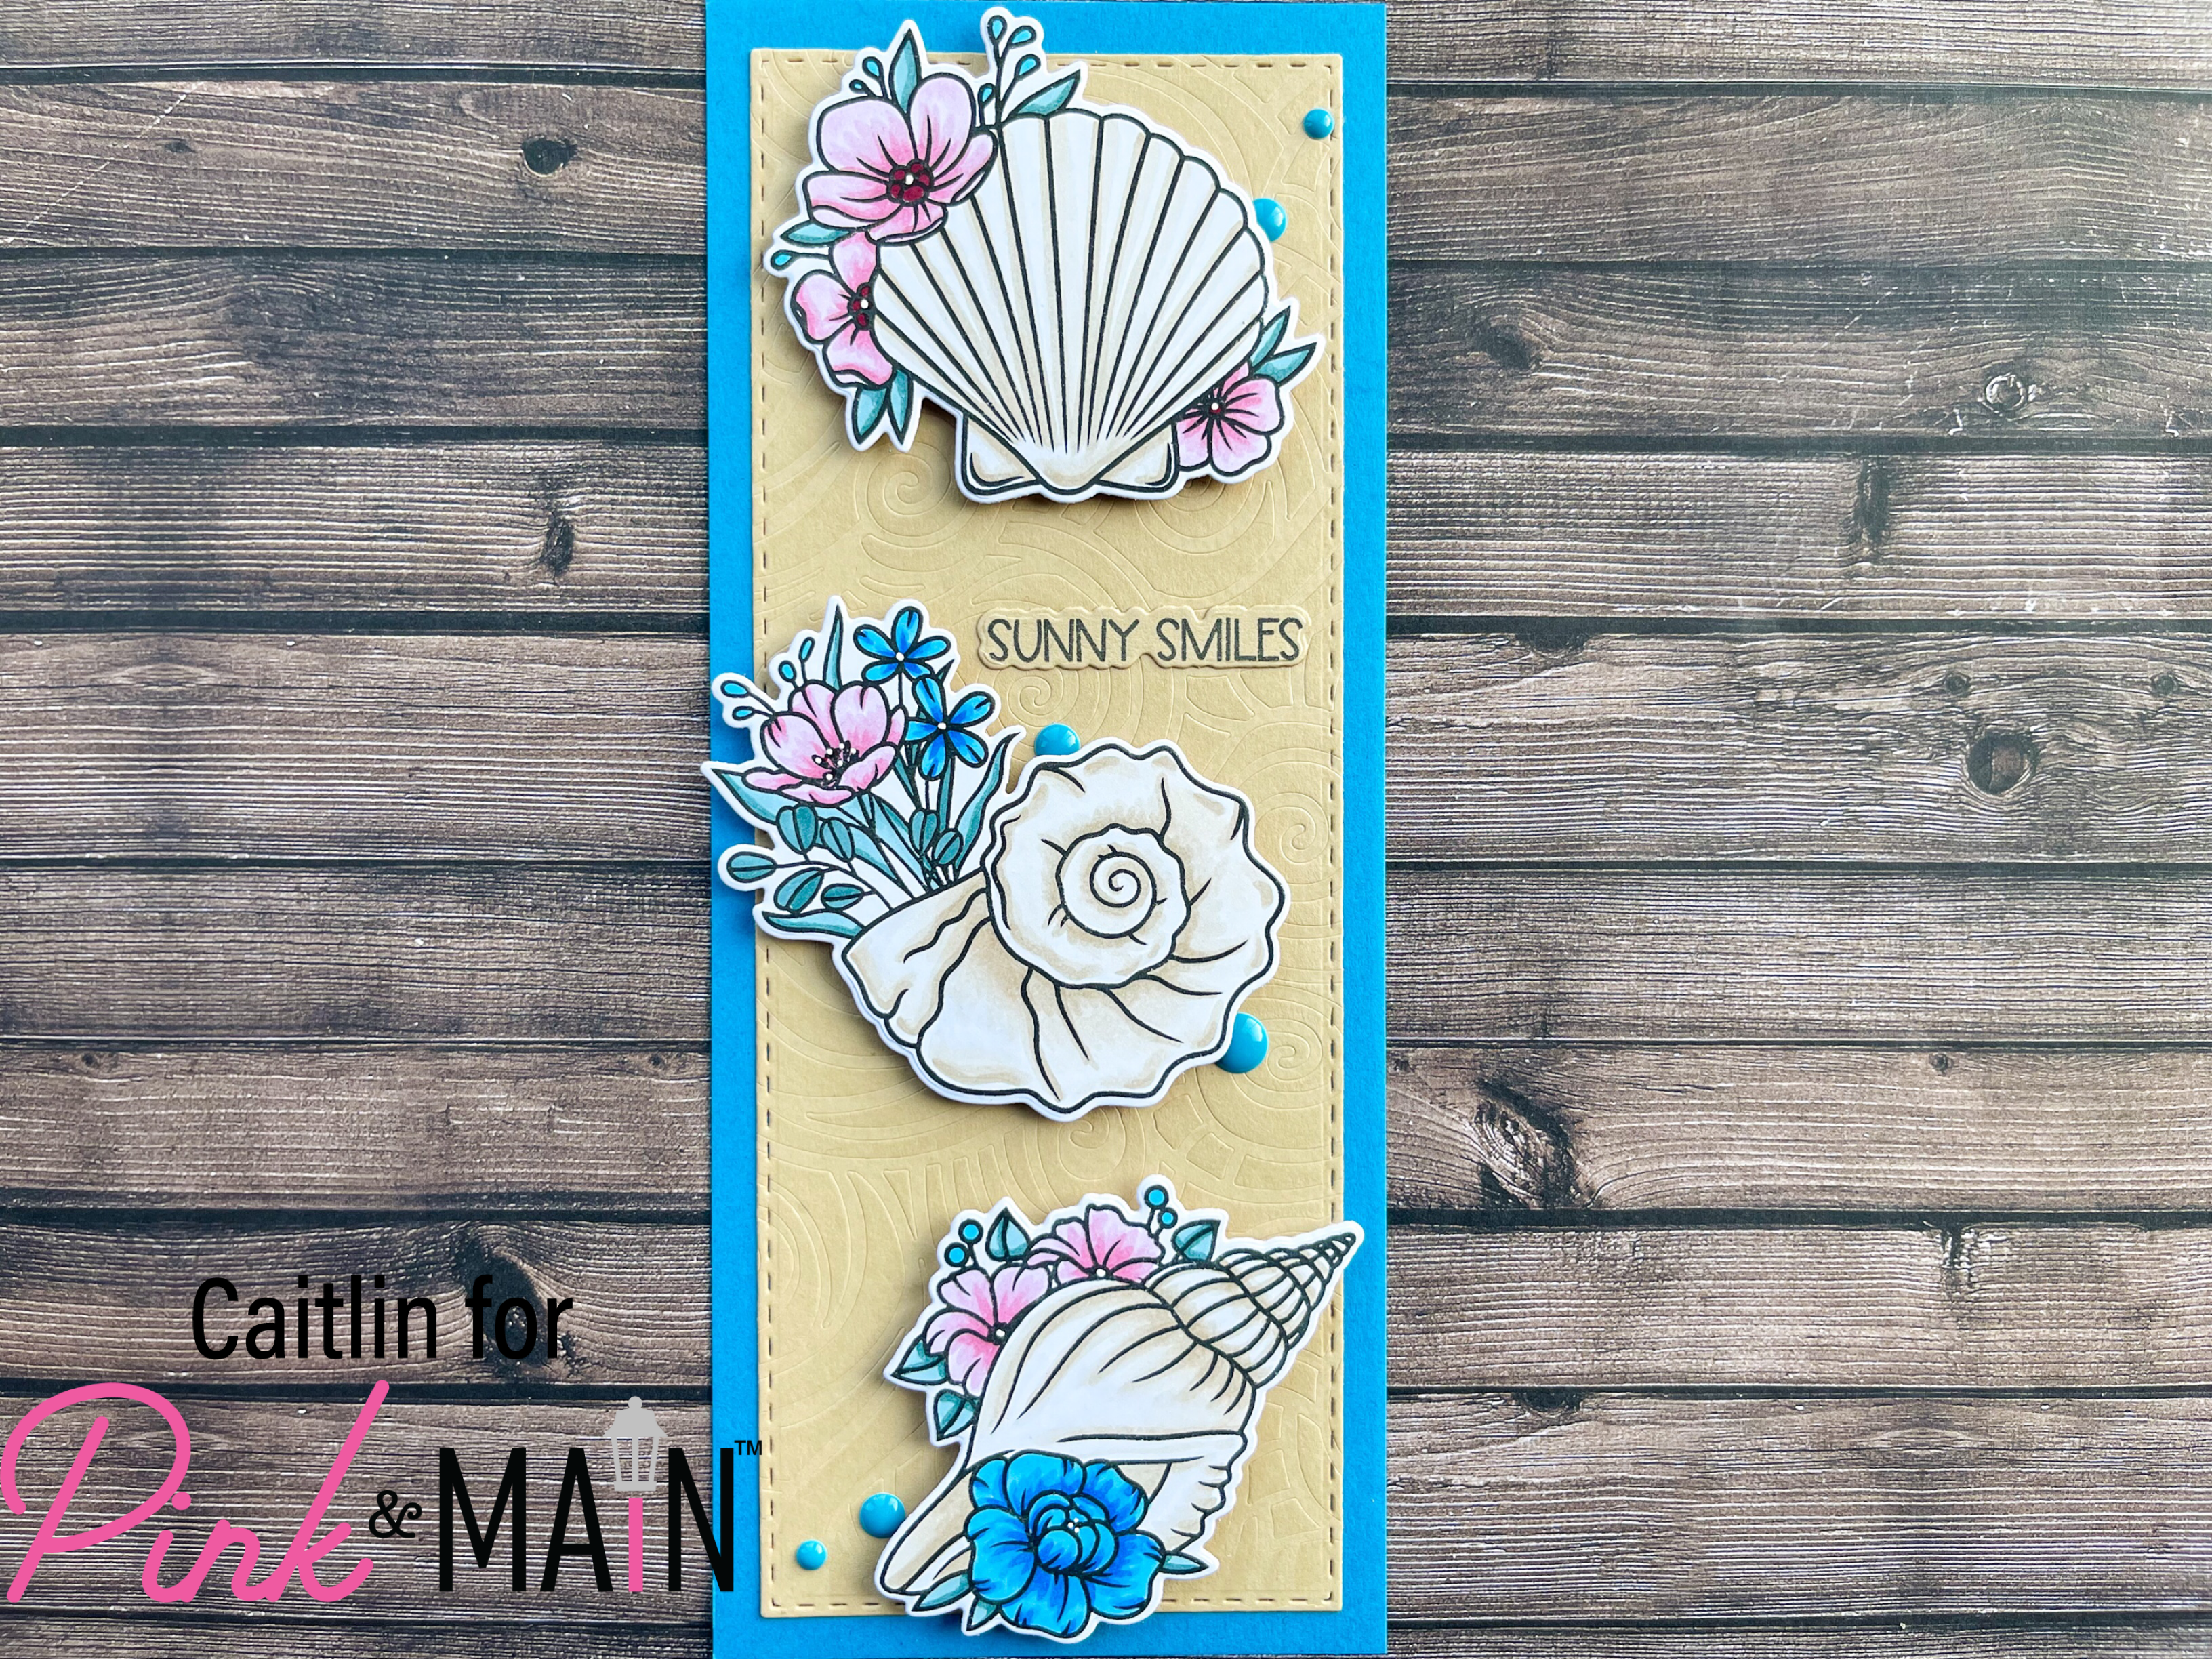
I started out by creating the background for this slimline and so I grabbed two of the new card stock colors, Pebble and Middle School. I trimmed Middle School (blue) down to 8.5 in x 3.5 in and then used one of the Stitched Slimline Dies to cut out the Pebble (tan) layer. I wanted to use the new Curly Waves Stencil but I wanted it to have texture as well as color so I ran it through my die cut machine with the Pebble panel and a piece of craft-foam to dry emboss the pattern into the paper and then I used a very light tan ink to ink blend the raised areas with the stencil and one of the Mini Ergonomic Blender Brushes. The end result it very subtle but I love the detail and hint of texture it gives to the background and it gives me a very sand-like feeling for these shells to go over.
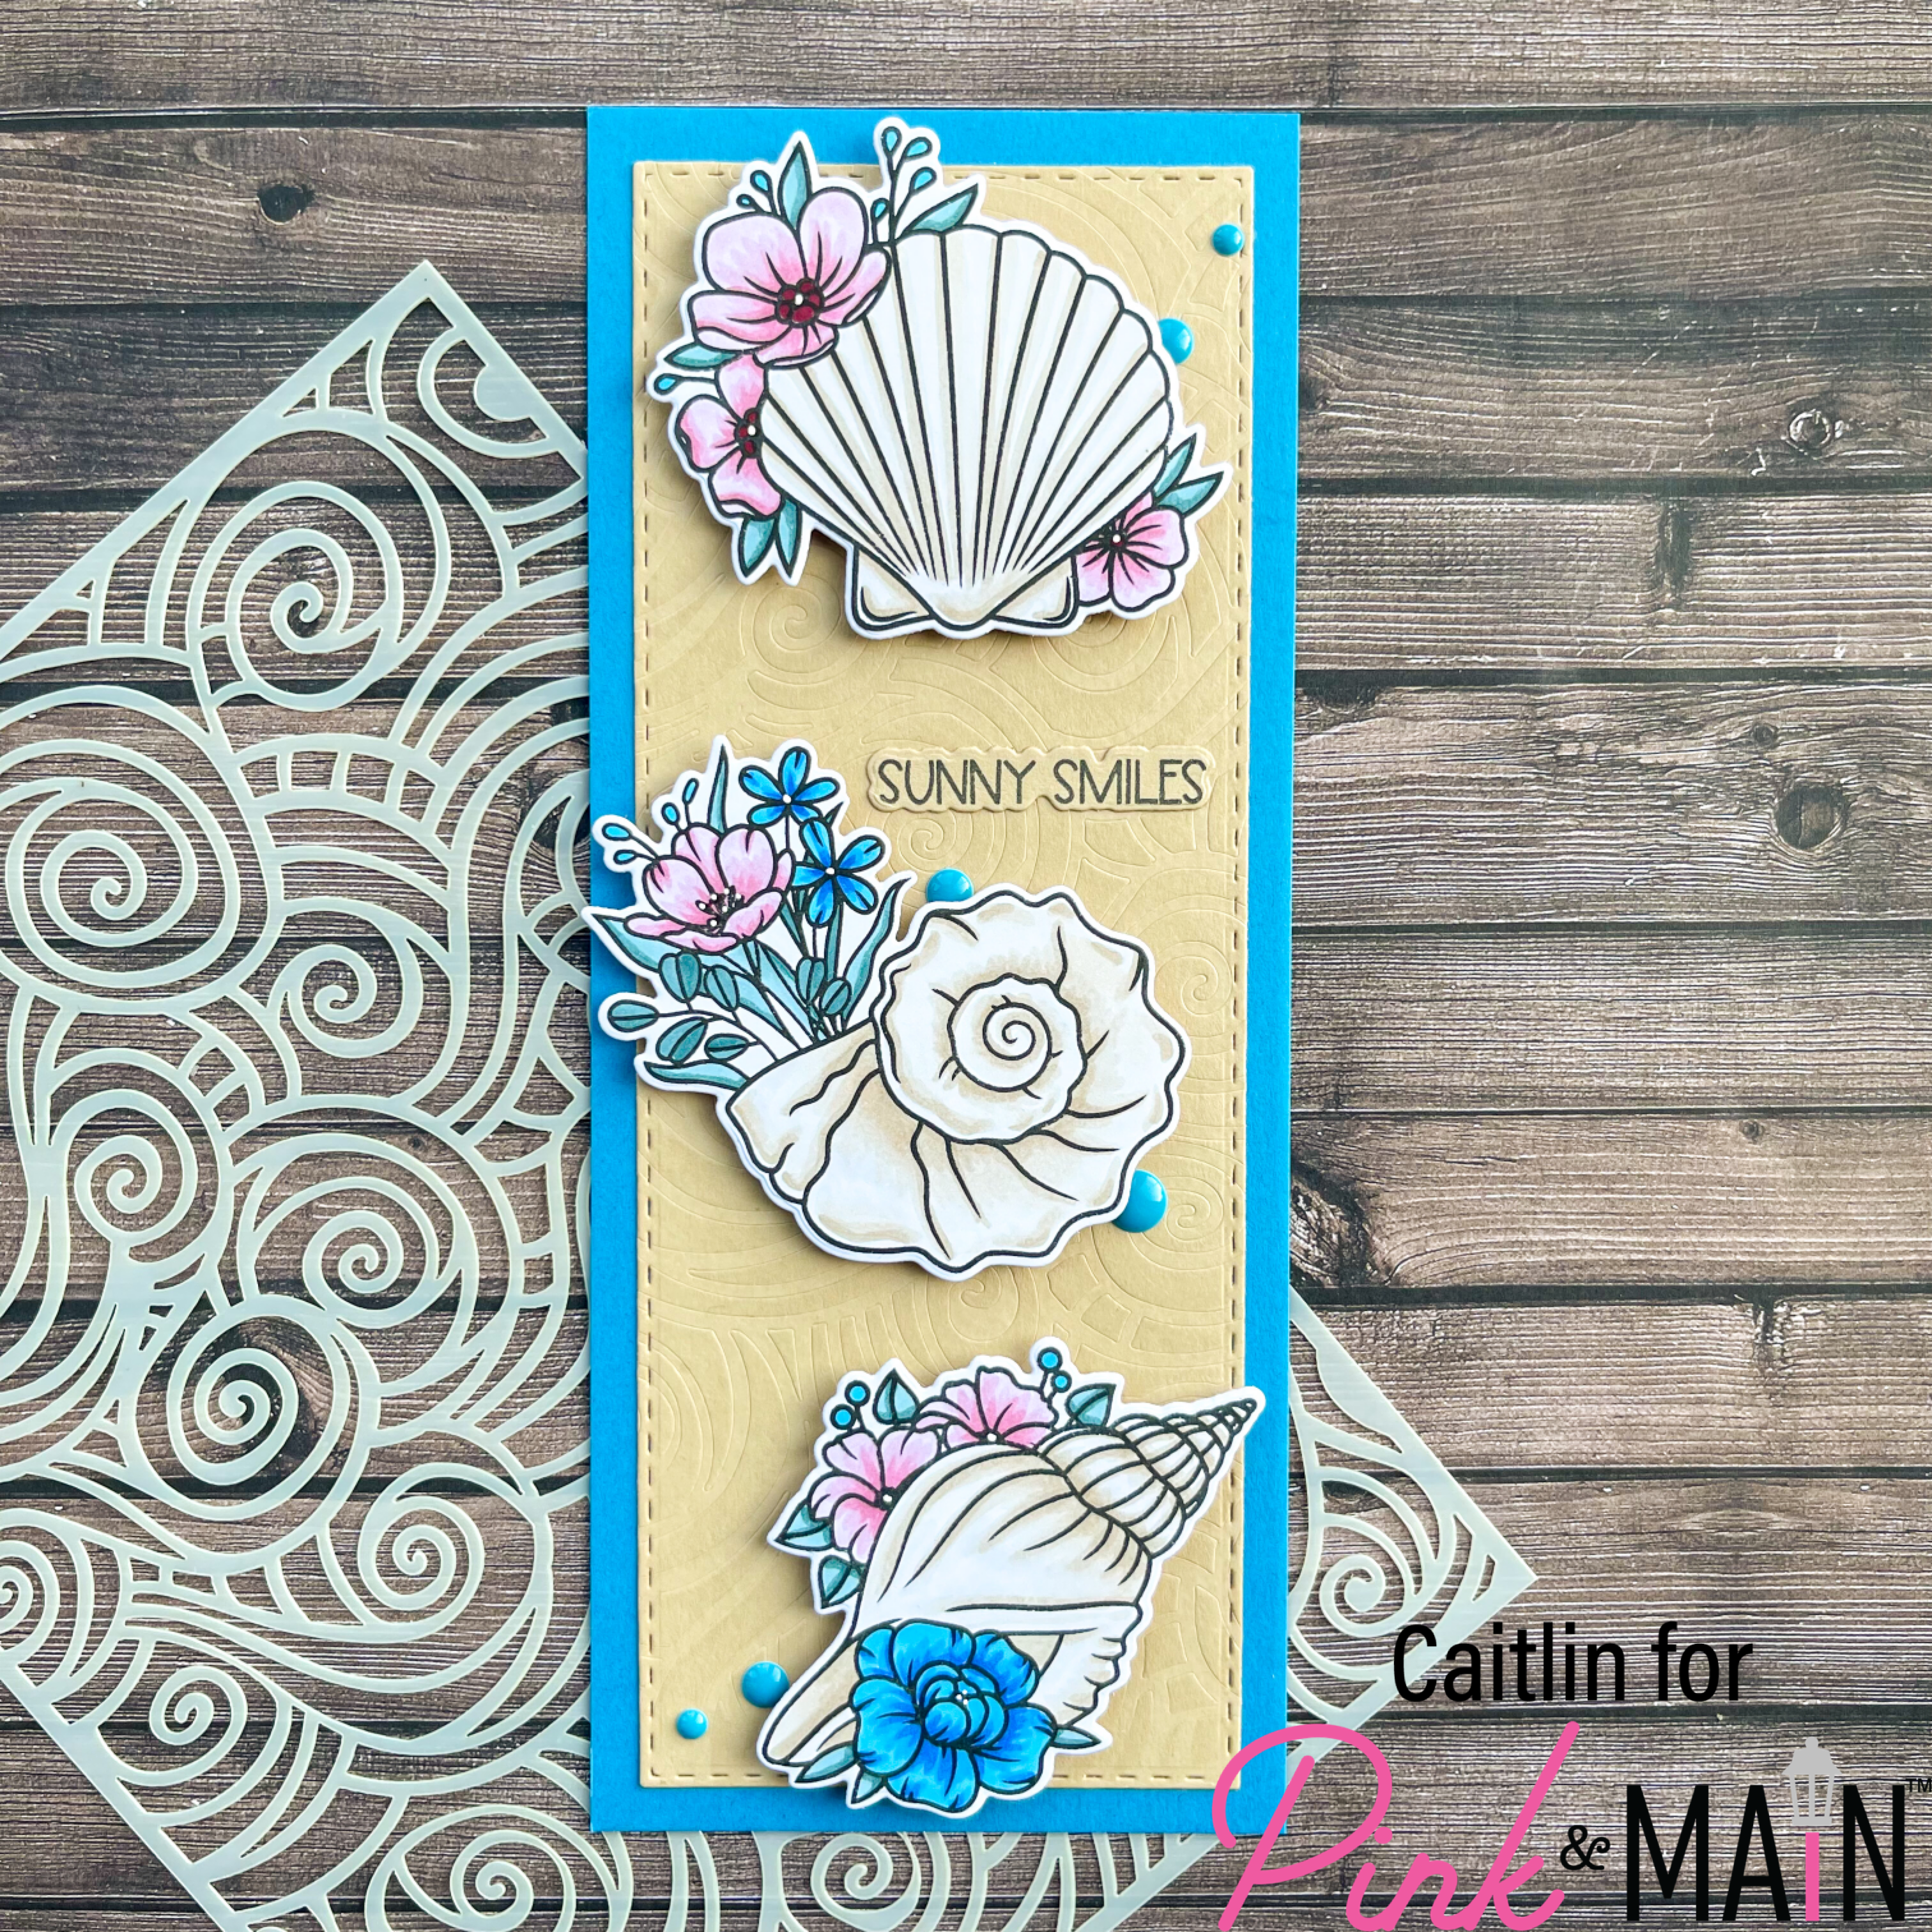
I adhered the stitched panel to the main blue panel and then stamped 3 of the beautiful floral shells onto white card stock with Colic-friendly ink. I used E40 markers to create soft, cream colored shells and I tried to match some of the flowers to the Middle School paper, adding in some rose pinks and blue-greens for the leaves to keep a very calm and fresh color scheme. I added in a few little dot accents with a white gel pen and then used the coordinating dies to cut them out. I also stamped out the Sunny Smiles sentiment from the Stay Cool Stamp Set which I love because all the sentiments have dies that cut them out perfectly and I think that is such a clean look. I used the EZ Squeeze Glue to glue the sentiment down flat and used little foam squares to pop the shells up. I also grabbed the new enamel dots from the subscription box to add some more pops of blue tucked under and around those shells. I also have a full process video for this project over my YouTube Channel if you want to see it all in action: https://youtu.be/Jv5wJS8BDZk