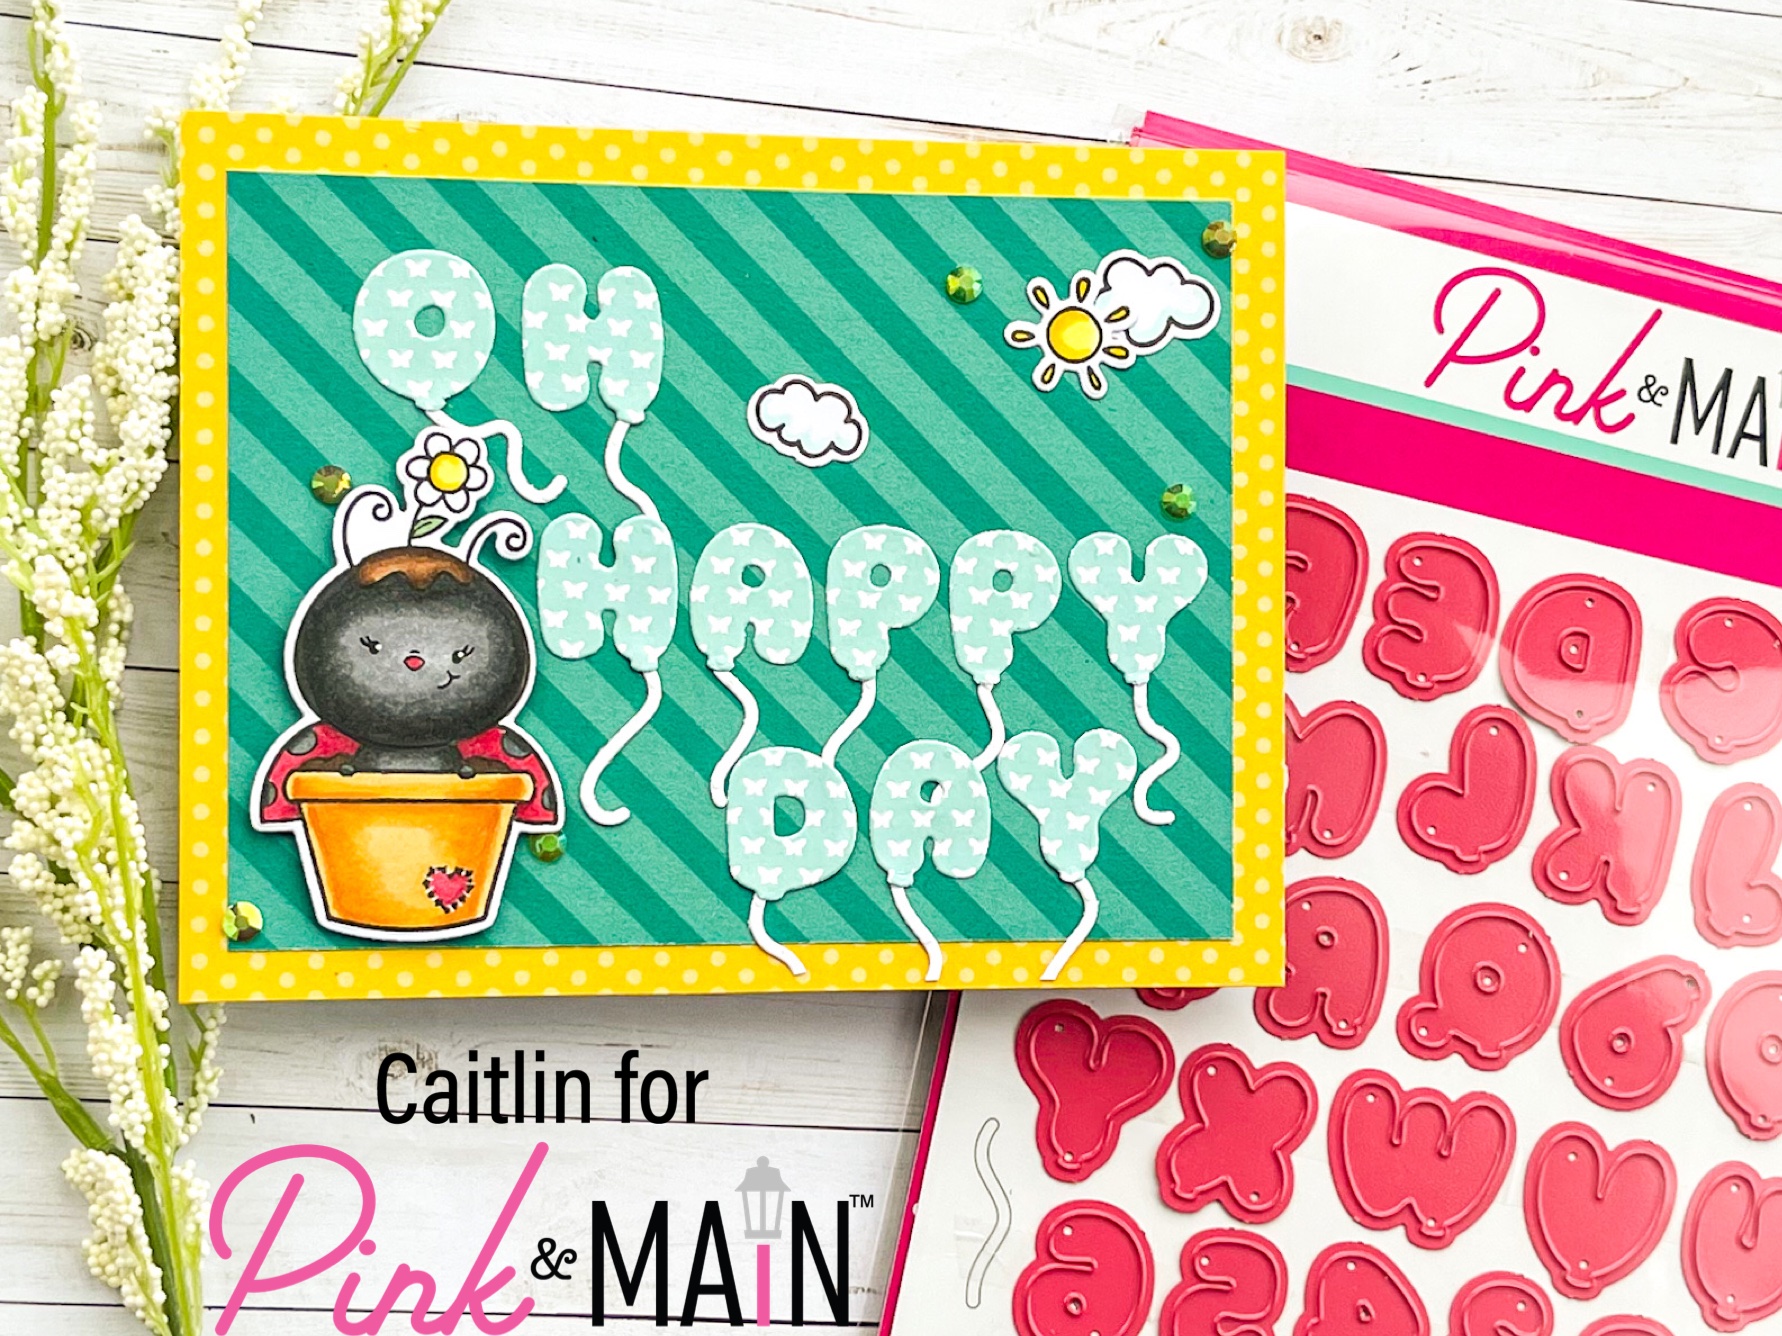
Hi friends, this is Caitlin from Caitlin Annalee Cards and today I am sharing a Spring themed Birthday card. I don’t often create for a specific event but my niece’s birthday party is this weekend and I really wanted to make her a sweet card. I have been waiting for the perfect time to break out the Balloon Alpha Dies and this was it! I started out with cutting the letters from the white and teal butterfly pattern in the Butterfly Kisses 6×6 Paper Pack. I knew right away that I wanted to use “Oh Happy Day” instead of Happy Birthday, just to change it up and lining up the letters and cutting them out was super easy. I really love how sweet these are and will definitely will be using them again.
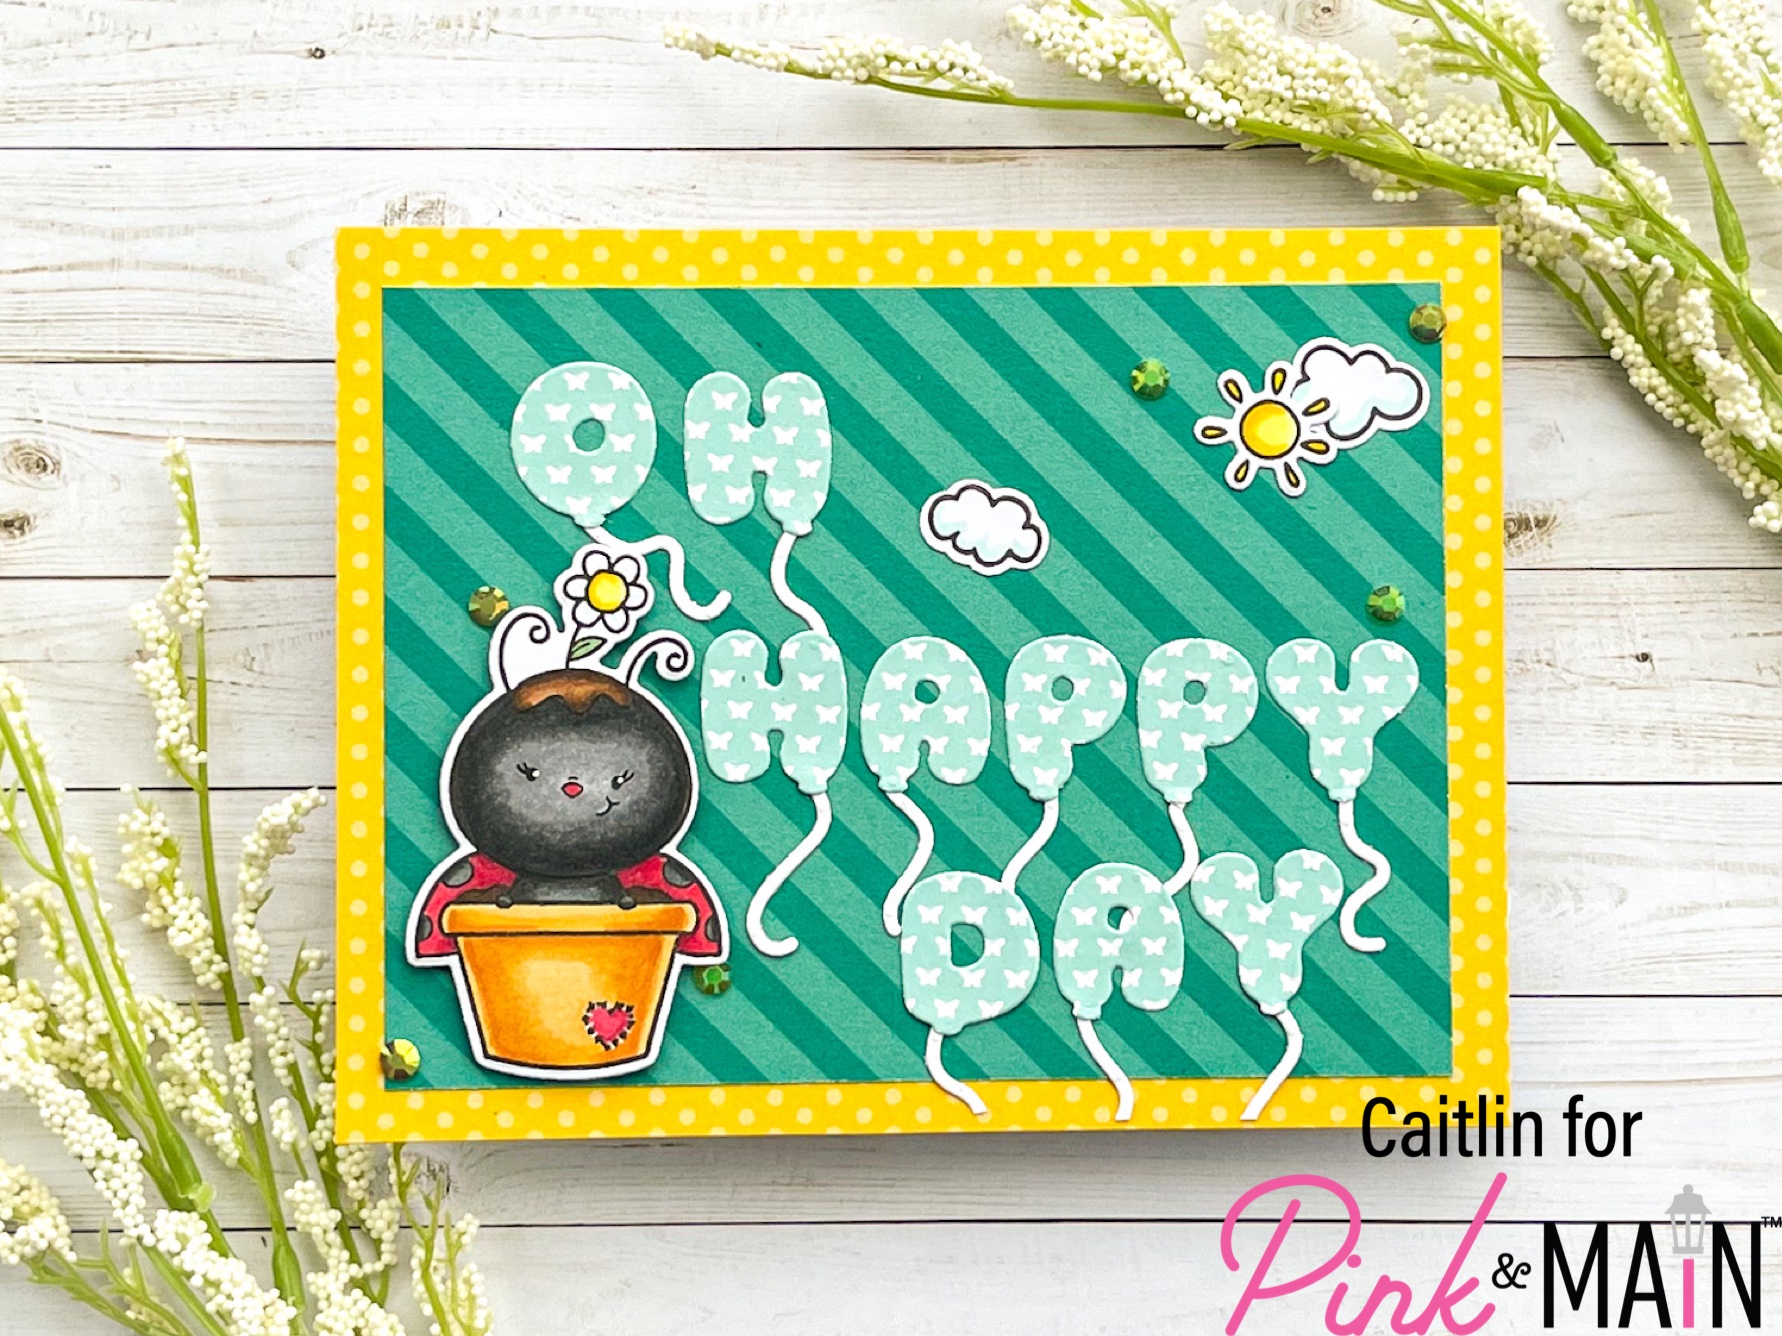
Because of the pattern paper that I grabbed for the letters, I decided to add to the teal color story and bring in the tone on tone stripes from the Year Round Dots and Stripes 6×6 Paper Pad. I trimmed this panel down to 5 in x 3.75 in and was intending to leave the white card base as the boarder until I started coloring my image. I thought this little Lady Bug from the Lady Luck Stamp Set popping up from a flower pot would be so sweet and used Copic Sketch Markers to color it in. I also stamped and colored two clouds and the sun to add a little more interest and color to the card. I used the coordinating dies to cut them all out and once I saw the little pops of yellow in my coloring, I knew I needed to bring in yellow again with sparkles and paper. I grabbed the tone on tone yellow dots, also from the Year Round set and added that as my first layer on my A2 card base.
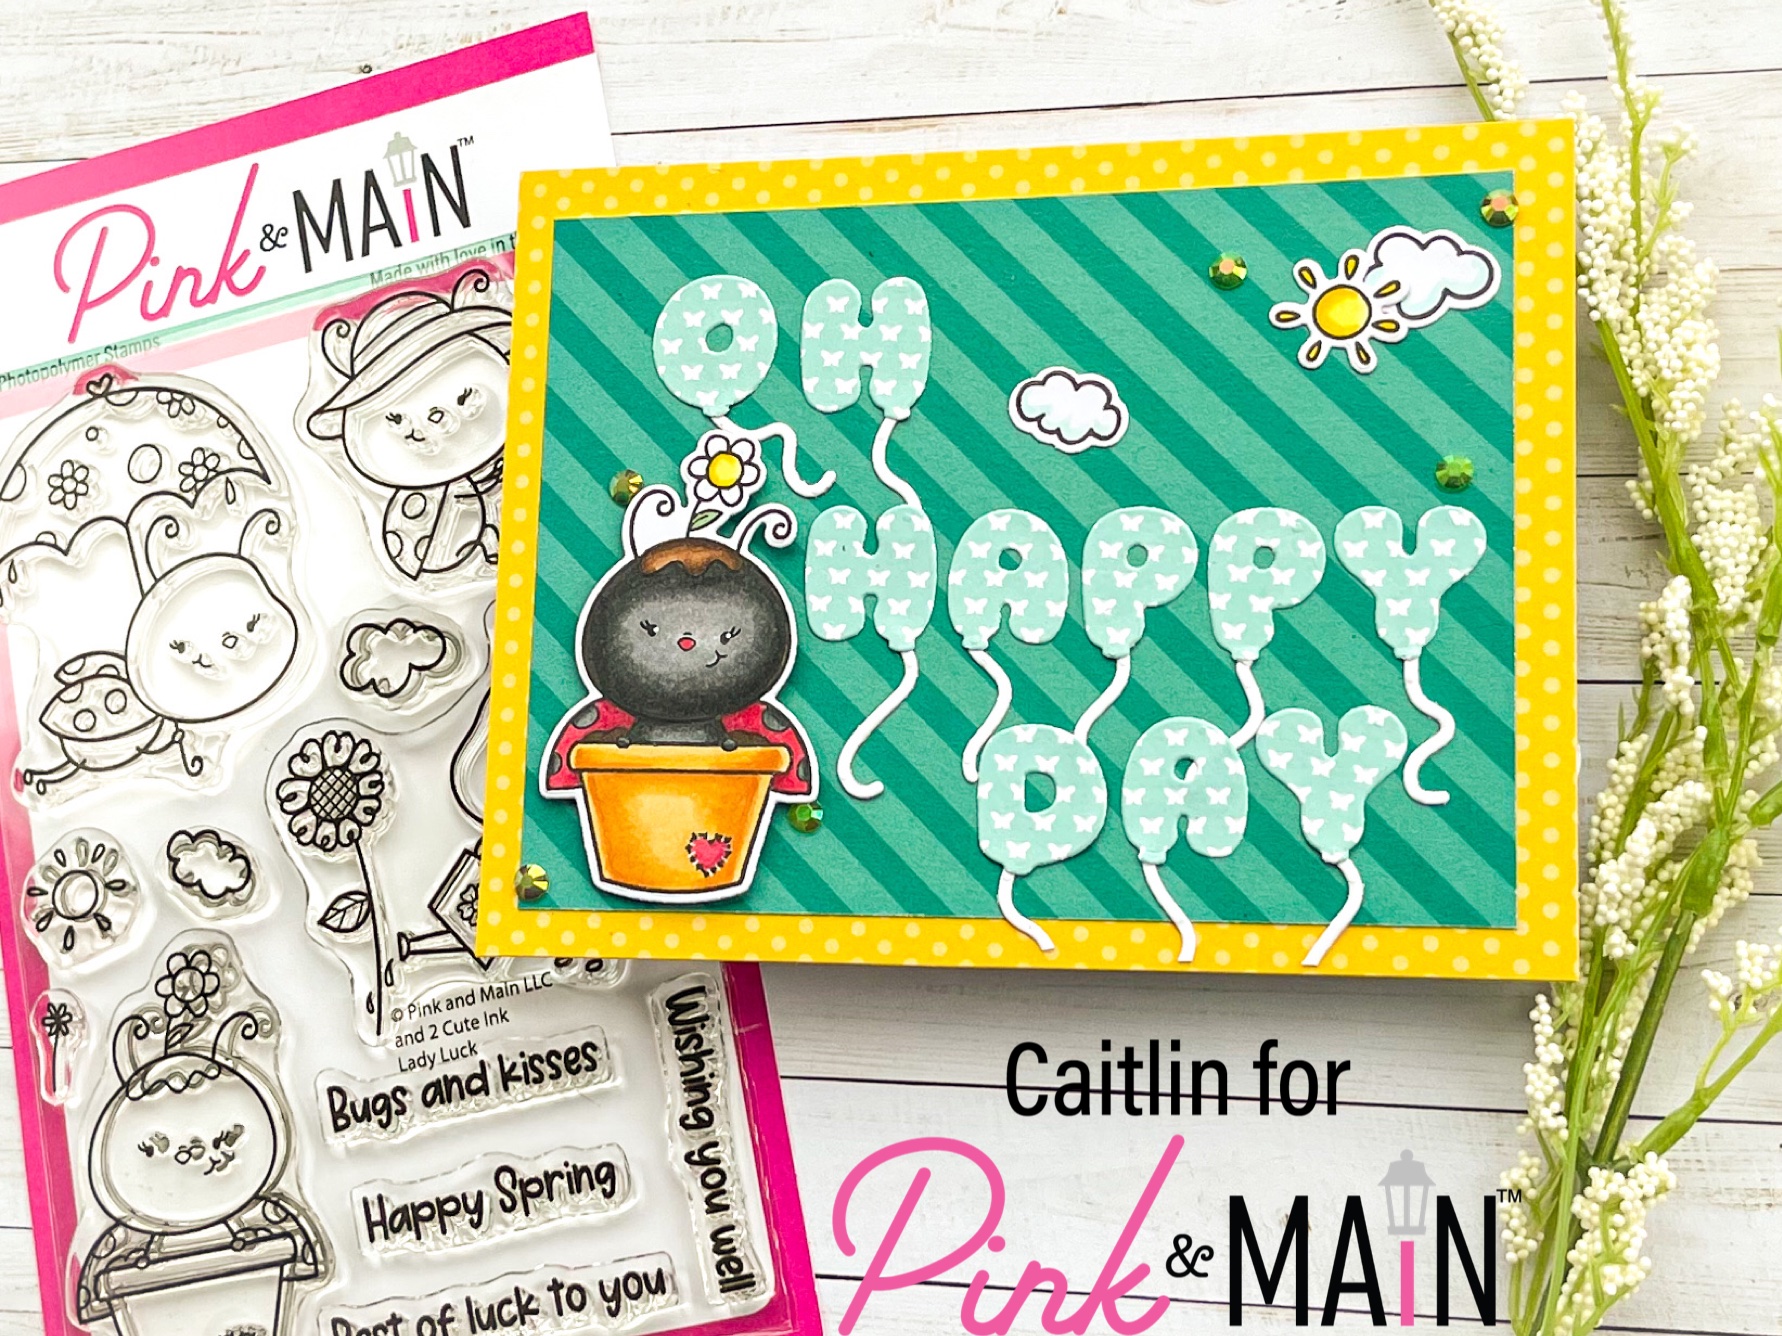
Then I added the teal panel flat with liquid glue and laid out my letters to figure out where my ladybug should go. I decided on a lower left placement and all my letters fit so well around it. I added liquid glue to the back of the letters, leaving the bottom edge unglued so that the little balloon strings could be slid underneath. I popped up the lady bug image with foam tape and added the sun and clouds to the upper right to balance everything out with liquid glue. The last step was to add some sparkle so I added triangles of yellow Warm Jellies Gems in either corner. I just know the Birthday Girl is going to be so happy and I hope you feel inspired to combine some die cuts with colored images soon!