
Hi Friends! This is Caitlin from Caitlin Annalee Cards and today I am sharing this fun St. Patricks Day card. Every year my children set up leprechaun traps the night before St Patricks Day and try to catch one so that they can win his gold, that is how I came up with the feature image for my card today.
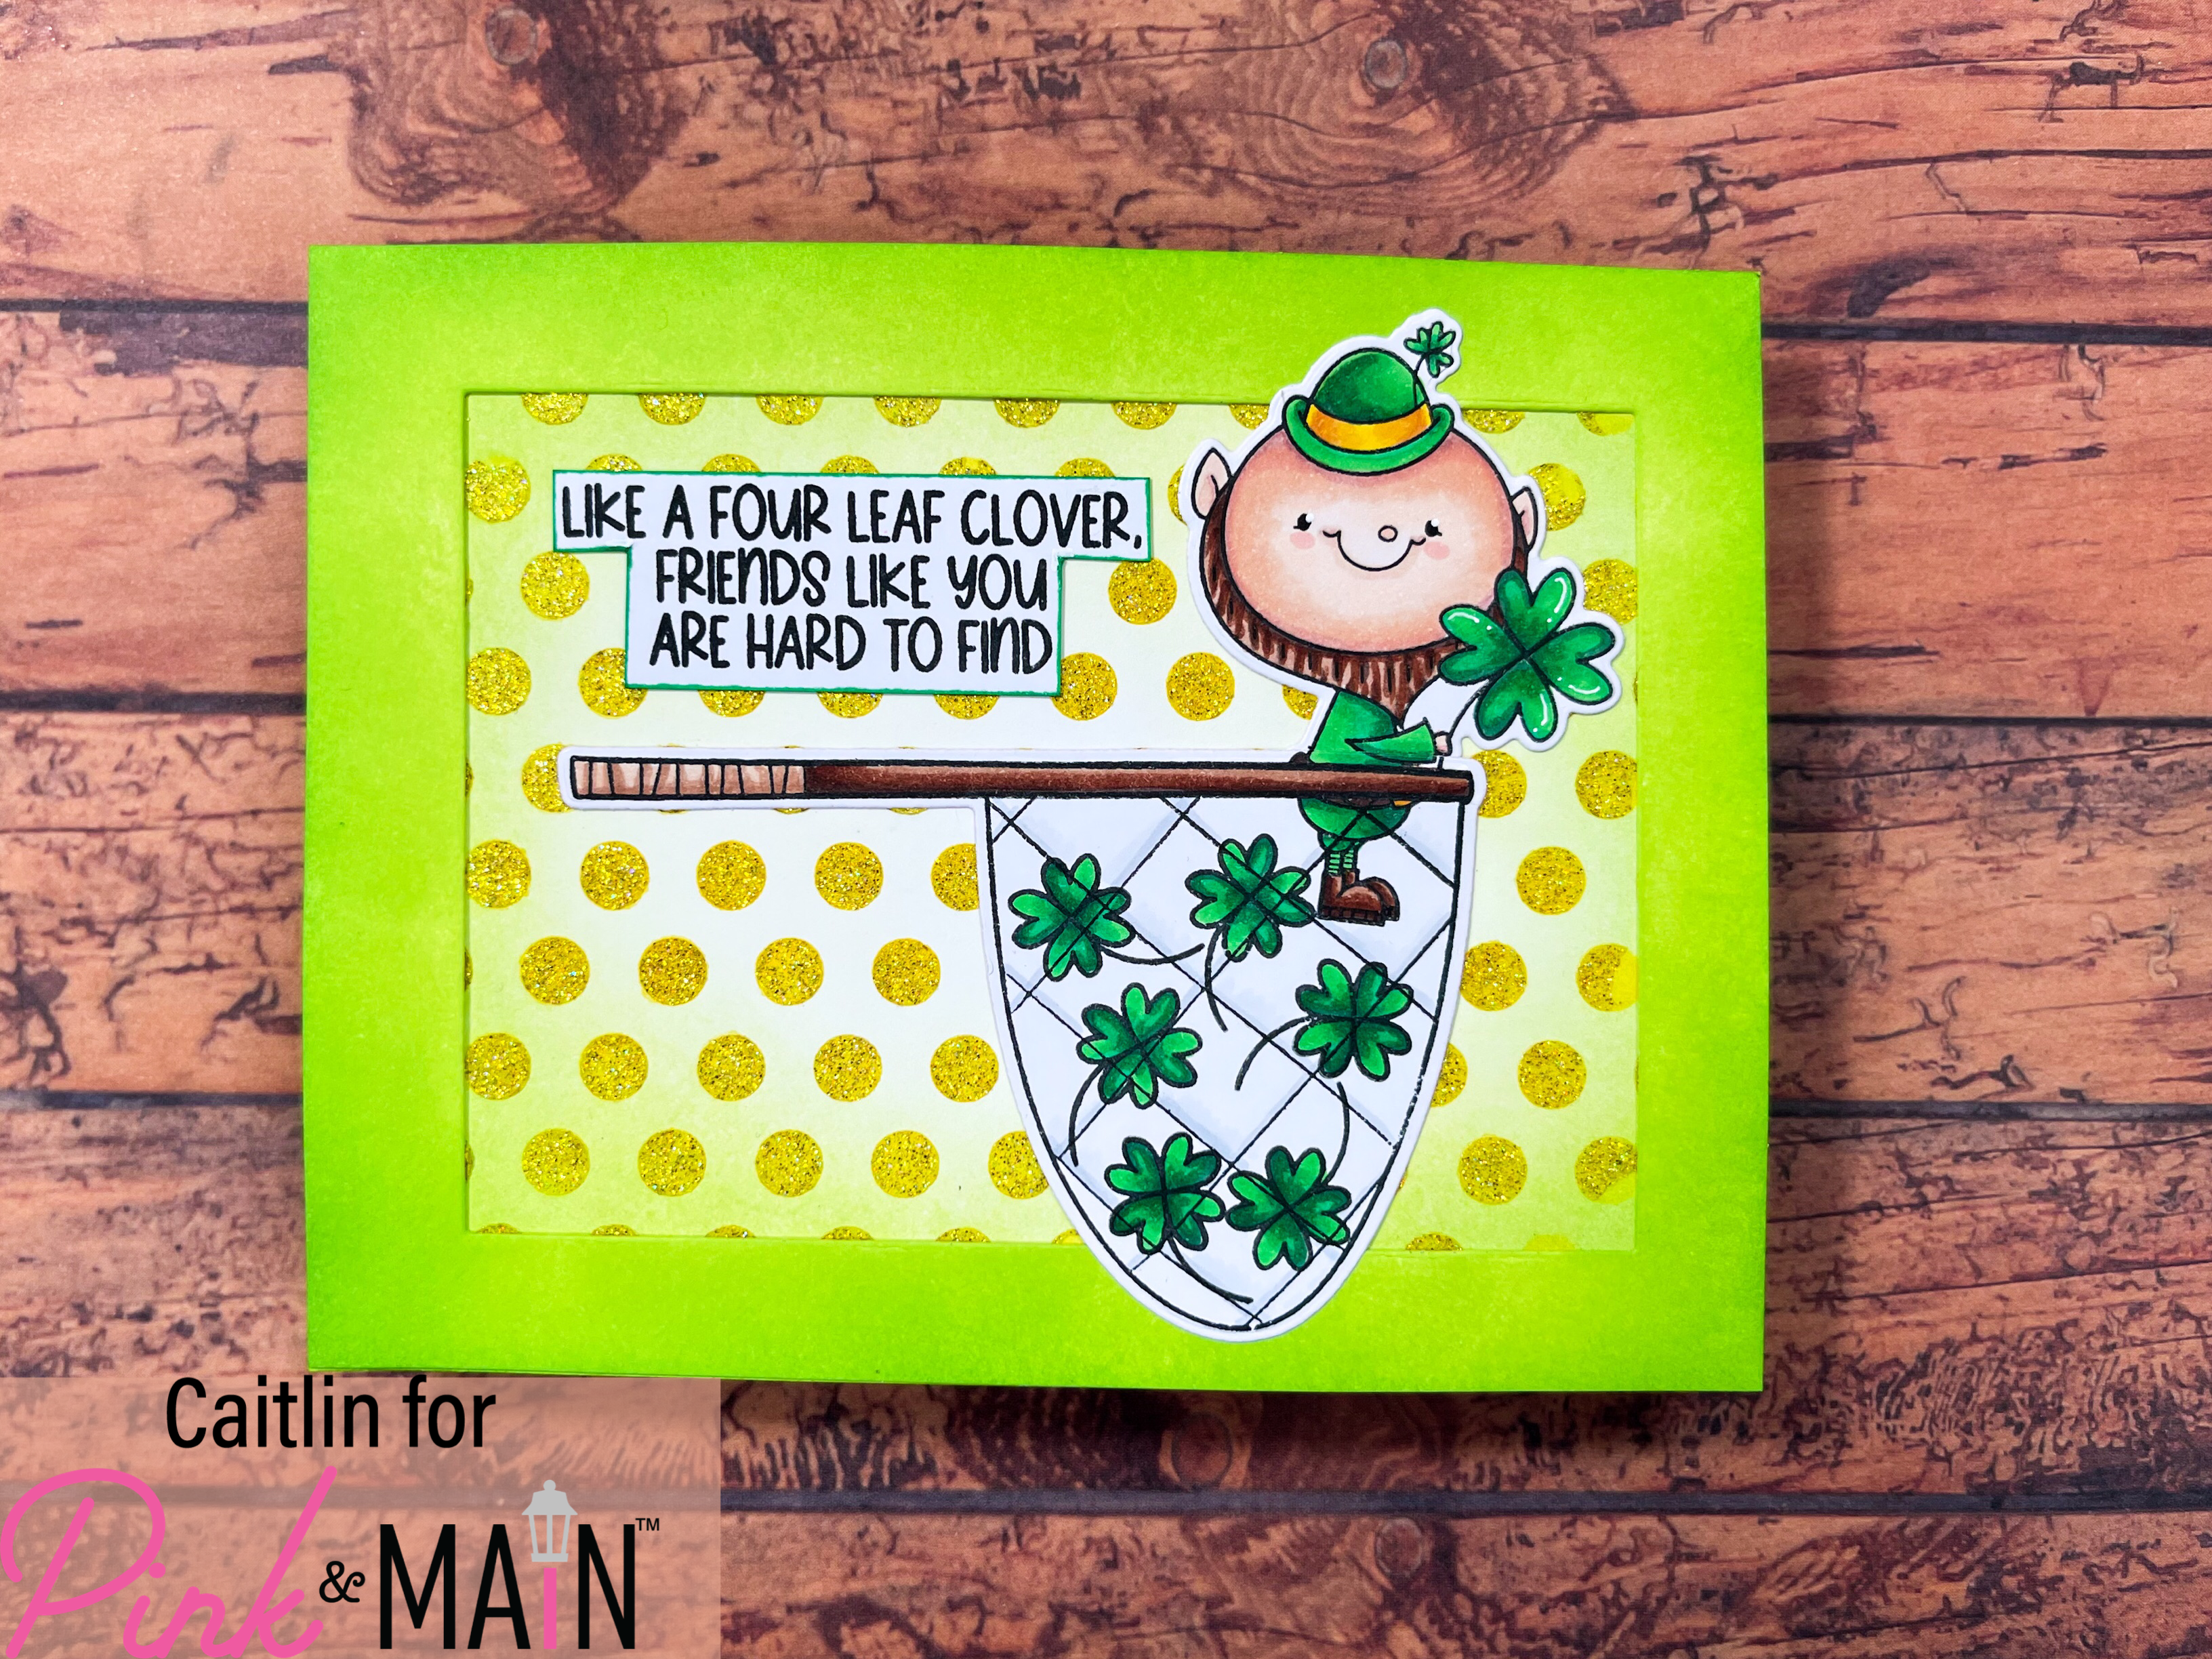
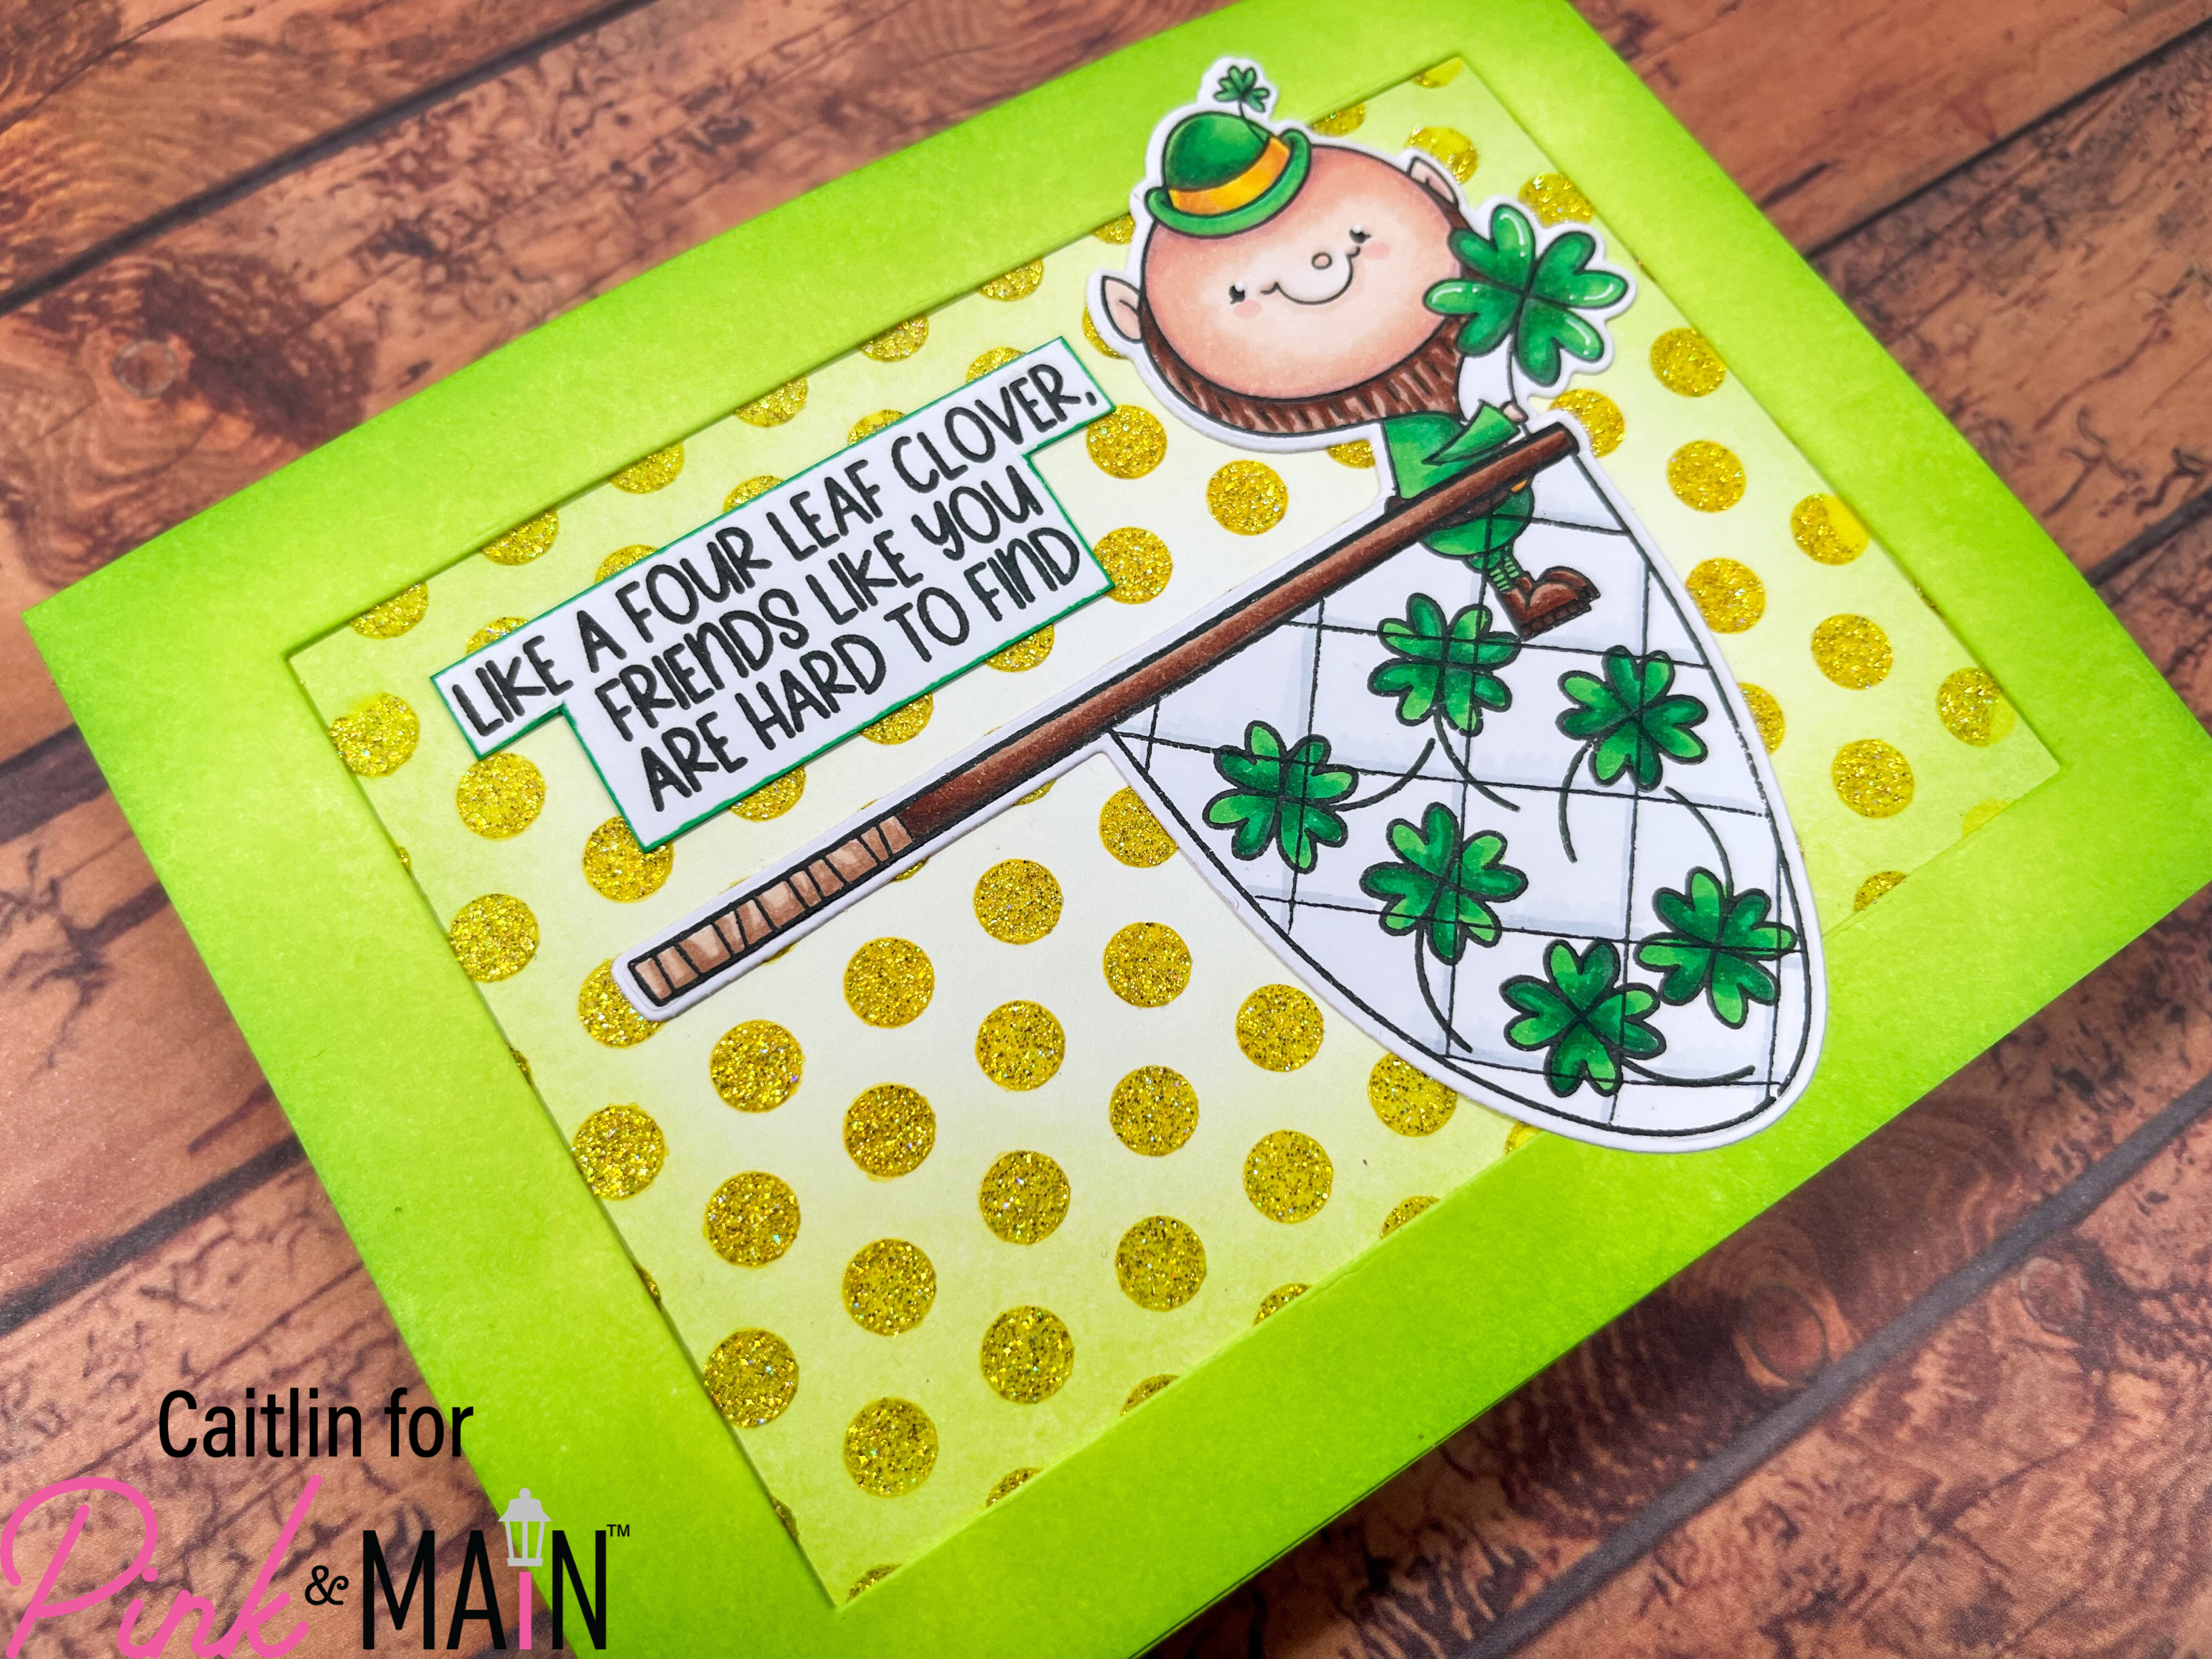
I started by stamping one of the leprechauns from the Lucky Leprechaun stamp set as well as the net from the Way to Glow stamp set. I used a scrap of full stock Post-it note to mask the wooden handle of the net and then I stamped the leprechaun at the edge of the net so that his arm is resting just over the handle. I also stamped the large shamrock in the net 6 times, rotating it around to fill the space under and around the leprechaun. I Copic-colored in both images using the same colors and shading for both the full and half leprechaun so that they will line up when they are both die cut.
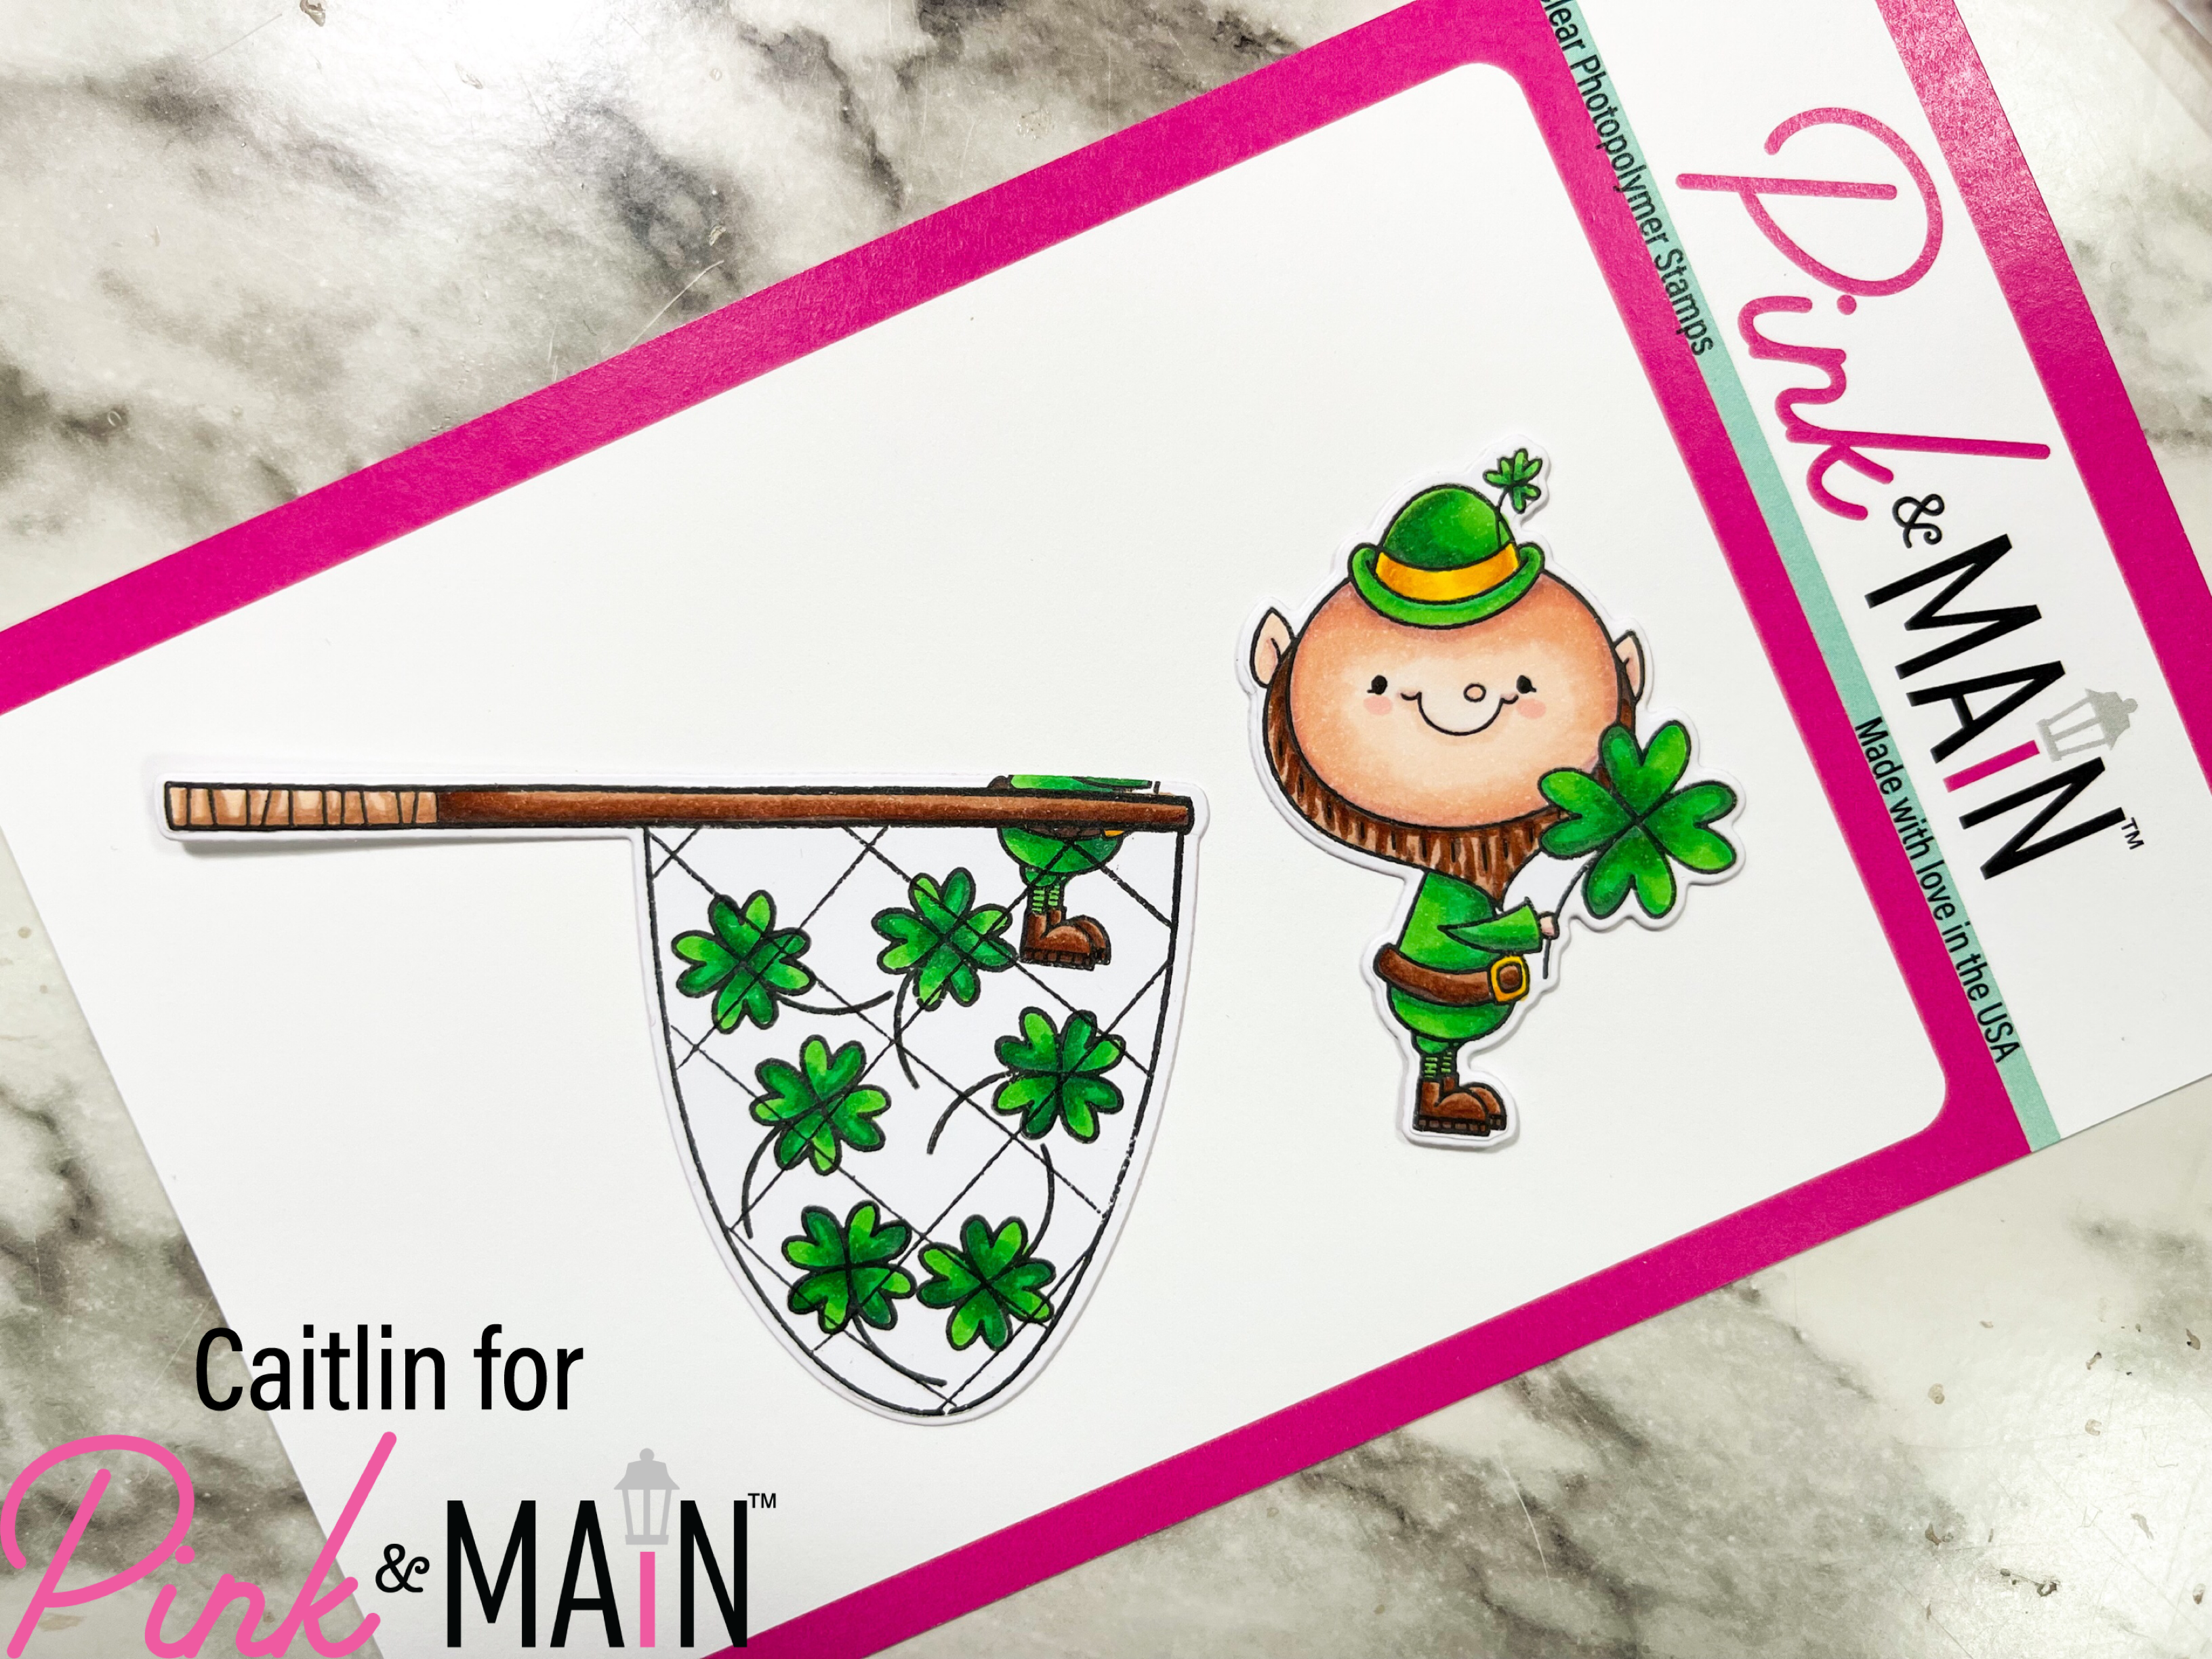
I used the coordinating die sets to cut out both images, not worrying about the net die cutting off the leprechaun. Then I glued them together with a small dot of the EZ Squeeze Glue, lining up the black outlines for the leprechaun. Once I had my main image set up and drying, I got to work on the background. I used a whole sheet of 80lb white card stock, first cutting it in half at 5.5 inches. I scored one half of the card stock at 4.25 in to make an A2 card base and I cut the other half at the 4.25 in mark to make two A2 card panels. I used a one of the Layered Rectangle A2 dies to cut the center of one panel out to create a frame. I used Twisted Citron and Mowed Lawn Distress Inks to ink up both the frame and the other panel. I really wanted to incorporate gold coins into the cards somehow so I created my own glitter paste with the Glossy Gel and a small scoop of the Lemonade Super Fine Glitter and used the Dotty Stencil on the solid panel. I gave everything about 20 minutes to dry and then I adhered the frame to the glittered panel and then that whole thing to the card base. The last step was to stamp and cut out the sentiment and glue it onto the card alongside the main image.
I hope that this inspires you get into your stash and have some fun!!!