
Hello friends! This is Amanda from Twiddler’s Nook today and I’m sharing a super fun Easter card with you! The last release was packed full of spring and Easter goodies and I’m still having so much fun creating with it all!
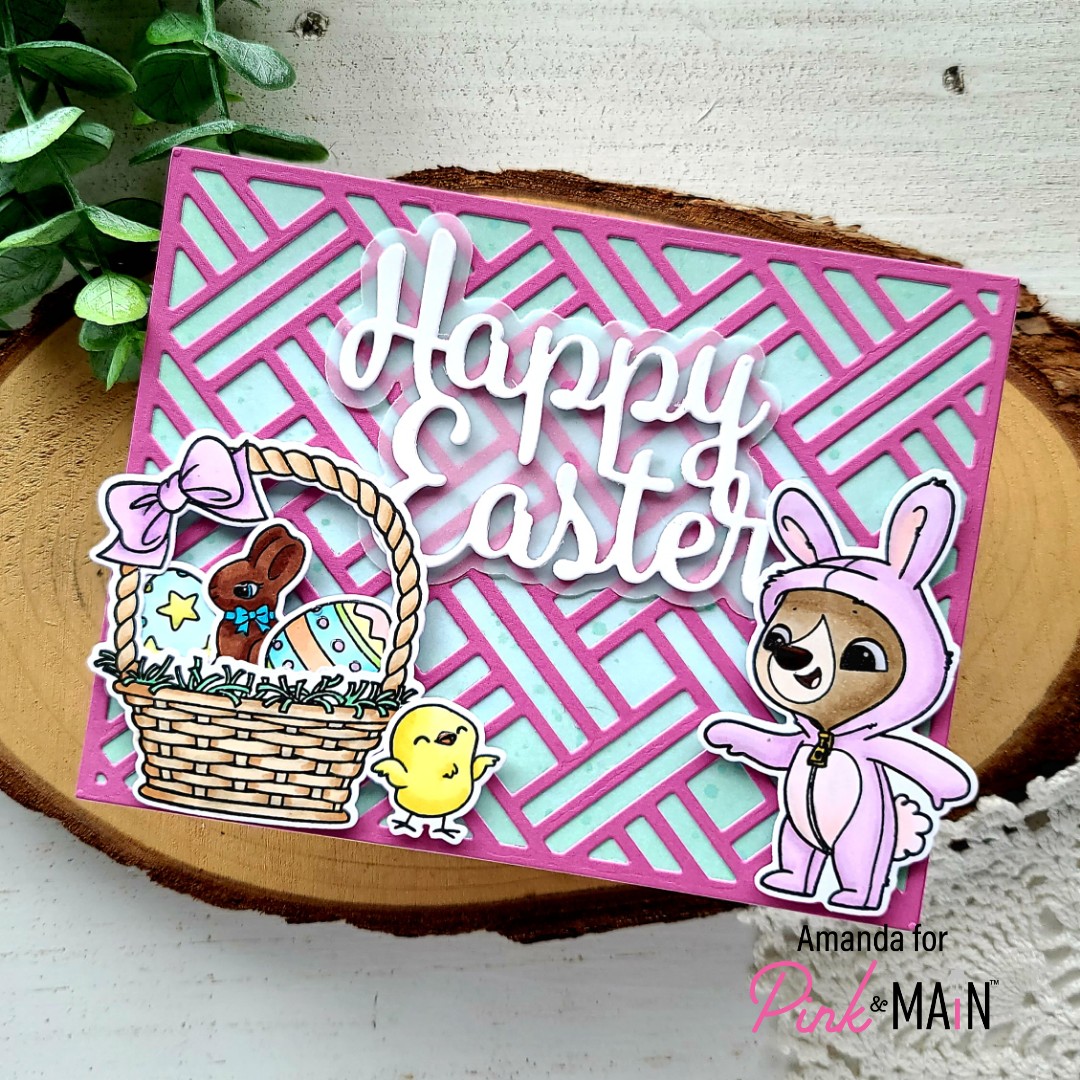
I started by stamping images from Easter Greetings and colored them with my copic markers. I used the coordinating dies to cut them out and arranged everything on my card front to make sure that the big Happy Easter word dies would fit like I wanted. Once I decided it would work, I cut the words from white cardstock 4 times and adhered them together with EZ Squeeze liquid glue. I cut the shadow from vellum and used tape runner to adhere it because I find that liquid glue warps the vellum.
For my background, I chose some teal cardstock and cut it out with the largest Layered A2 Rectangle die, then I splattered it with watered down dark teal ink for a little texture. I cut the Basket cover die from purple cardstock and adhered the two together. I added them to a white card base and started adding the other elements.

The word dies are added with tape runner and the images are all added with foam squares. I did use a little liquid glue to add the small items to my Easter basket before the foam squares. I feel like it helps things stay put.
Moving on to finishing touches, I added glossy accents to parts of the eggs, critters eyes, noses and beaks. I’m ready to switch gears to these super fun and happy spring colors. Aren’t you?
Products used today:
Easter Greetings stamps and dies
Happy Easter word dies
Basket cover die
EZ Squeeze liquid glue
Glossy accents
Foam squares
Tape runner
I appreciate you sharing your time with me. Have a fabulous day!