
This post uses affiliate links at no additional cost to you! By clicking the links in this post, I earn a small commission should you make a purchase. Thank you in advance!
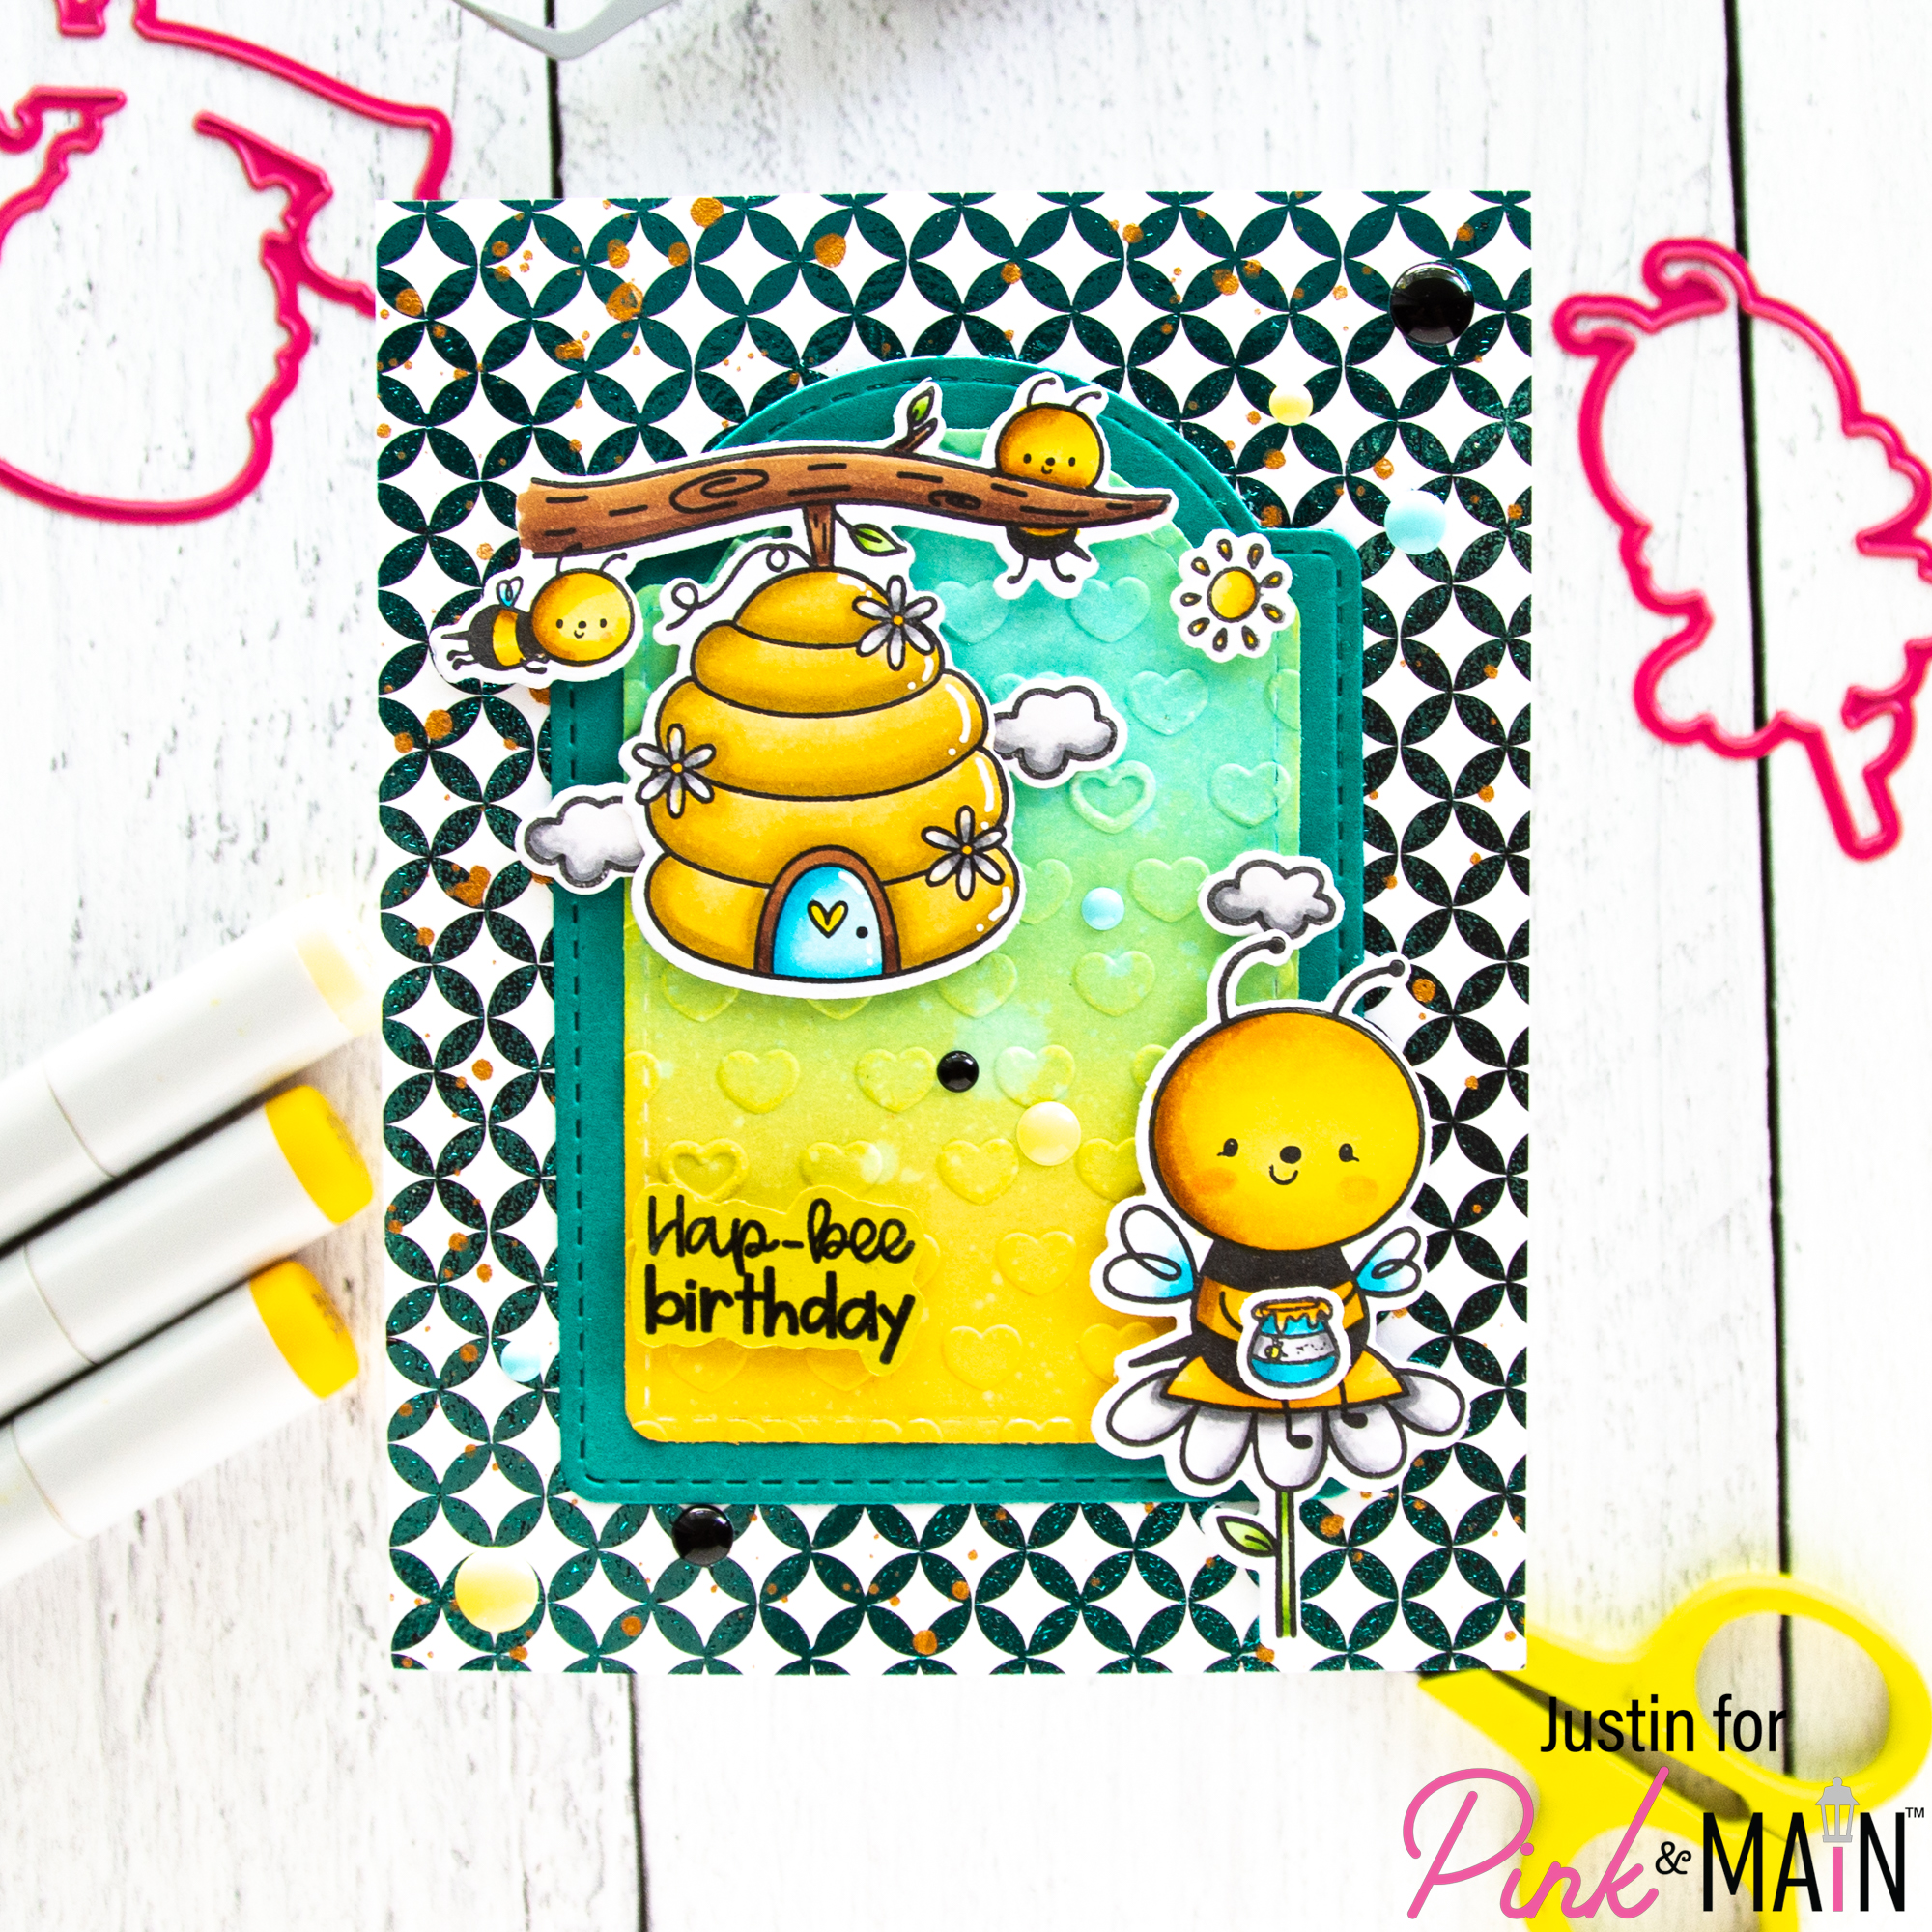
Hello friends! Justin here, and today I am sharing a foiled card I created using the July Stamp of the Month, Sweeter than Honey! I think the Stamp of the Month Subscription is such a fun way to add adorable stamps to your collection, and at a discount as well! On top of that, subscribers automatically get 15% off future orders while being a subscriber as well!
Below is a list of products I used to create this birthday card:
Pink & Main Products Used:
Sweeter Than Honey Stamp Set
Sweeter Than Honey Coordinating Die Set
Black & White Paper Pack
Many Hearts Embossing Folder
Arch Tag Dies
Lakeside Cardstock
The Park Cardstock
Pandamonium Enamel Dots
Magic Anti-Static Brush
Clear Embossing Powder
Other Key Products Used:
Blending Cardstock
Copic Markers
Distress Oxide Inks: Squeezed Lemonade & Salvaged Patina
Teal Foil
Foam Tape
Here is a brief walkthrough of how I made my card!

First and foremost, I turned on my laminator and let it heat up for a good 30 minutes or so.
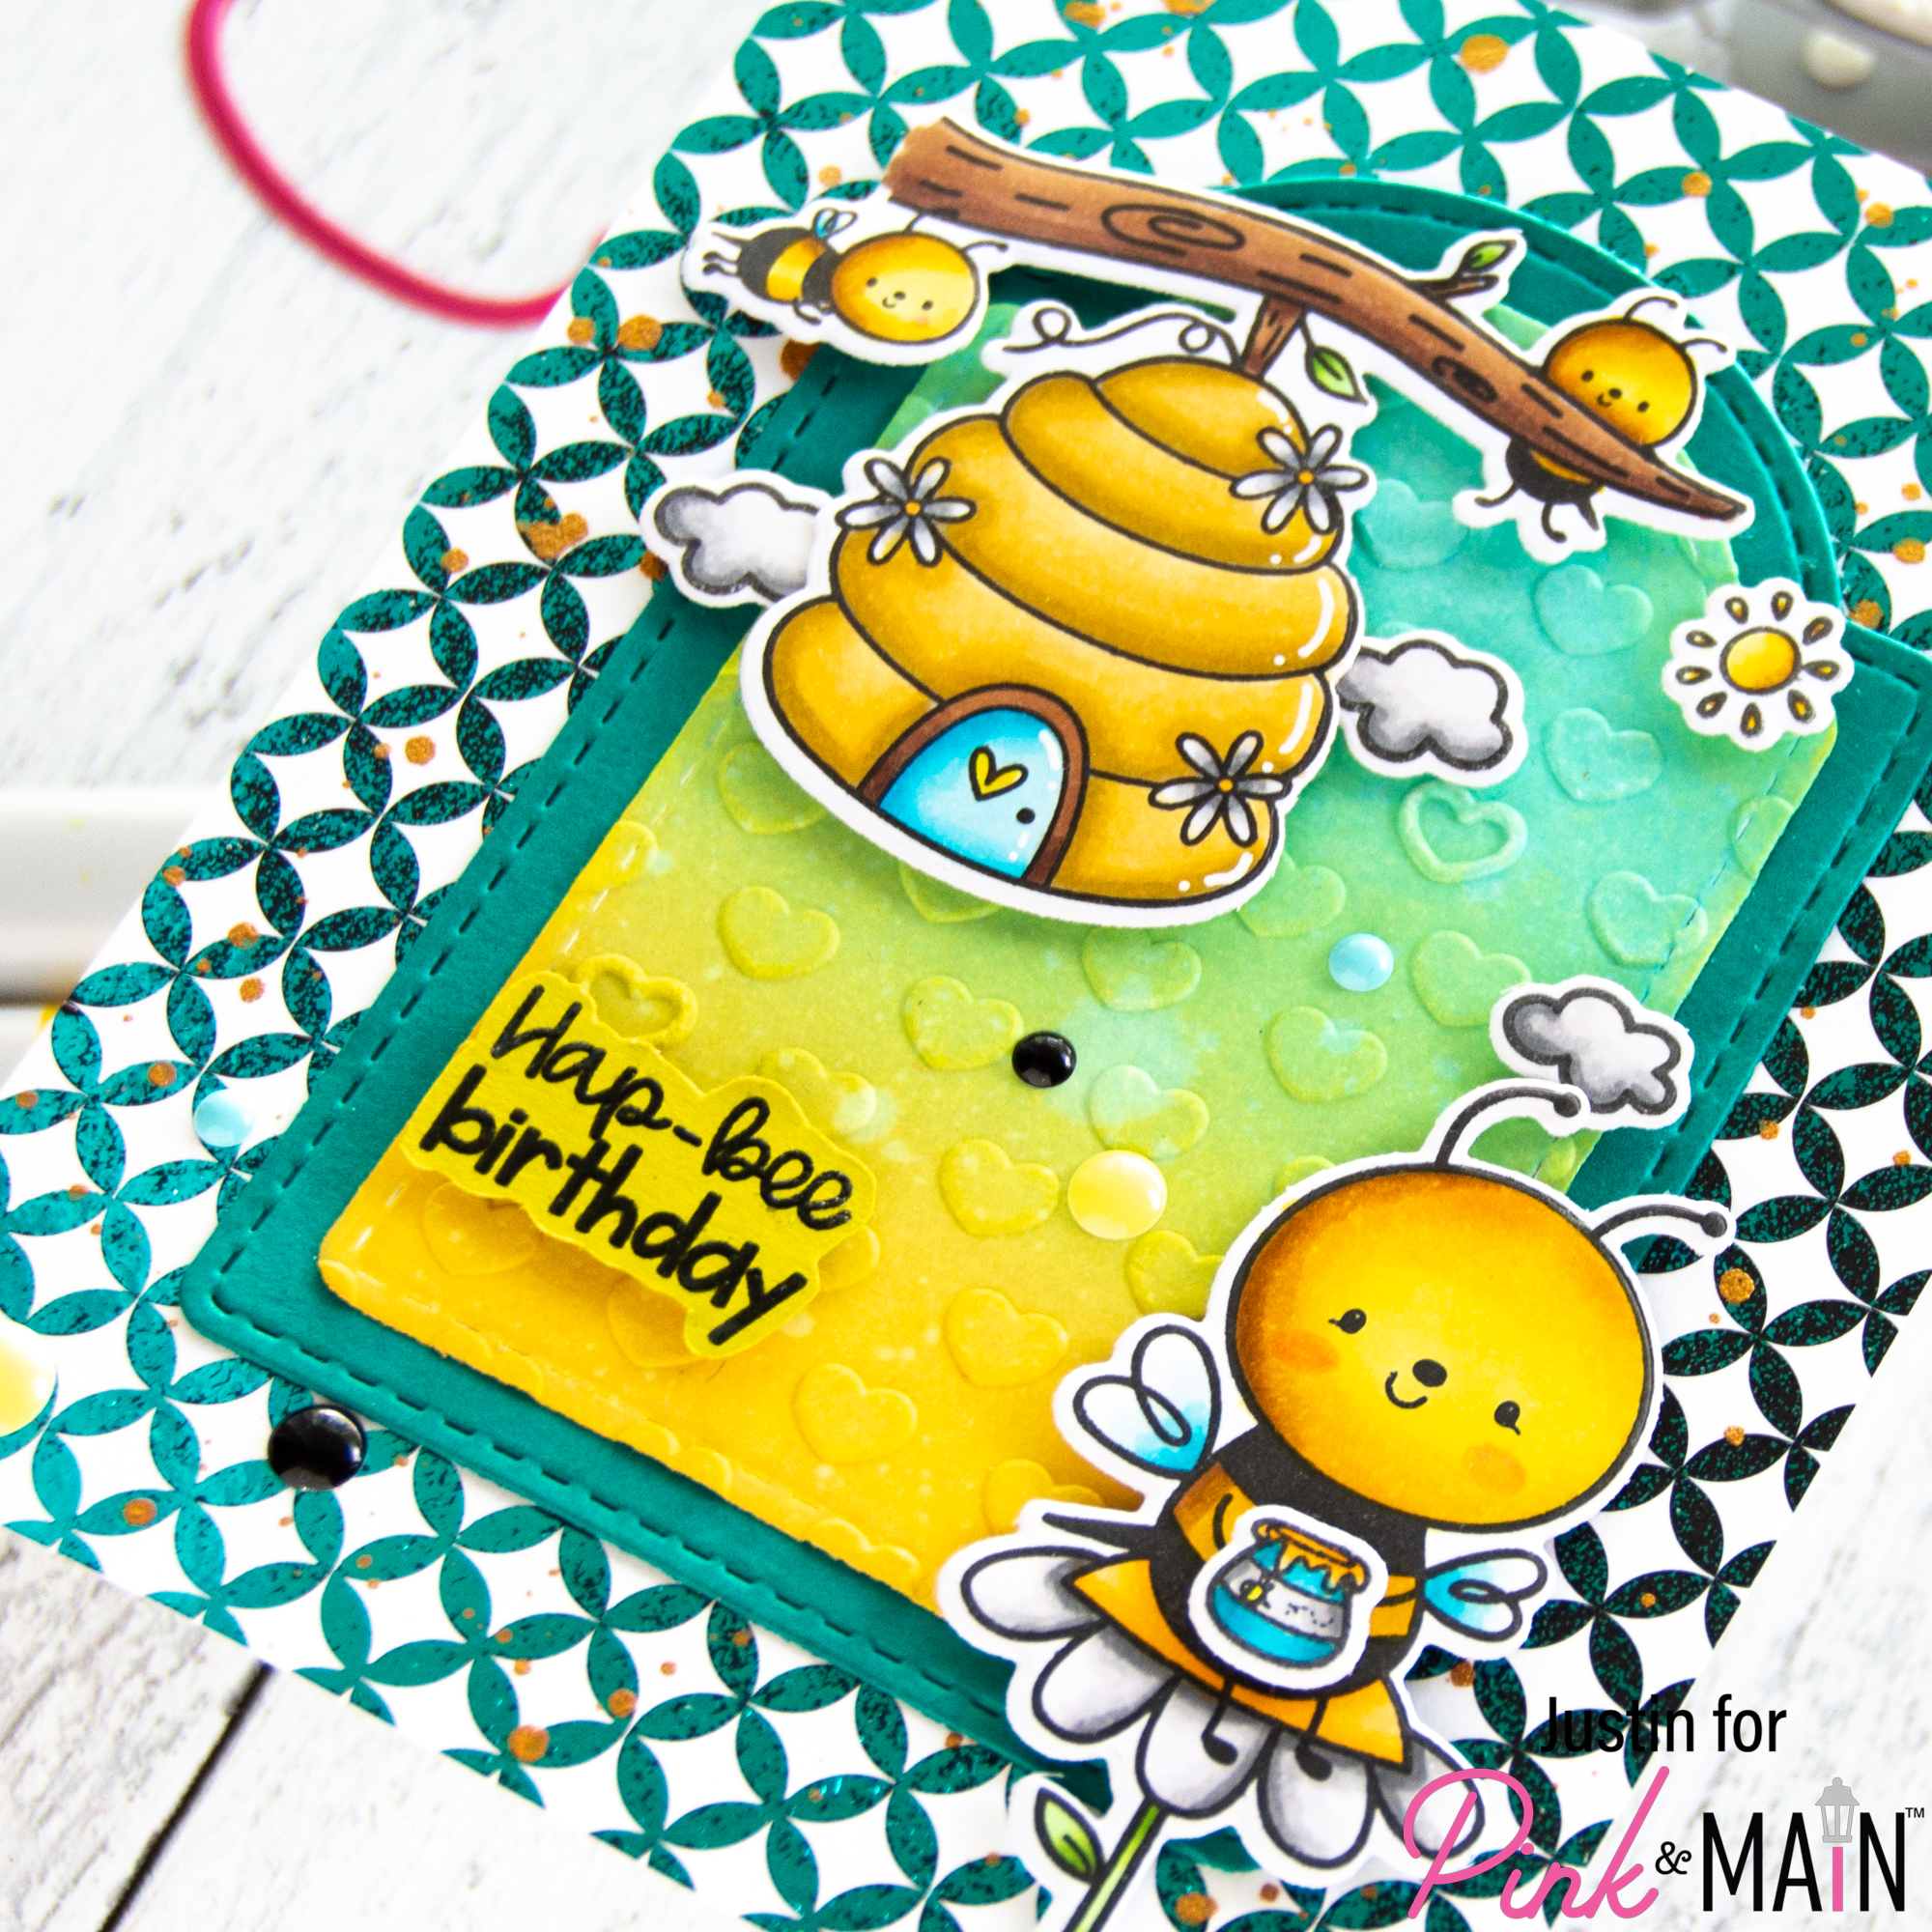
While waiting for my laminator to warm up, I colored up all my images from the Sweeter Than Honey with Copic Markers and cutting them out with the coordinating dies. I set these aside for later.
I grabbed one of the prints from the Black & White Paper Pack and trimmed it down to A2-sized. I then took a piece of Teal Foil, wiped the back of the foil and the front of the Black & White panel with a Microfiber Towel, placed it into a parchment paper sandwich, and processed it through my laminator. I removed the foil to see how it transferred. I then splattered this panel with gold metallic watercolor and set it aside to dry.
I die cut (1) Arch Tag from Lakeside Cardstock, and then the next smaller size from blending cardstock. On the smaller tag, I blended an ombré using Squeezed Lemonade and Salvaged Patina Distress Oxide Inks. I spritzed this panel with water, placed it into Many Hearts Embossing Folder, and processed it through my die cutting machine to get that embossed effect. Using liquid adhesive, I adhered the smaller tag on top of the Lakeside Tag.
For the sentiment, I brushed some The Park cardstock with my Magic Anti-Static Brush, stamped the sentiment “Hap-bee Birthday” in black pigment ink, and heat embossed it in Clear Embossing Powder. I then fussy cut the sentiment out.
To assemble my card, I used liquid adhesive to adhere the background tags, and foam tape for all of the images and sentiment to give them a little bit of lift. I then applied a few Pandamonium Enamel Dots for finishing embellishments!
Thank you so much for stopping by the Pink & Main blog today! I am hoping this birthday card leaves you buzzing with excitement to subscribe to the Pink & Main Stamp of the Month Club and get your crafty on!
For more crafty inspiration, please follow me on Instagram and check out my personal blog as well!
Thank you again for stopping by, and happy crafting!
Justin