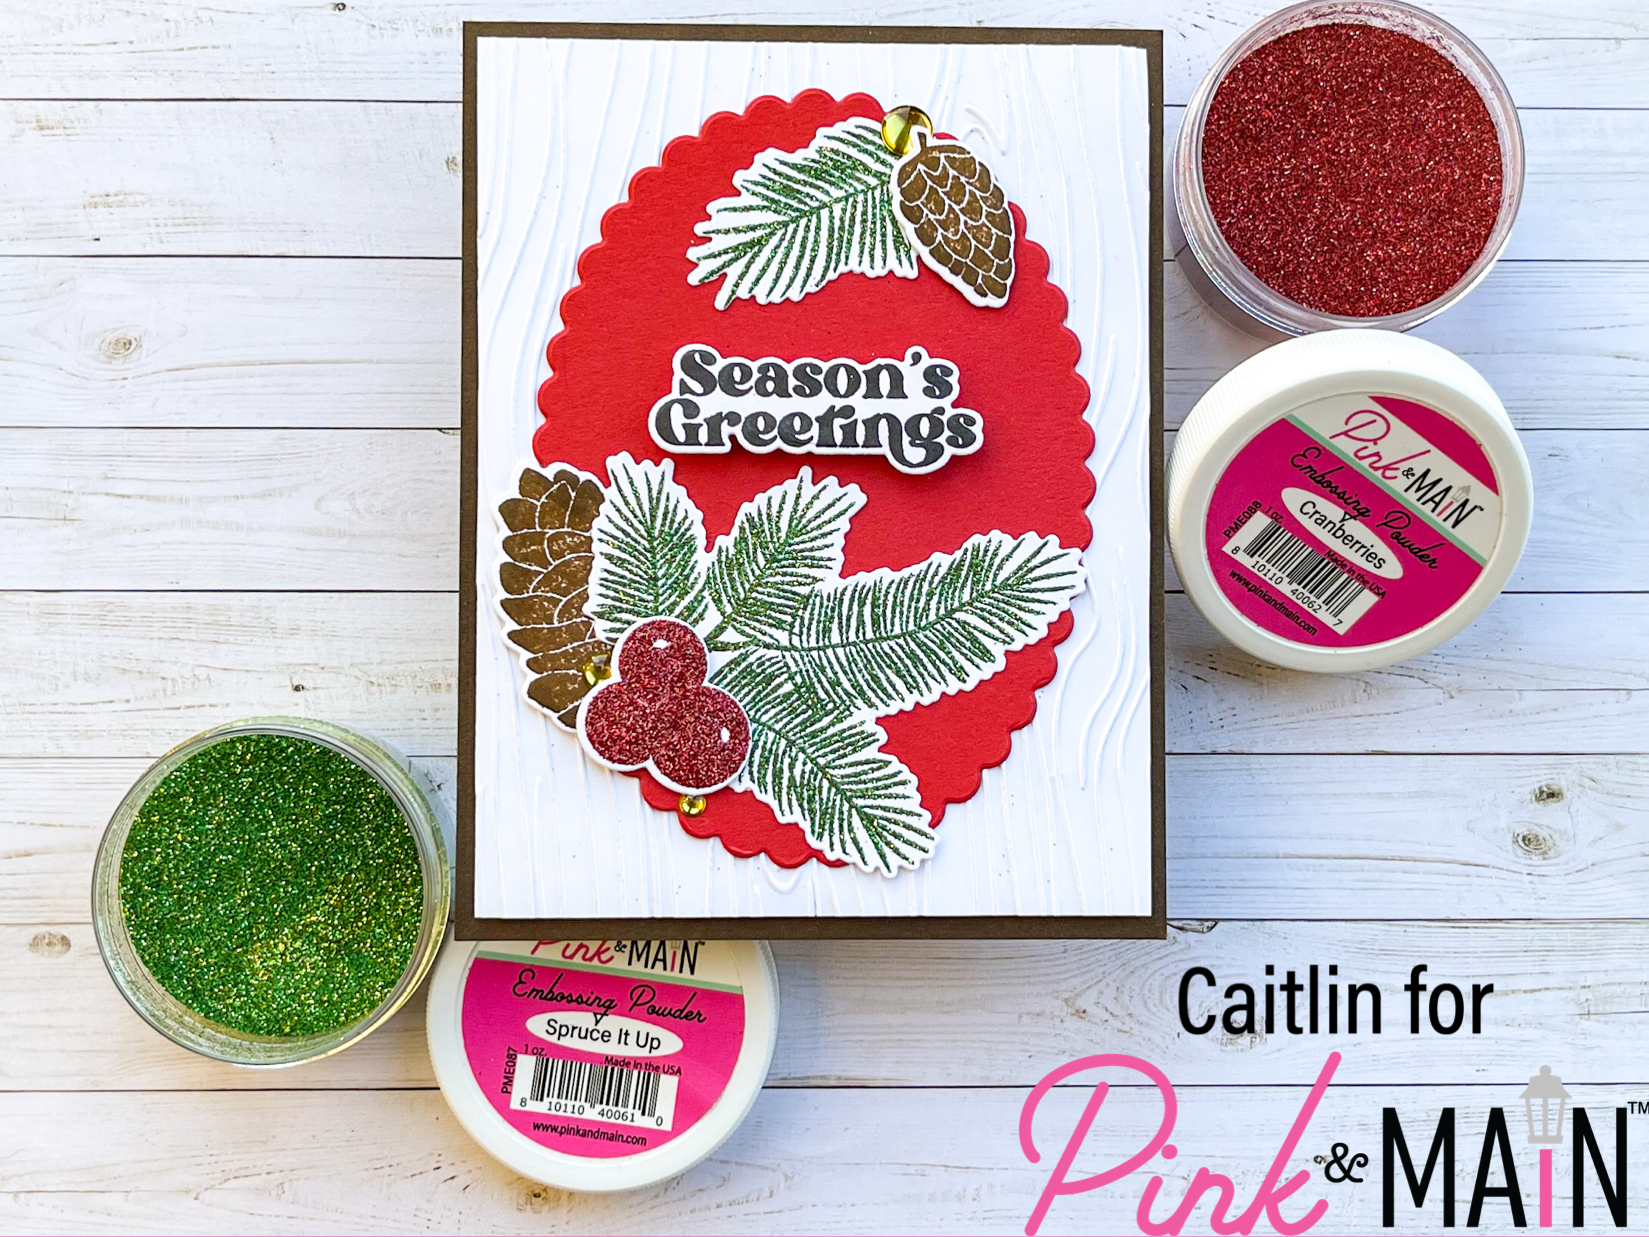
Hi friends! This is Caitlin from Caitlin Annalee Cards and today I am jumping into Christmas… finally. I wanted to make something a little less cutesy this week but I just couldnt give up on the sparkle. I grabbed the Pine Boughs stamp set and some tried and true favorite supplies of mine and got to work. I started out with a side folding A2 card base and added a panel of Coffee Shop Card Stock. I love how dark and rich this color is and I think this thin mat really helps to ground the rest of the card. The next step was trimming white card stock down to 5.25 in x 4 in and running it through my die cutting machine with the Wood Grain Embossing Folder. I have really been loving adding tone on tone texture with embossing folders lately and Pink and Main has so many amazing options, I just can’t stop playing! I added the white layer with some thin foam tape to help add extra dimension and interest to the card. My last layer before my stamped images was a piece of Stop Sign Card Stock that I cut with one of the Scalloped Oval Dies. I glued that down flat to the dry embossed panel with liquid glue being sure to press down well so that the wood grain didn’t interfere with the adhesion.
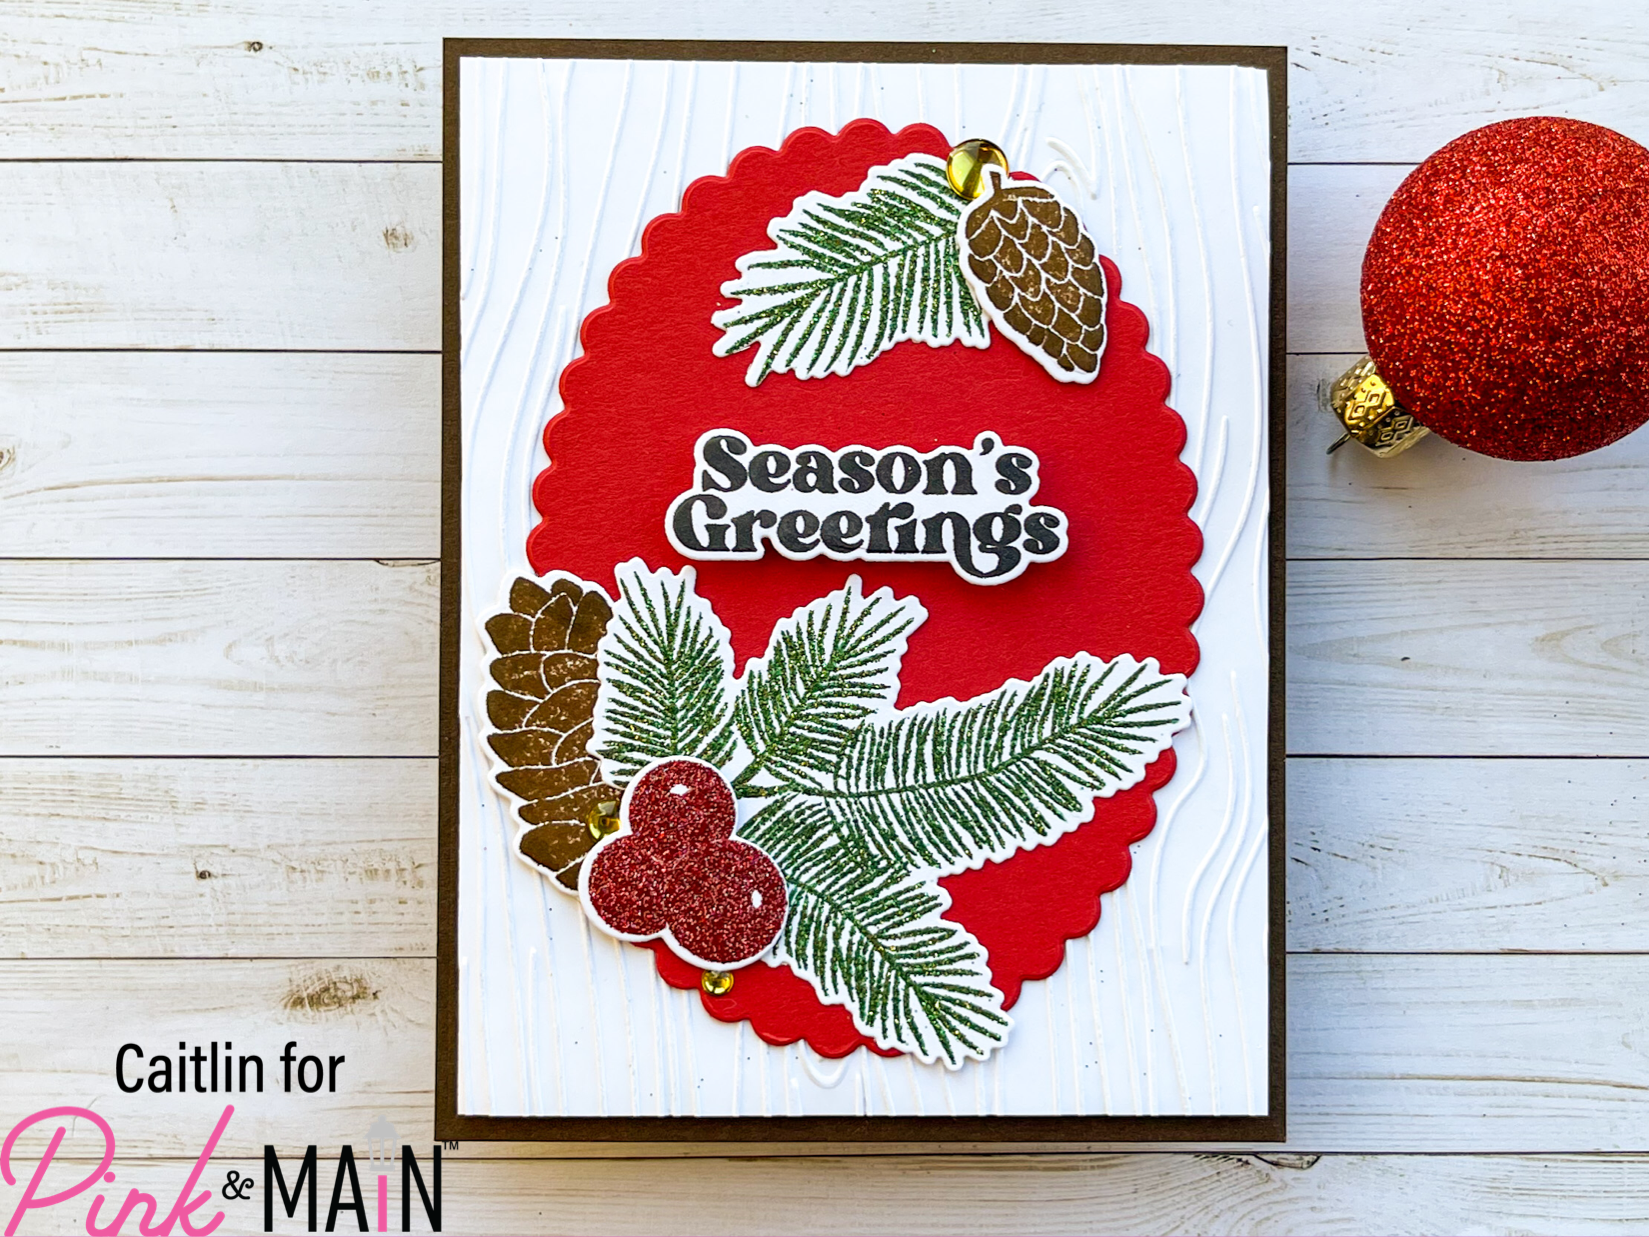
It was finally time to stamp my images and I really wanted to bring in some of the glitter embossing powders. I stamped the pine cones first with Gathered Twigs Distress Ink all over and then added some Ground Espresso Distress Ink just to the edges. I set them to the side to dry. Next I stamped the pine boughs with Rustic Wilderness Distress Ink and then with a layer of the Pink and Main Watermark and Embossing Ink and coated the images with the Spruce it Up Glitter Embossing Powder. I tapped off the excess and heat set them. I repeated the same steps with the berry stamp, using Lumberjack Plaid Distress Ink and Cranberries Glitter Embossing Powder. I used the coordinating dies to cut out the images and the sentiment, which I stamped in black ink.
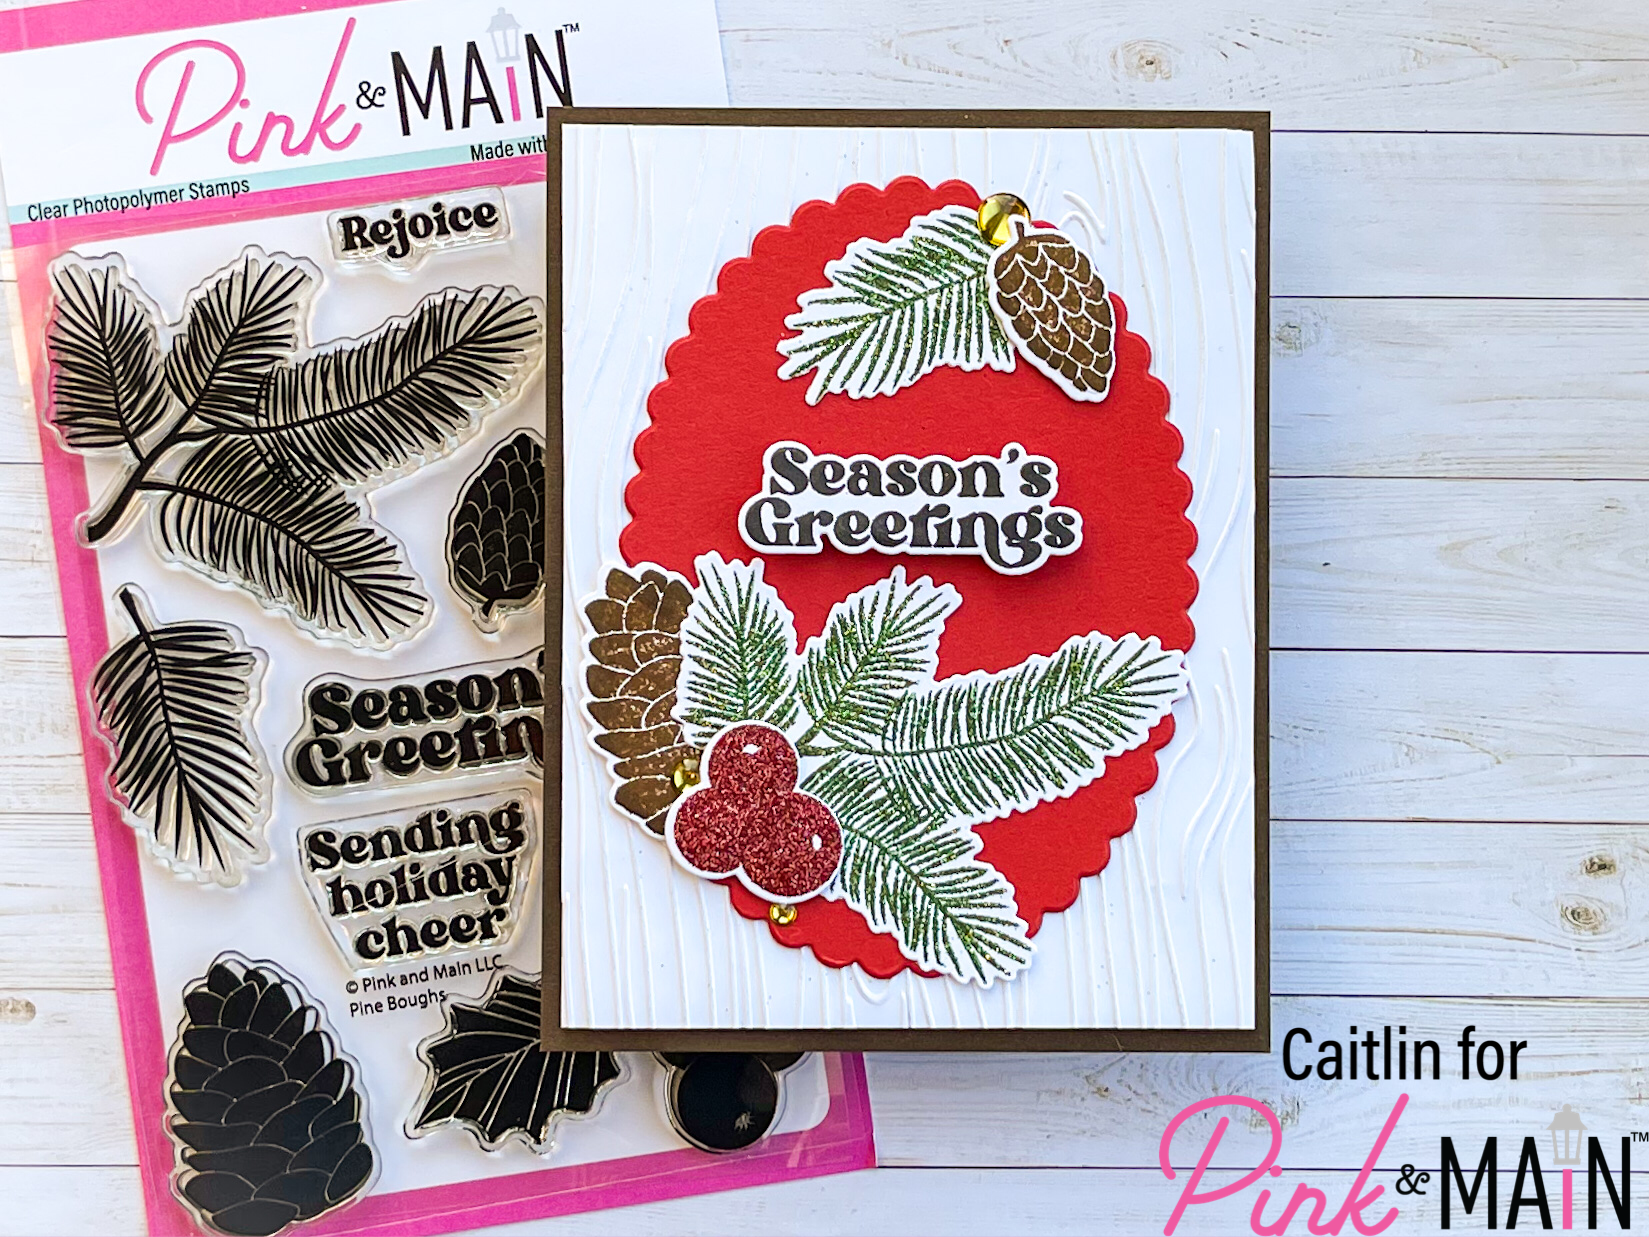
I added the sentiment first with foam tape to help it attract the eye and balance all the glitter on the images. On the top of the oval, I glued down the small pine bough first with liquid glue and then added the small pine cone with thin foam tape. On the bottom of the oval, I added the large pinecone and pine bough with liquid glue and popped the berries up with the thin foam tape. To add one final touch of shine, I added a few of the Gold Glossy Dots in between the layered images. I love how the images give this card a rustic or farm house feel but the glitter still keeps it fun and a little glamourous. I hope you are feeling super inspired to get to work on some holiday crafting and I cant wait to share a sneak peek with you next week for the November release (it’s seriously amazing!)