
Hi crafty friends, It’s Joy here and I’m sharing how I added ink to the embossing folder, to create a beautiful background. I used the Round About 6×6 Embossing Folder. I hope you enjoy this project.
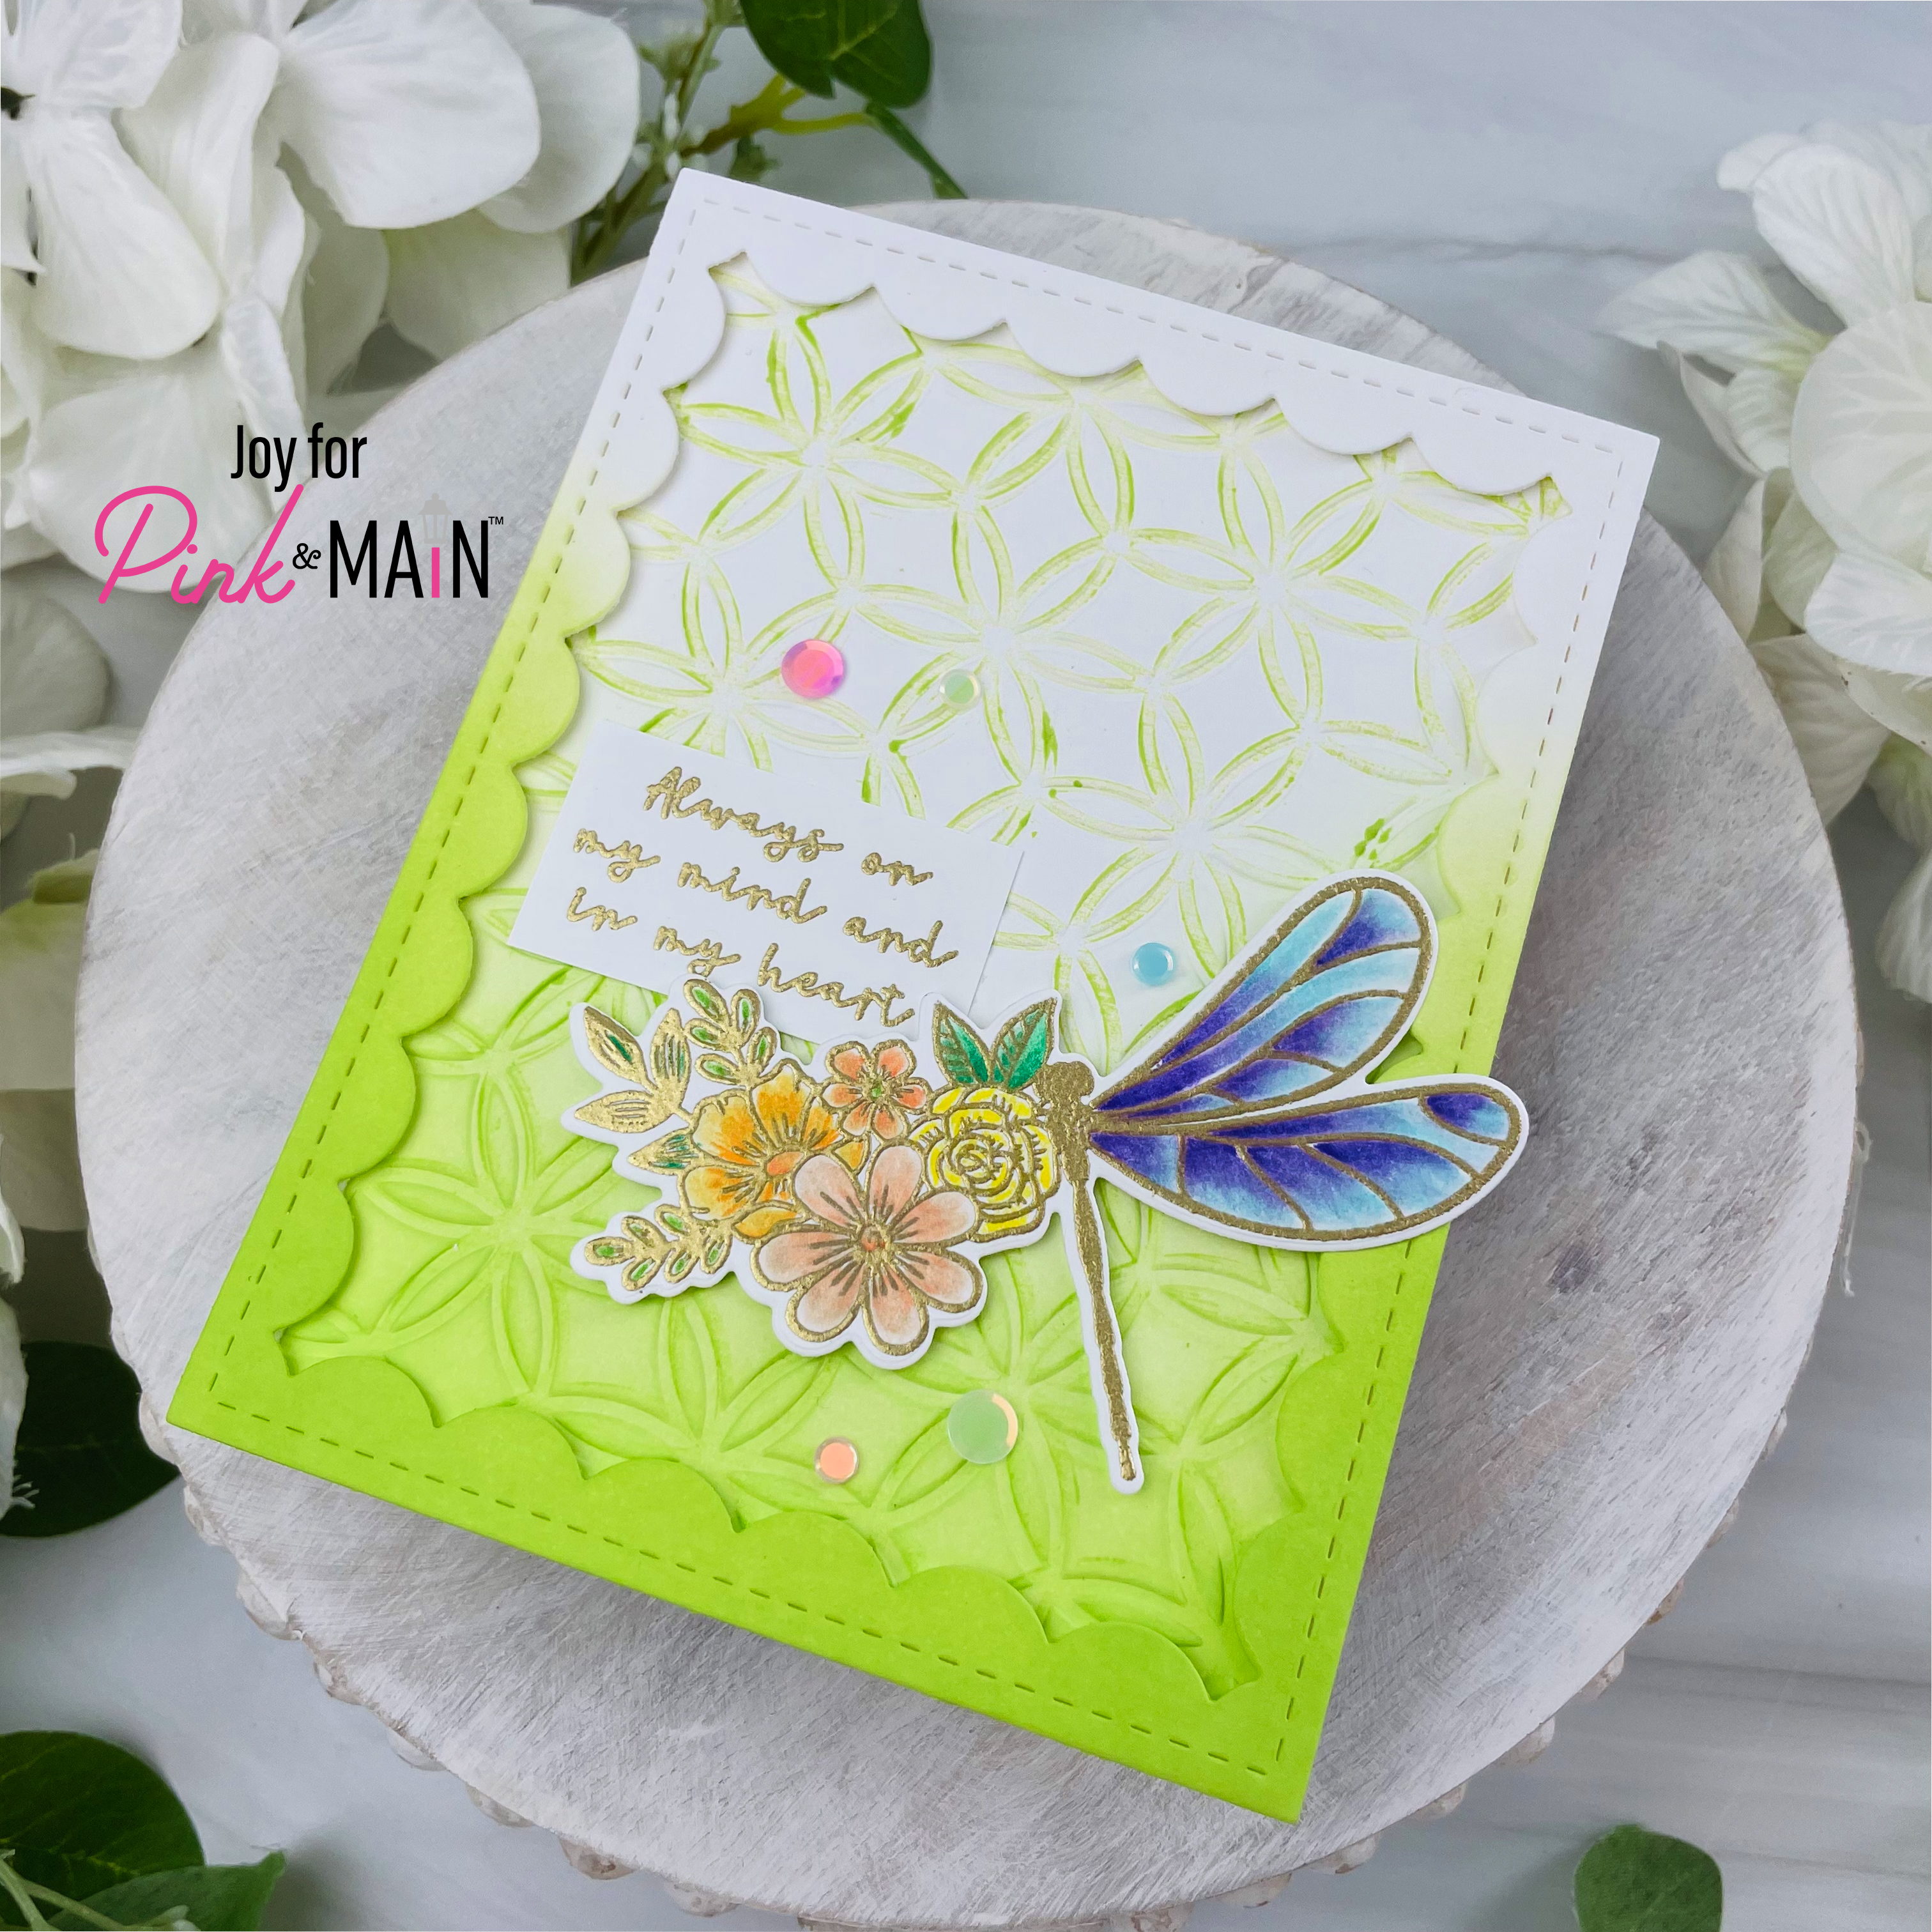
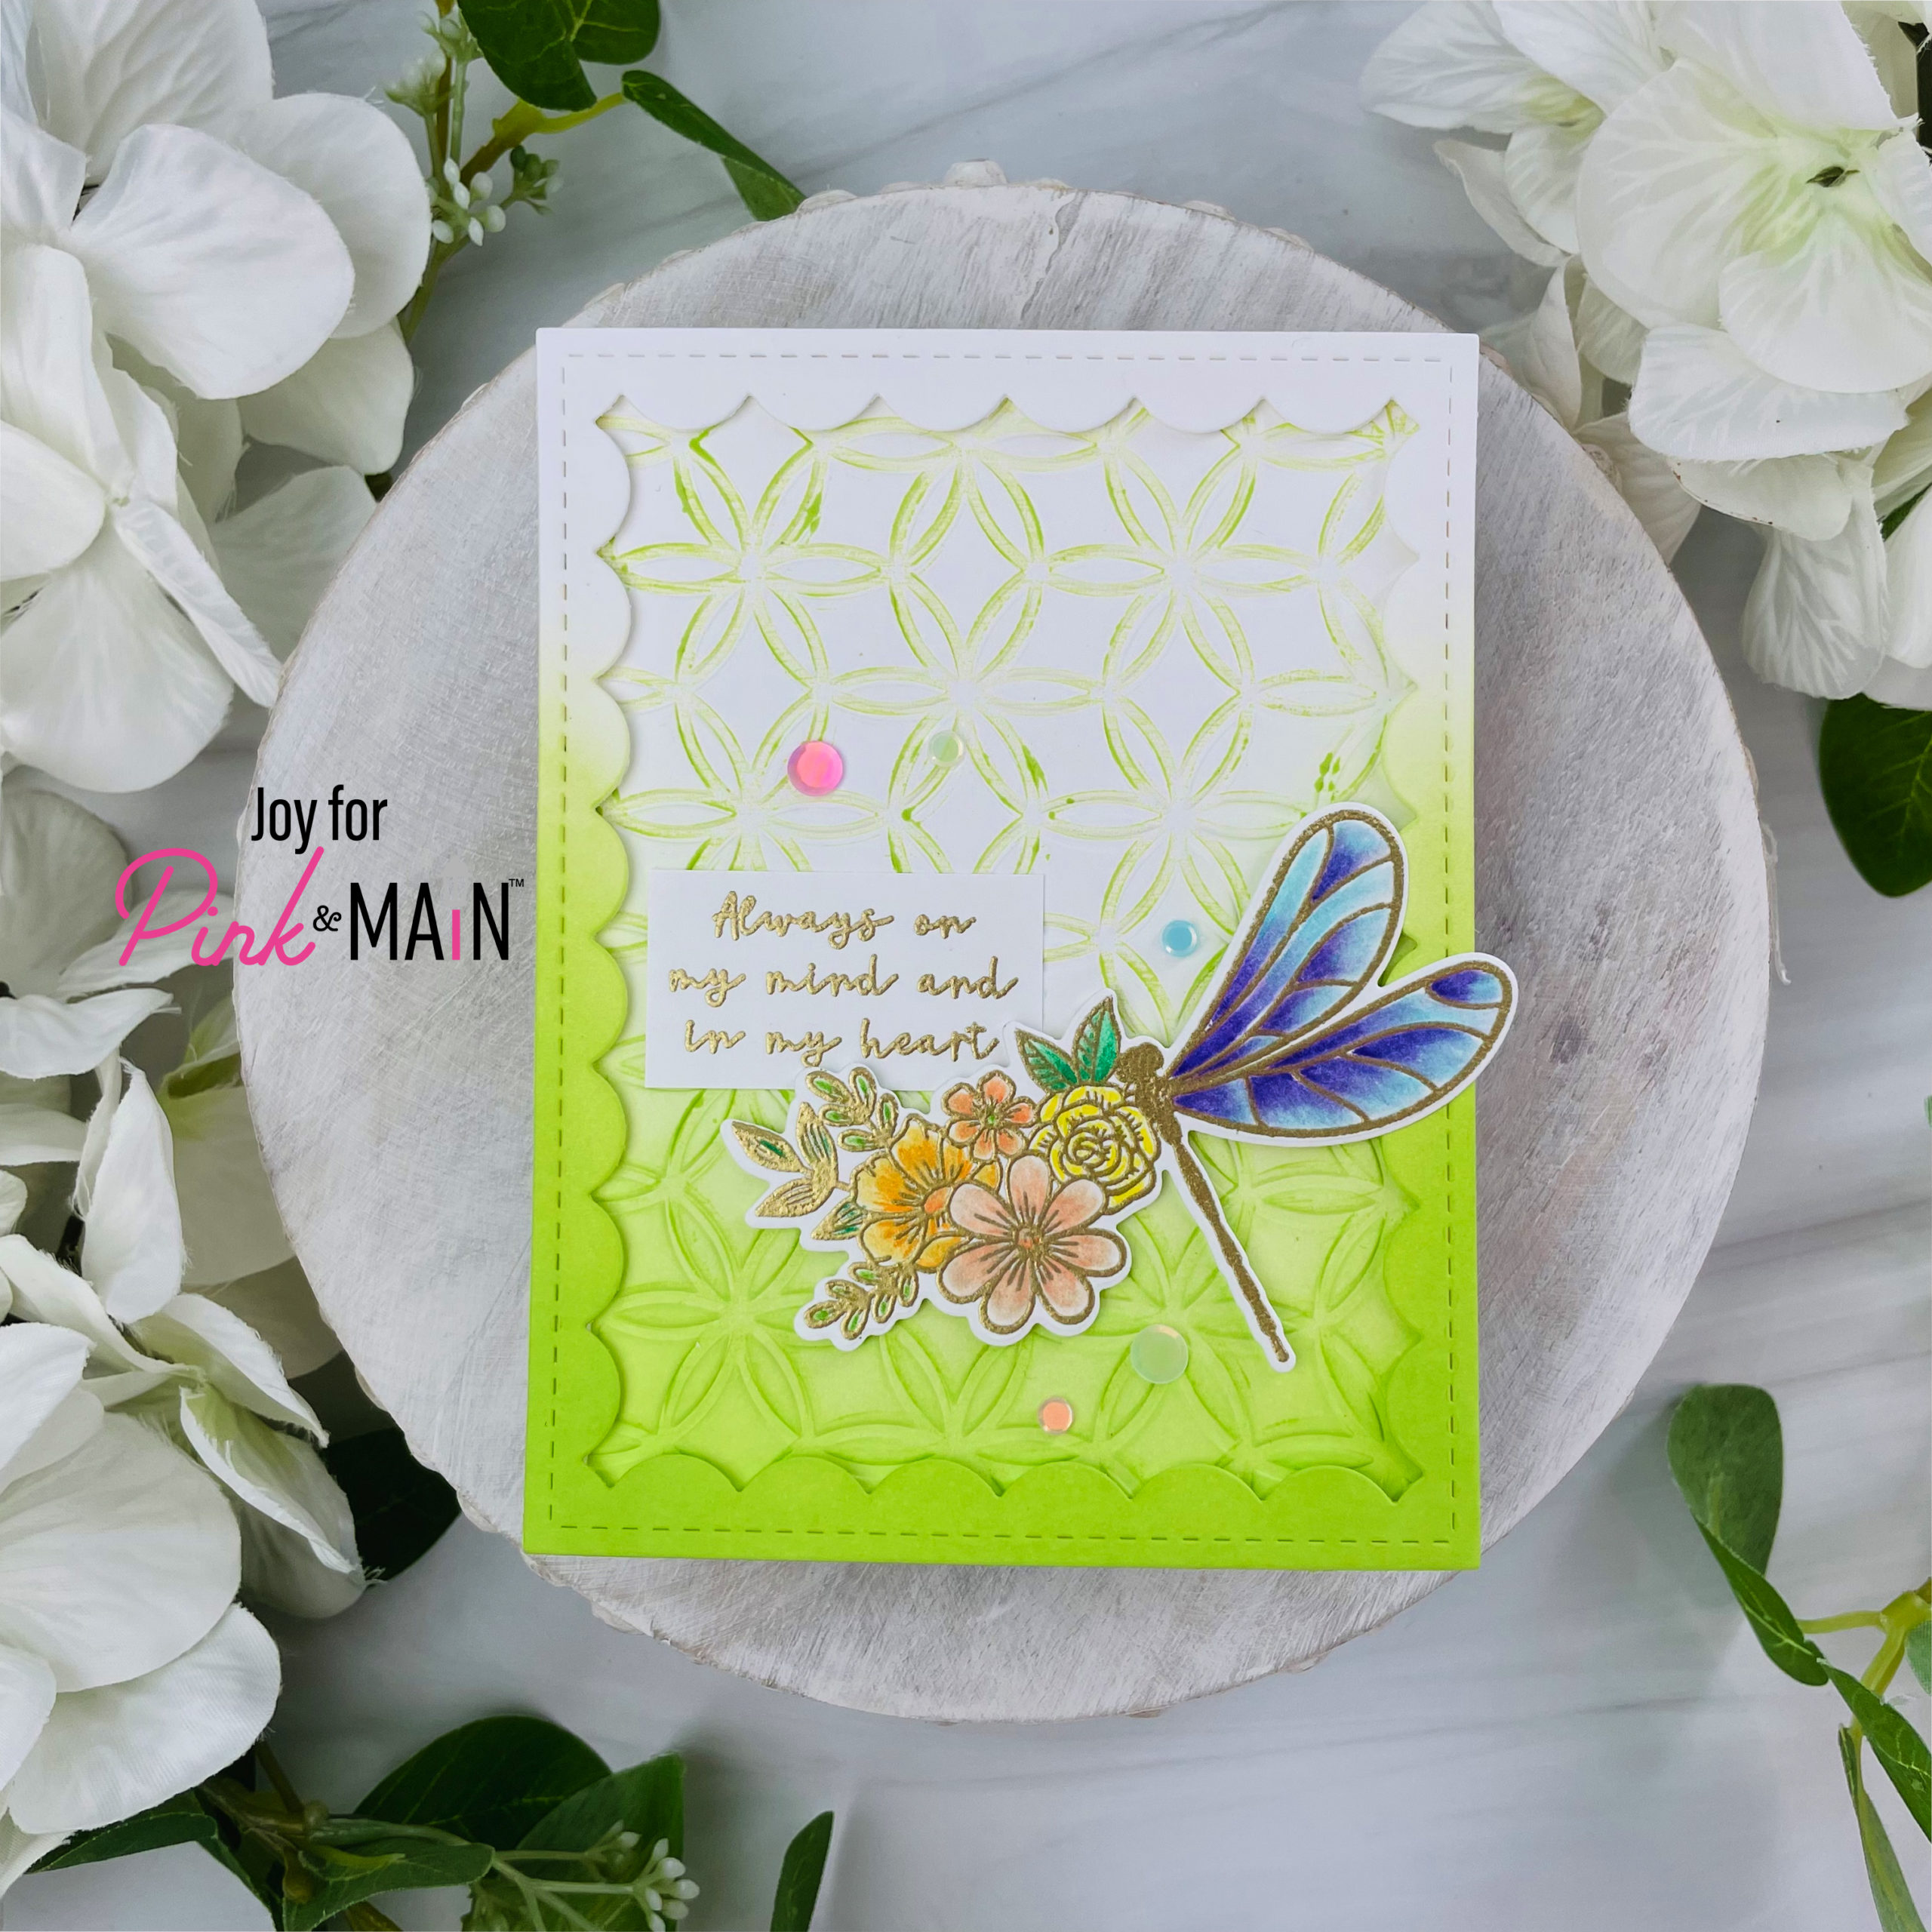
For the background, I inked the inside of the Round About embossing folder, on the side of the raised images. I inked it with green ink, then put my white cardstock inside and embossed it. No the de-bossed areas are green. I inked up the bottom of the panel green and left the top white.
I die cut a piece of white cardstock using the Reverse Scallop Rectangle and then inked that with green ink part of the way up. I added the frame to the card panel with foam tape for dimension.
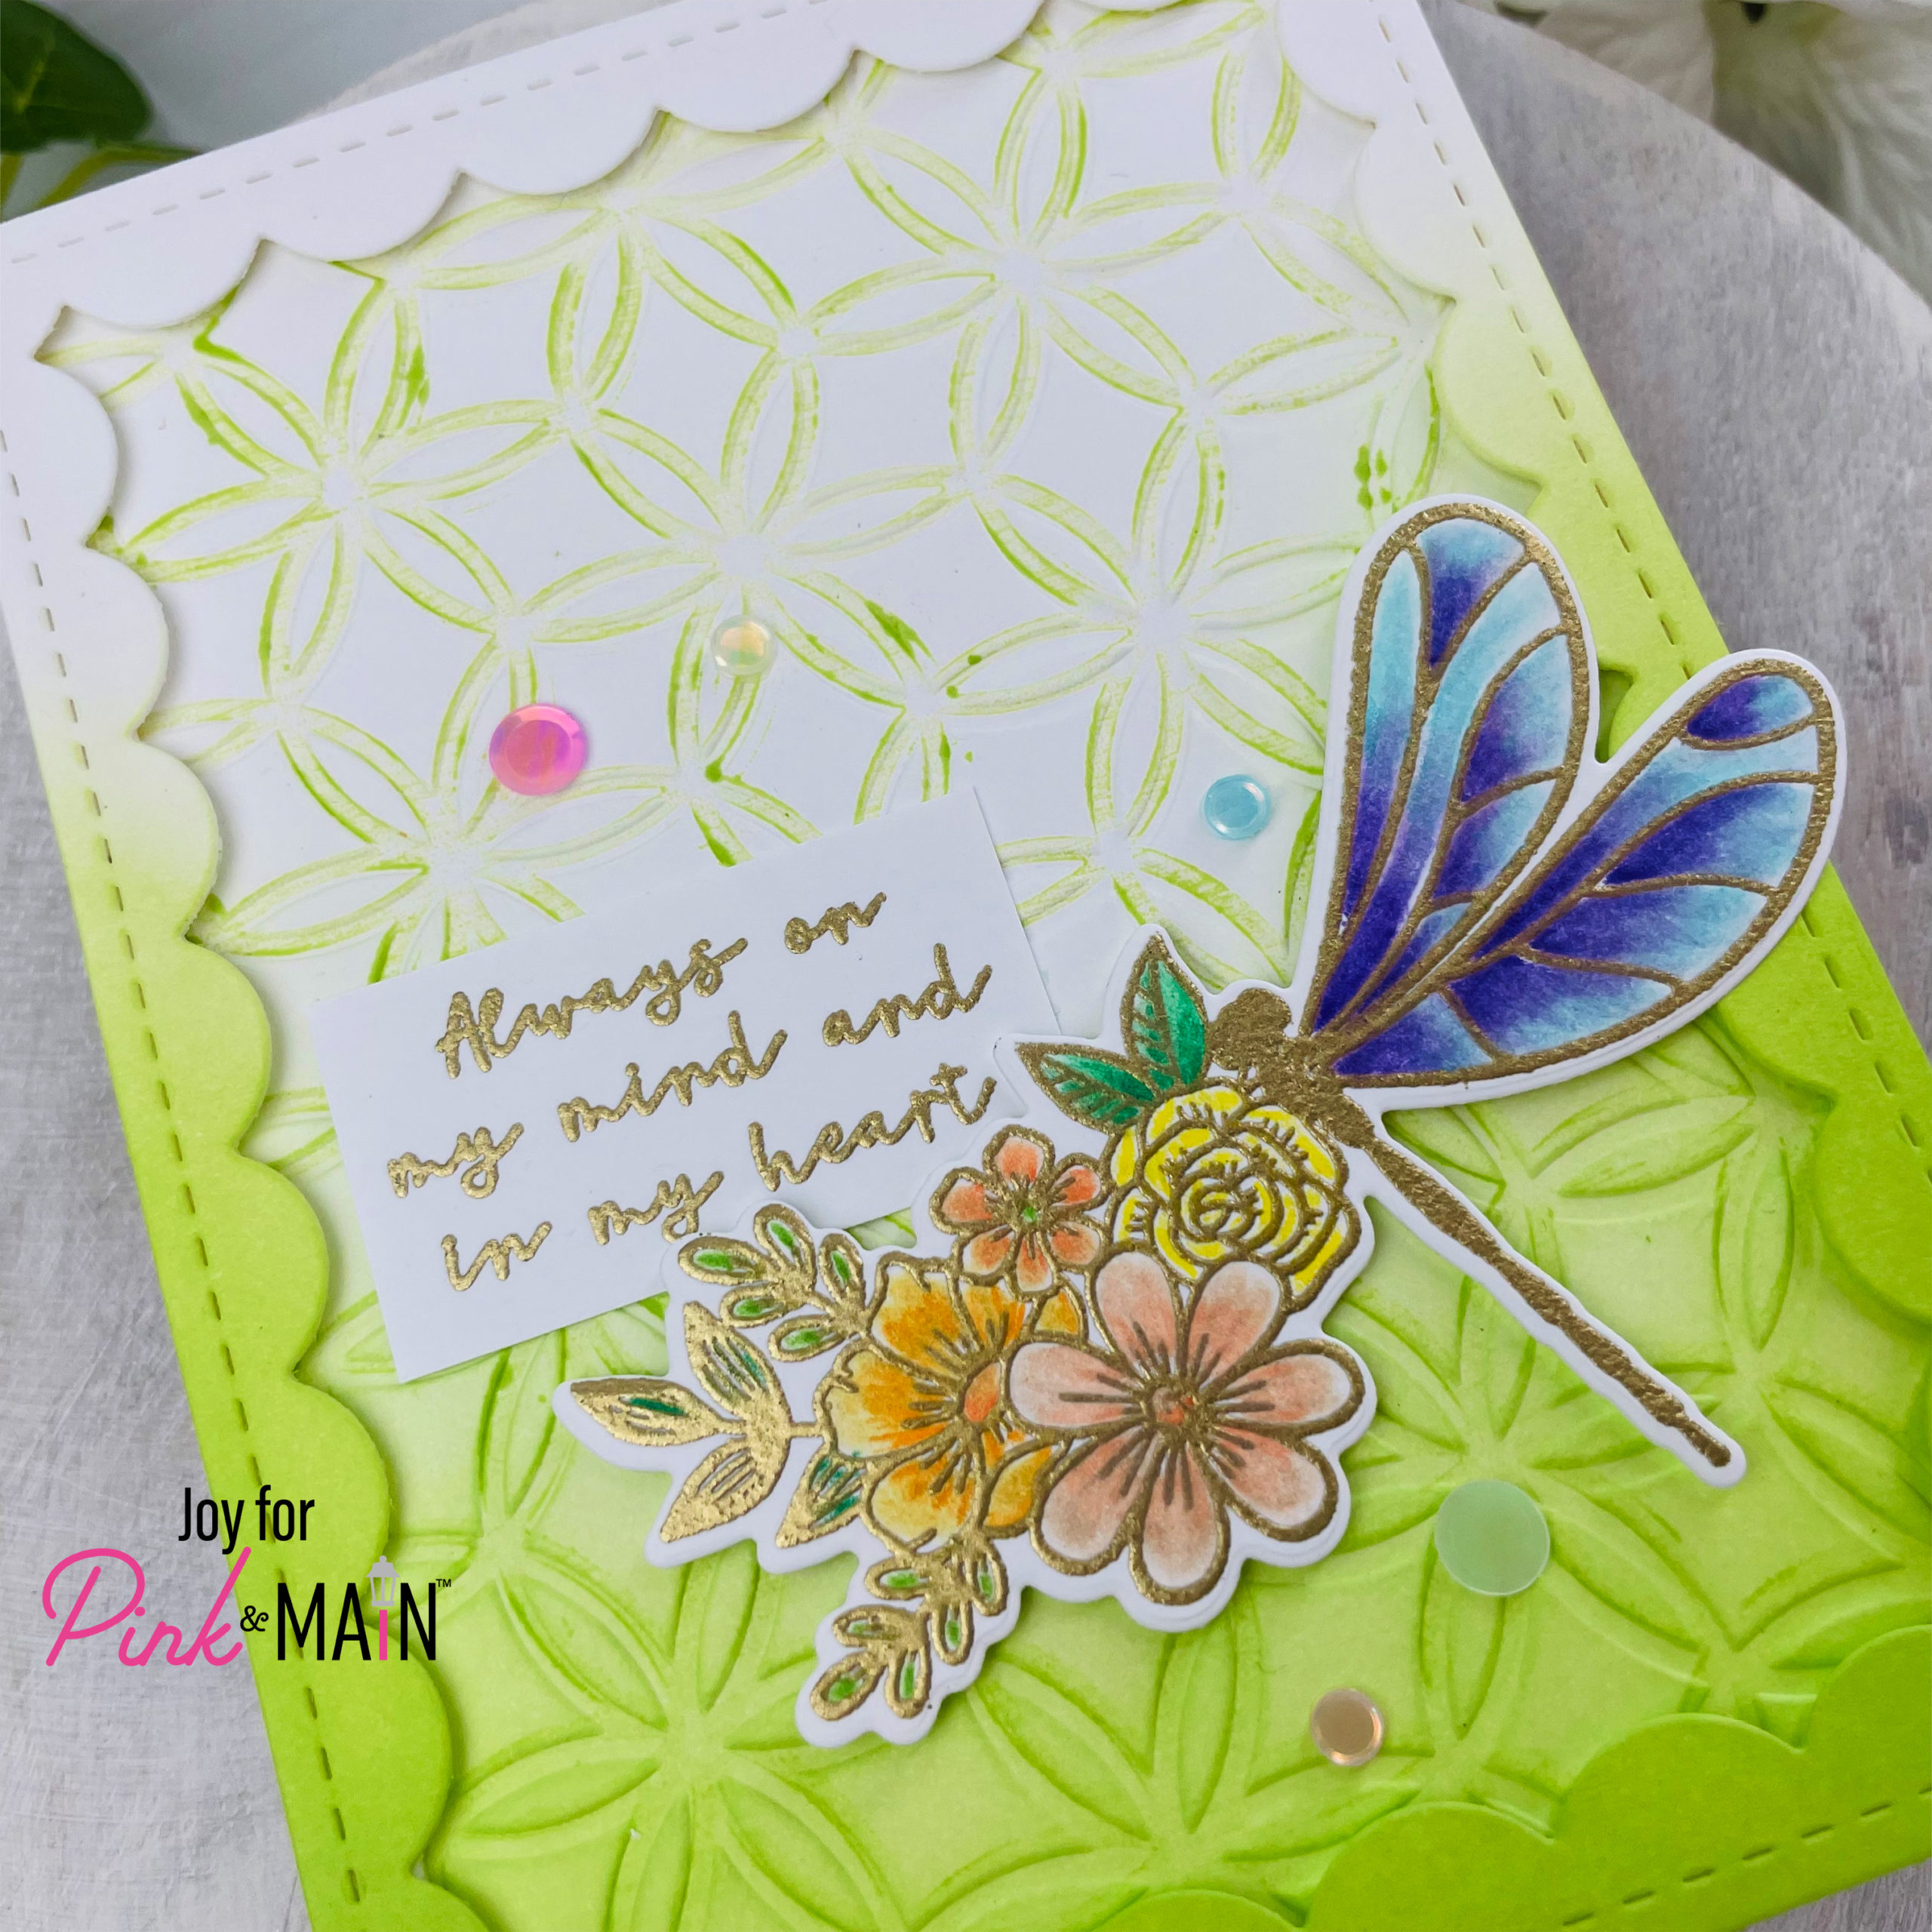
I stamped the dragonfly from the Floral Wings stamp set with clear ink and gold heat embossed the image. I haven’t colored with colored pencils in forever, so I decided to do that. I blended a teal and purple for the wings, then pinks, yellows and oranges for the flowers. The leaves are two colors of greens. I like to use Gamsol when I color with colored pencils. This helps smooth out the pencil lines.
You add a little color with the pencil, then dip a paper stub into Gamsol and gently rub over the colored area, it blends it and carries the color further on the image.
Thanks so much for stopping by, have a wonderful day!
Hugs,
Joy Baldwin
Create It With Joy