
Hello crafty friends.
It’s Lisa Mears (@LisaMearsDesigns) on the blog today sharing three shaker cards I made using products from Pink and Main’s 10th birthday release.
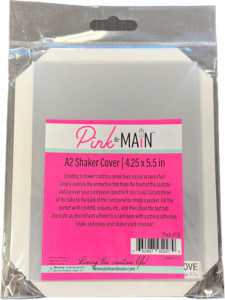
Pink and Main has come out with amazing shaker covers in four different sizes:
A2 Shaker Cover(4.25″ x 5.5″)
Small A2 Shaker Cover (3.75″ x 5″)
Mini Slimline Shaker Cover (3.5″ x 6″)
Slimline Shaker Cover (3.5″ x 8.5″)
These shaker covers already come with the acetate and adhesive! You don’t have to worry about cutting acetate and adding foam to these shaker covers. Pictured below is the A2 Shaker Cover.
On my YouTube channel, I’m sharing a step-by-step tutorial how I made three shaker cards using the new Pink and Main Shaker Covers You can watch my video below or on YouTube.
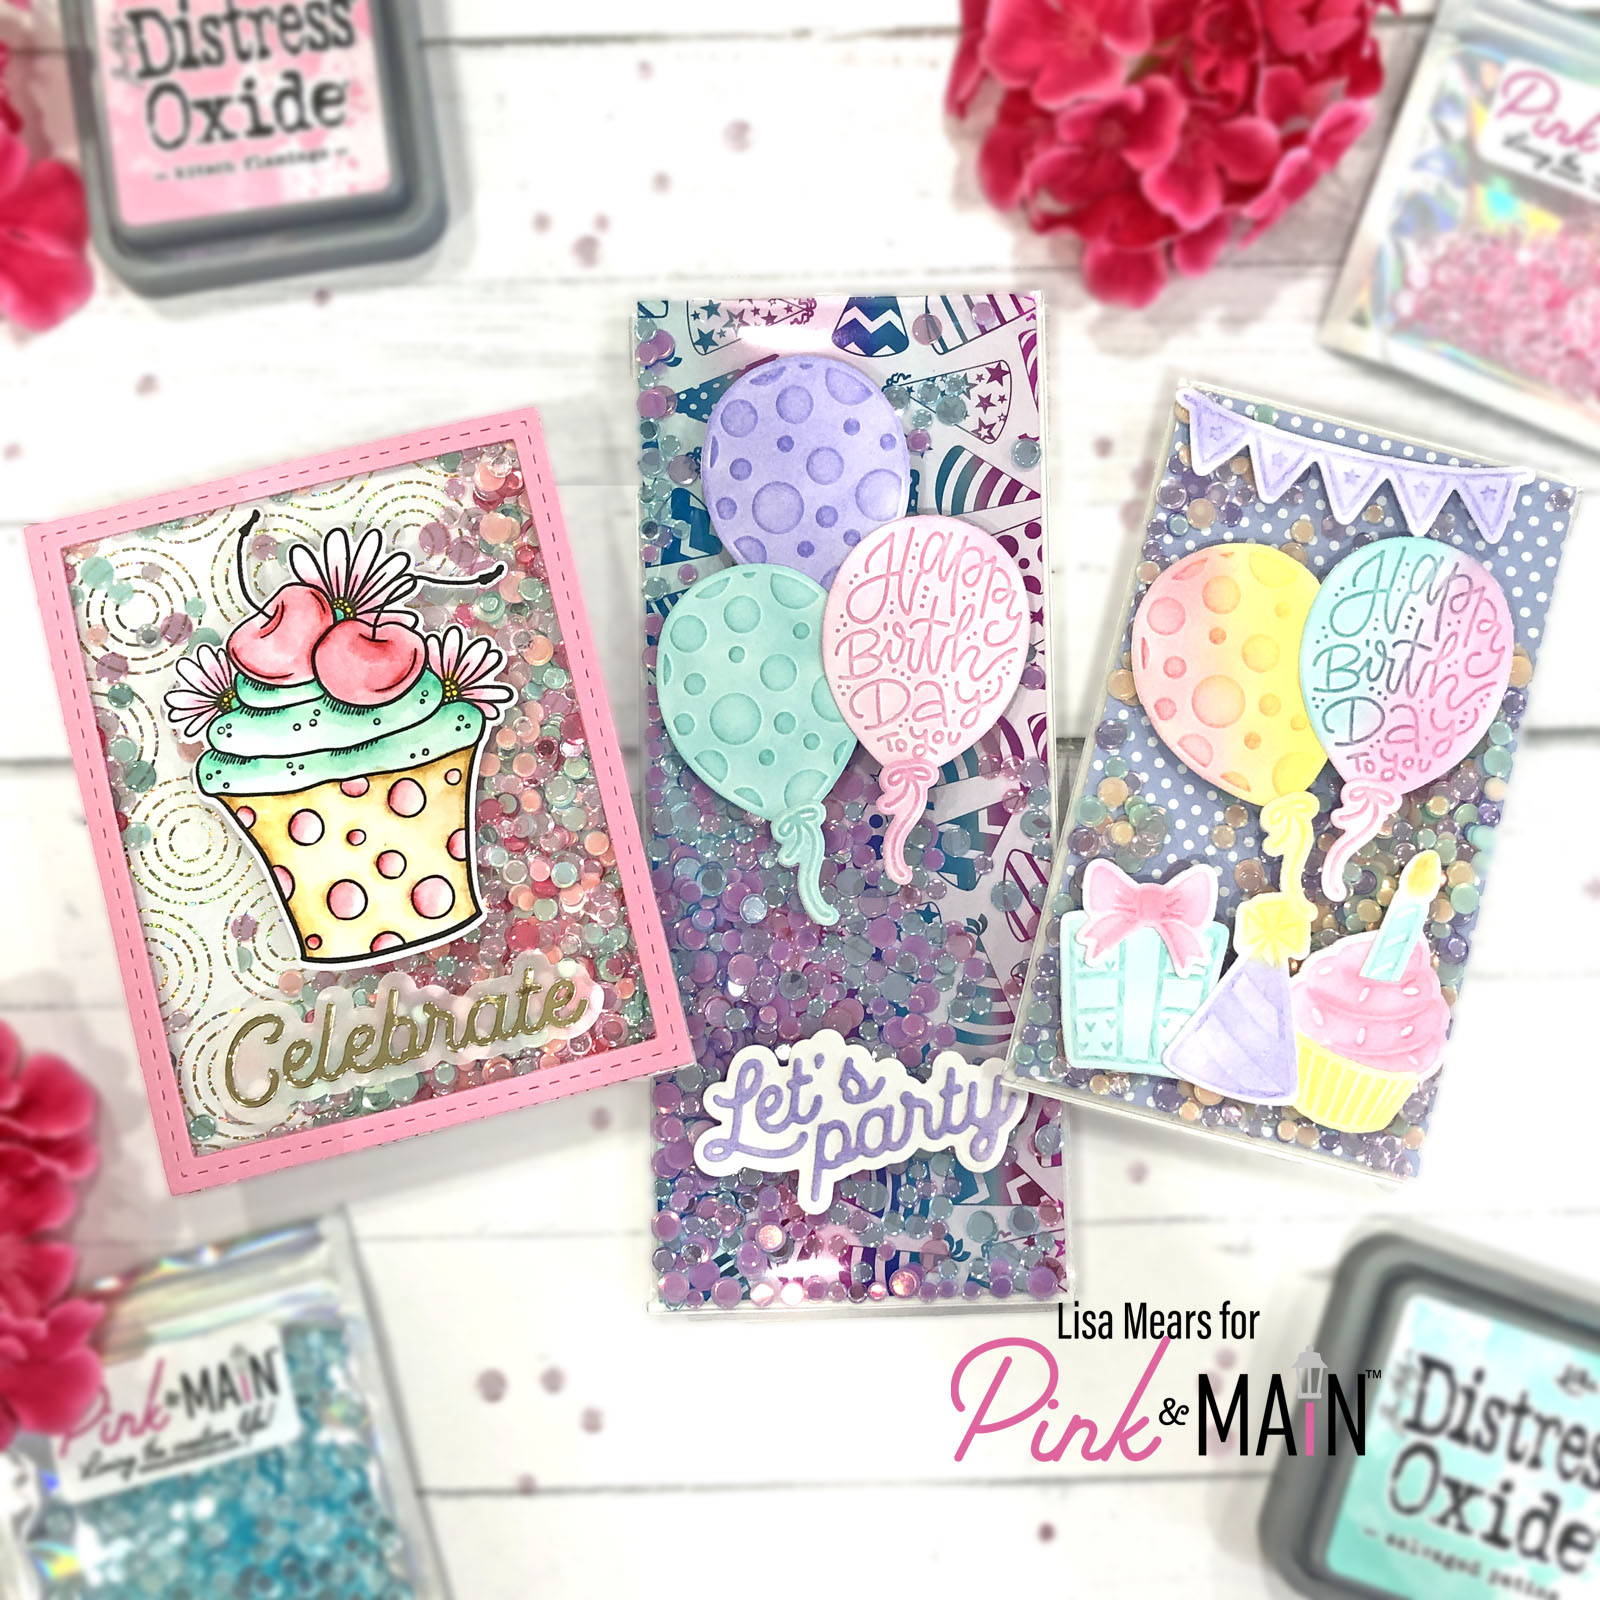
Card 1

For this card, I used the A2 Shaker Covers. I love how this size shaker cover fits perfectly on an A2 size card base. I added the largest frame from the Pink and Main Stitched Rectangle Frame dies. For the card background, I foiled a Birthday Background Foilable Panel with Sparkle Gold Cheerfoil and added the Cherry Cupcake stamp to the top. I used the Birthday Sentiment Dies for the sentiment and added it to a vellum shadow layer.
Card 2

For this card, I used the Mini Slimline Shaker Cover and inserted a piece of pattern paper from the Pastel Dreams pattern paper pad. I added the Peaches n Cream, Purple Orchid, Seafoam, and Prom Dress Confetti inside. I used the Birthday Cut and Emboss Folder and inked the die cuts with Distress Oxide Inks. I love how adding inks to the die cuts really makes the images “pop.”
Card 3

For this card, I used the Slimline Shaker Covers and inserted a foiled background from the Birthday Background Foilable panels. I foiled the background with Ombre Pink Teal Cheerfoil and inked over the foiled background with distress oxide inks. I used the Birthday Cut and Emboss Folder for the balloons on the card and inked them with Distress Oxide Inks. The sentiment is from the Birthday Sentiment Dies.
Once again, if you would like to see how I made these three cards, watch my video on YouTube.
Thanks for stopping by today. Have a great day!