
Hello and welcome back!! Laurie with you today to share a card featuring a little ink blending and a little inlay die cutting!
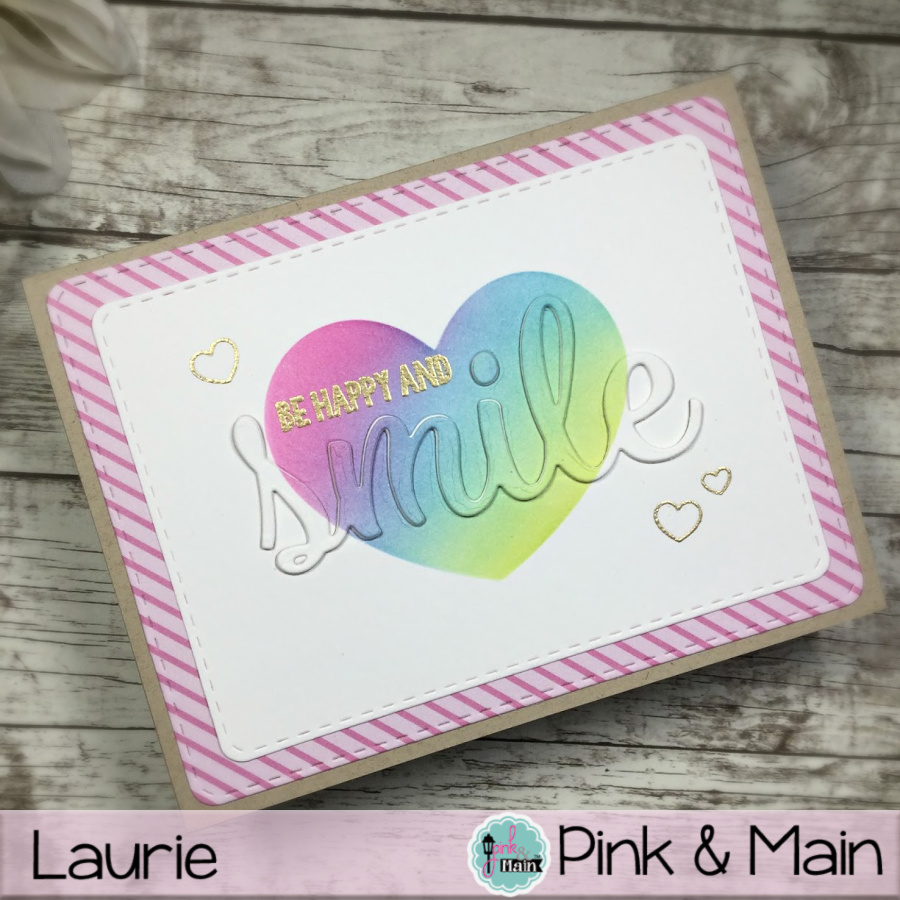
I started by laying down the Mask It Heart Stencil onto a piece of white cardstock. I chose a pink, a blue and a green ink to create a pretty “almost rainbow”. I used the second largest of the Stitched Rounded Rectangle Dies and tried to centre the rainbow as best I could.
The Smile Dies are an oldie but goodie set of dies which co-ordinate with the Smile Stamp Set and are a staple to have in your stash! I used the scripty smile die to cut out the centre of the blended heart. Make sure you keep any negative pieces like the centre of the “e” and “l”!

I die cut the “smile” three more times out of scrap cardstock and adhered them all together to create a dimensional sentiment.
Before putting everything back together, I gold heat embossed the “be happy and” portion of the sentiment. This nestled perfectly between the “s” and the “i”. I used the largest of the Rounded Stitched Rectangles to cut a piece of pink striped paper from the Pastel Dreams Paper Pad, adhered that to a kraft card base then centred the white panel on top.
All that was left to do was adhere the dimensional die cut back into place and add in the negative bits. And that’s the easy inlay die cut!
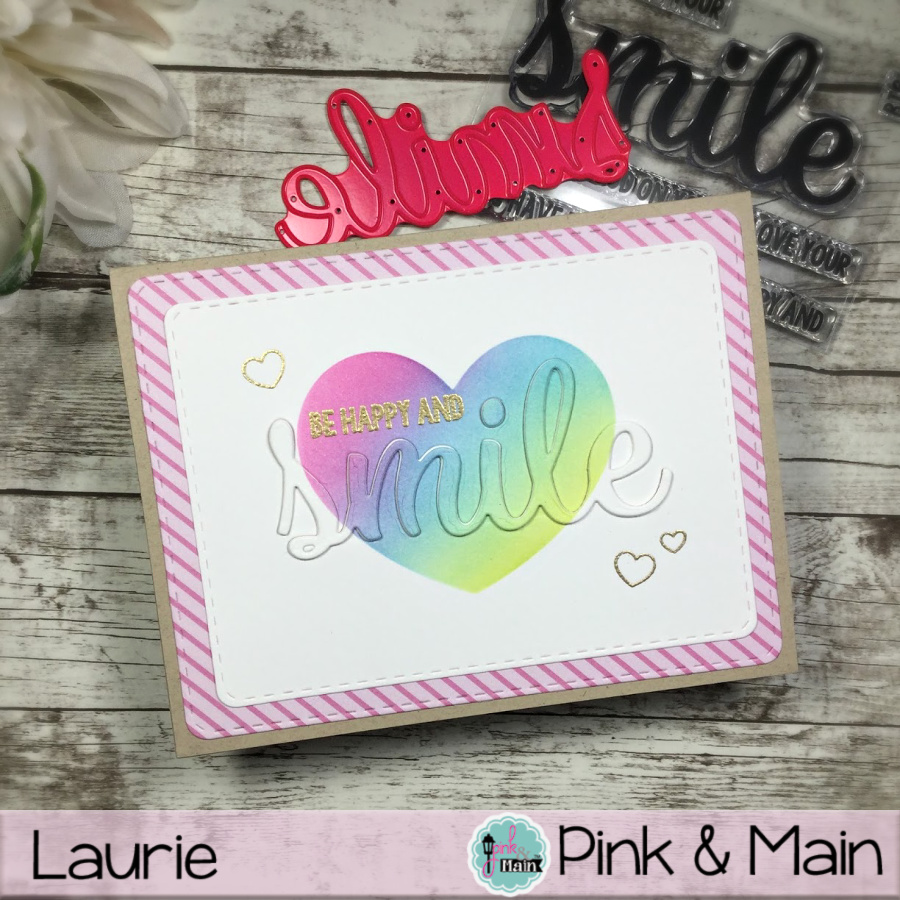
To finish off, I found a couple of small hearts in the Wonderland Stamp Set and used the same gold embossing powder!
And that’s my card for today! Hope you enjoyed and will continue to “Be Happy and Smile”!!
See you soon!
Laurie