
Hello Crafty Friends,
This is Sylvie @kaliscards!
Today, I have a couple interactive cards to share with some cool aquarium dies.
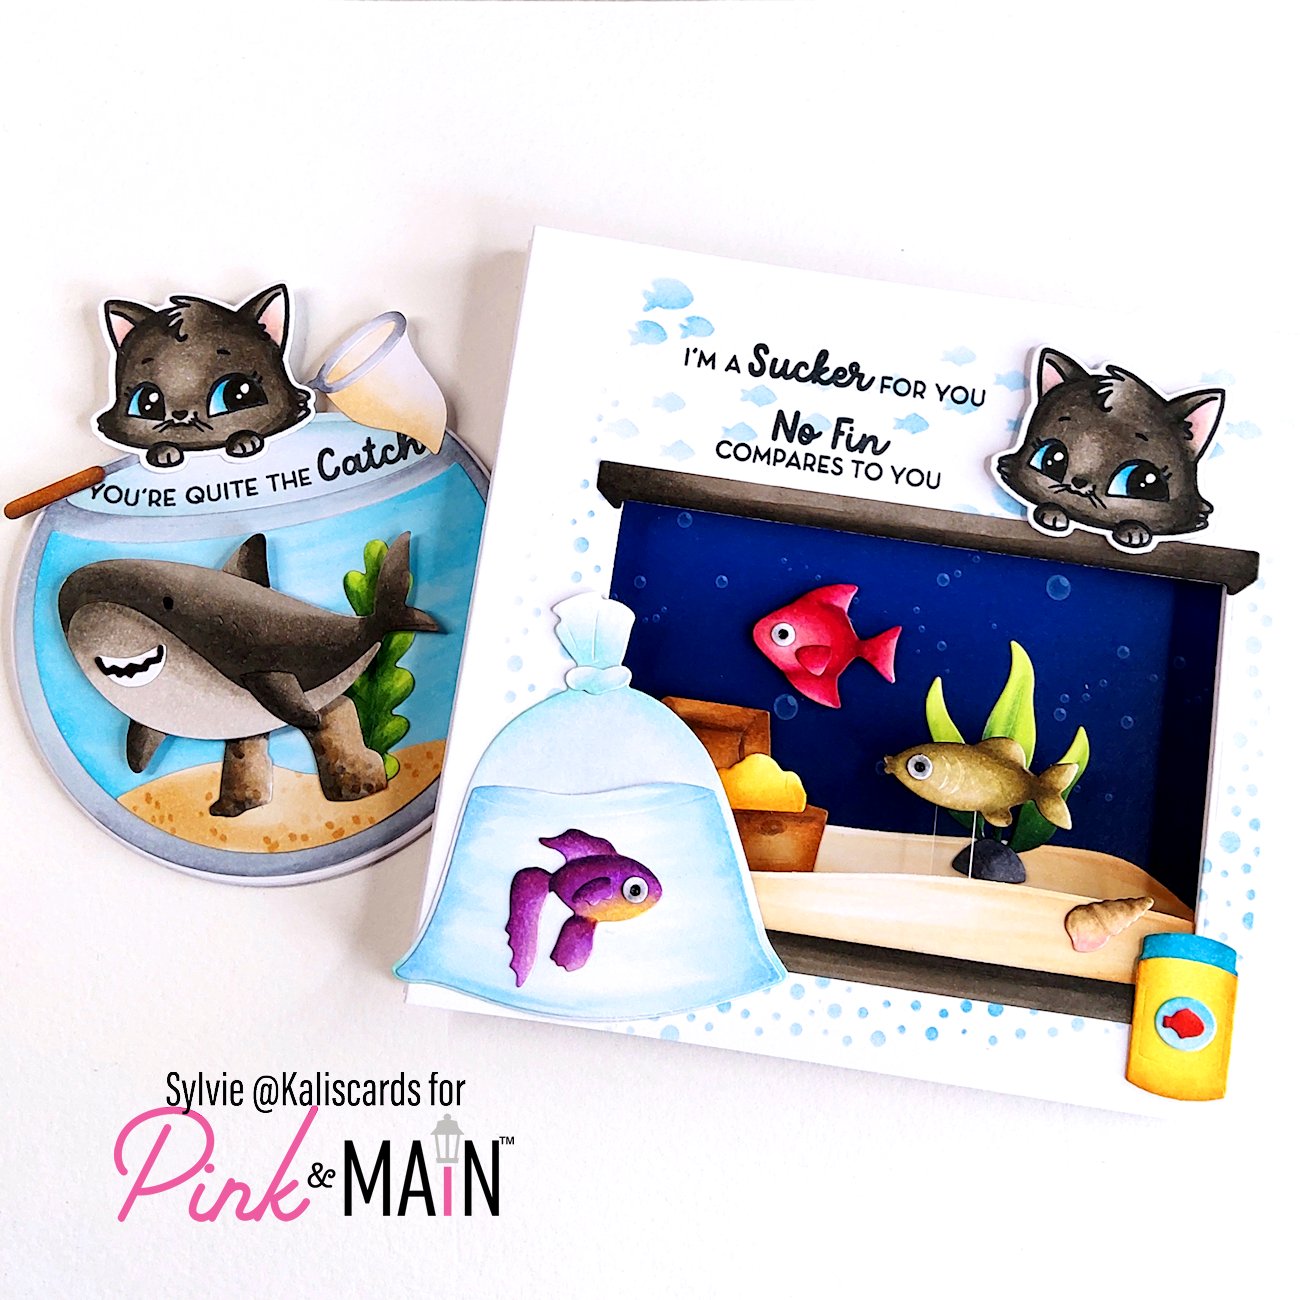
On one side, a rocking card with the Fish bowl dies and Ocean animal dies, and on the other side a pop-up frame card with the Aquarium dies, Fish bag dies and School of fish dies. Hope they inspire you.

To create the rocking card, I used a circle die to create the cardbase, folding the cardbase and die-cutting the circle slightly above the fold to match with the height of the fish bowl die.
I die cut the Fish bowl dies from white cardstock and colored them with Copic markers. I die cut the shark from the Ocean animals dies and also colored him with Copic markers. And finally, I also die cut the net from the Aquarium dies and once again used my Copic markers.
I then assembled the fish bowl elements with liquid adhesive and adhered it onto the cardbase. I stamped the sentiment from the What fish say stamp set, bending the clear stamp to follow the shape of the bowl.I then adhered the fish net. To finish the card, I also stamp the cute cat from the Stocking stuffers set, colored him with Copic markers and die cut it using the coordinating dies. I adhered him with liquid adhesive. Finally, I adhered the shark with foam tape.
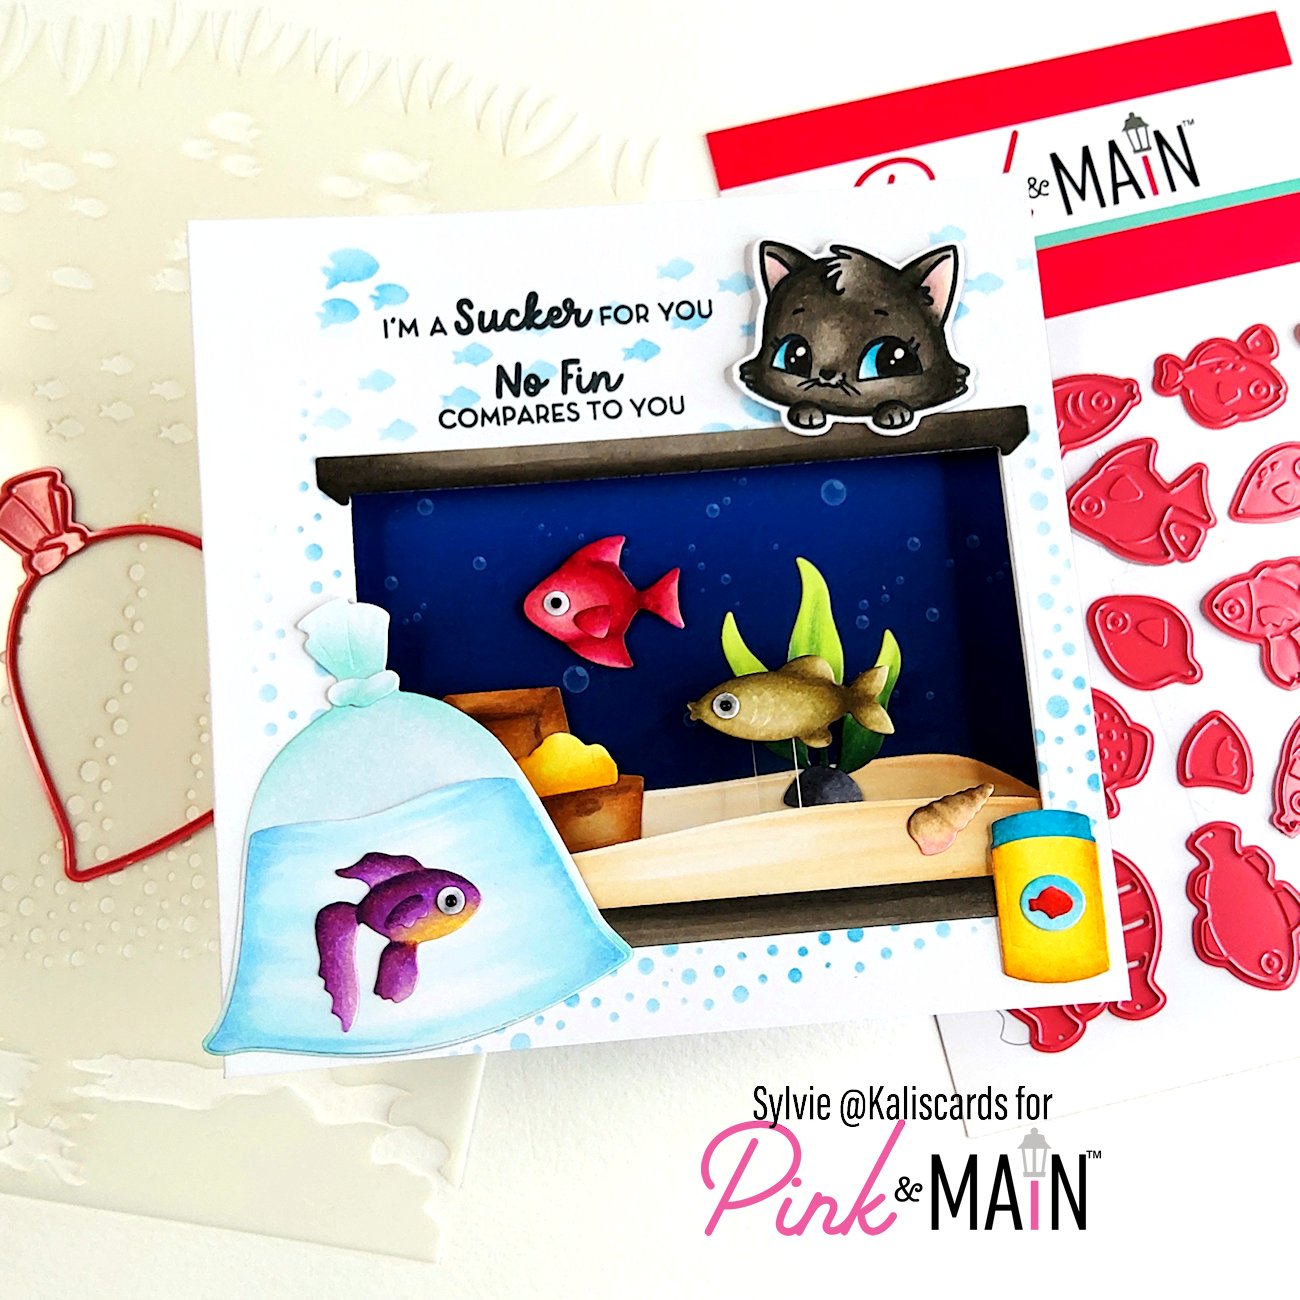
For the large aquarium pop-up frame card, I used the Aquarium dies, Fish bag dies and School of fish dies which I die cut from white cardstock. From the Aquarium dies, I die cut the sand twice to create layers.
I used the Aquarium rectangle to die cut an opening from my front panel. My front panel is about 5.5 by 8 inches. I positionned the opening in the bottom part and in the middle, de-centering it slightly towards the right, to allow enough space for the fish bag on the left.
I then scored the front panel on either sides at 0.5 inches, 1 inch and 2 inches and folded them to create a W shape folding backwards behind the front panel. This is what will create the pop-up effect and raise the front panel.
I then colored all the die cuts with Copic markers. I stenciled a few bubbles and fish with the new Ocean floor stencil with Distress ink Salty ocean.
I then adhered the top and bottom parts of the aquarium, with liquid adhesive. I then stamped the sentiments just above the aquarium from the Ocean life stamp set
I adhered one layer of sand at the back of the front panel and glued the shell.
I then prepared my cardbase, the same size as the central part of the front panel (without the folds). I also cut the bubble background from a sheet of the Ocean life paper pad and adhered in onto the cardbase with liquid adhesive.
I then added double sided tape on the 0.5 inch flap of the fold and adhered the front panel onto the cardbase.
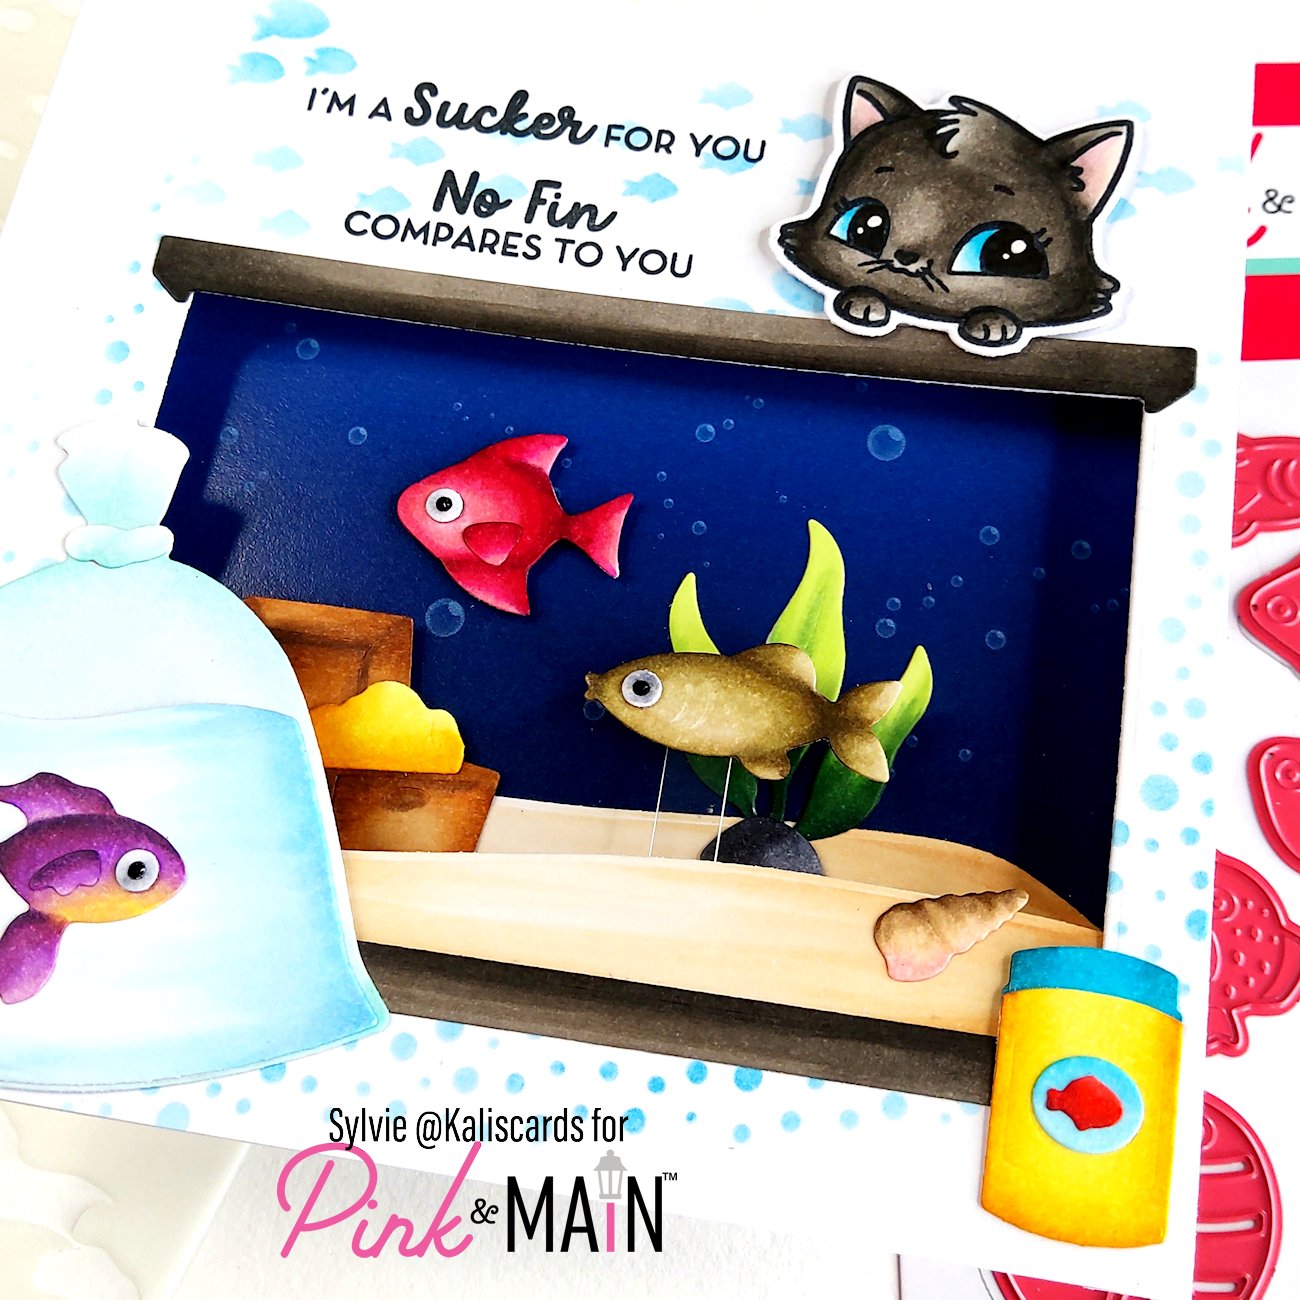
I glued the second sand border on the background, slighty above the front layer. I adhered the plant and stone, as well as the chest onto that layer of sand. I then placed one fish with foam tape on the background and the second one on a strip of acetate which I fixed behind the first sand layer.
Next, I assembled the fish food vial and adhered it to the right of the aquarium. I also assembled the bag and glued another fish on it. I then adhered the bag to the left of the aquarium.
To finish the card, I also stamp the cute cat from the Stocking stuffers set, colored him with Copic markers and die cut it using the coordinating dies. I adhered him with foam tape above the aquarium
Hope you liked these two projects. Thank you for stopping by.
Crafty hugs,
Sylvie