
Hi, everyone! Samantha here today on the Pink and Main Blog so excited to share a sneak peek of some super cute new products releasing in the store this Friday, June 21st. The slimline card below features the new Mice Cream Stamp Set paired with the new Ice Cream Truck Dies and I am just in love with both new products.
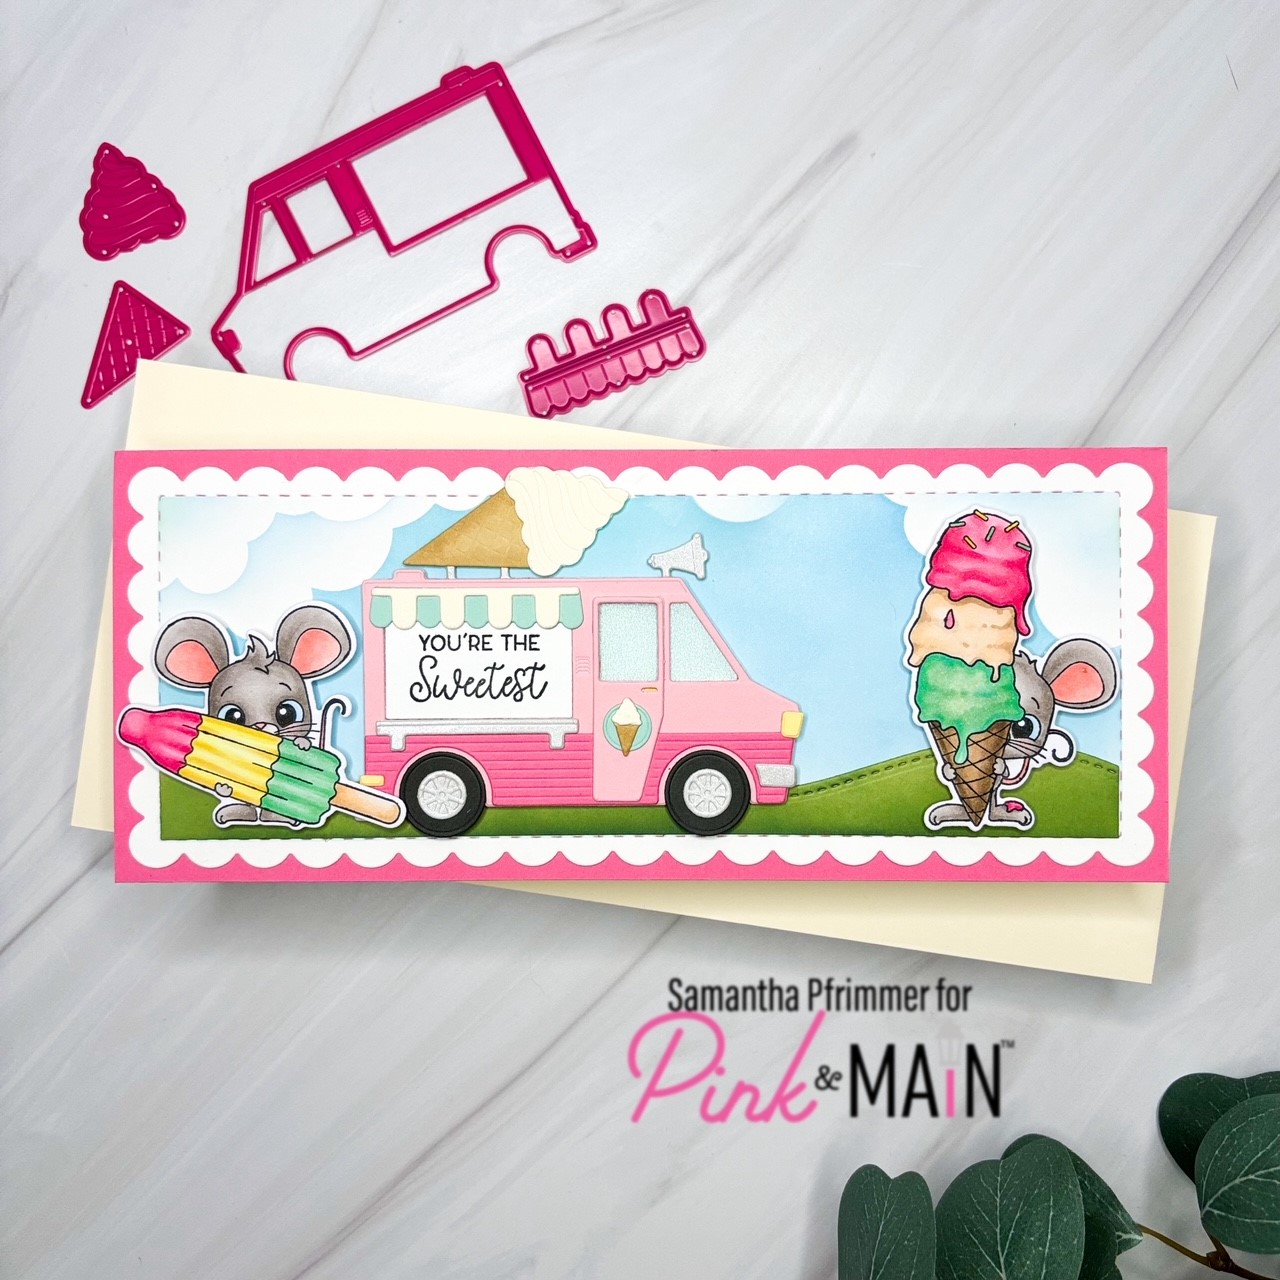
So anyone who knows my work will know I always love a good slimline, and I thought this size would be perfect to mash up these two sets. To start, I grabbed my Sympathy Slimline Dies and cut a scalloped panel from white cardstock. Using masking tape, I masked off the scalloped edges to protect them from ink-blending and then pulled out my Cloudy Day Stencil to add a soft cloud border along the top. Keeping my stencil in place, I continued my ink blending in sections along the remainder of the card panel using Distress Oxide Ink in Tumbled Glass.
Next up, I wanted to create a grassy base for my ice cream truck and mice. I decided to keep things simple and just create a border using green cardstock and my Waves and Scallops Dies. To extend my stitched wave the length of my slimline panel, I made sure to cut my green cardstock the length of the inside of the stitched rectangle card panel and then I ran it twice through my die-cut machine making every effort to match up the connecting cuts. Once complete, I added a little shading with Distress Oxide Rustic Wilderness before adhering to the base of my panel with glue.
PRO TIP: Make sure that you connect your two die cut points at a place where you will later place a stamp or another die cut. No one will ever know that the seam is less than perfect.
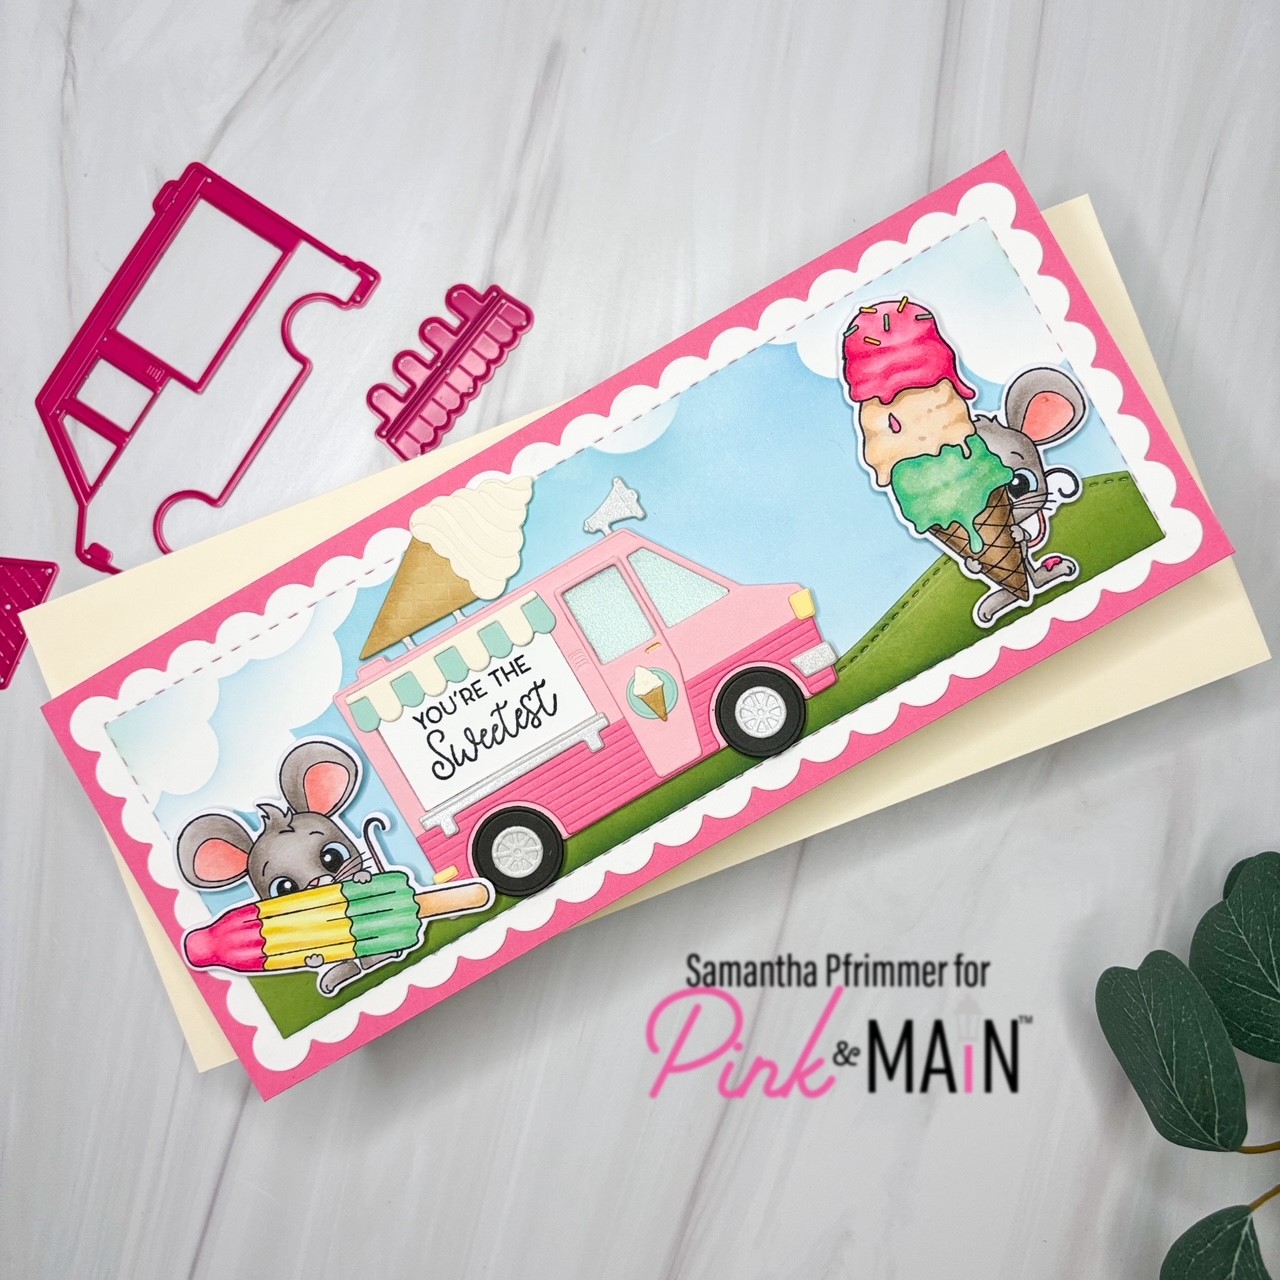
Now it was time to die cut and assemble my Ice Cream Truck. To start, I pulled out several shades of cardstock from my stash in pinks, cream, mint green, brushed silver for the chrome, and yellow for the lights. I then die cut all of my pieces before assembling the truck using the image guide on the back of the packaging. You may also notice I glued some sparkly vellum from my stash to the back of my ice cream truck to create windows before adhering the entire food truck to the card panel with foam tape. I also die cut my Ice Cream Truck frame from white cardstock, and using the negative die cut for the stall window, I stamped a sentiment from the new Sweet Surprise Stamp Set.
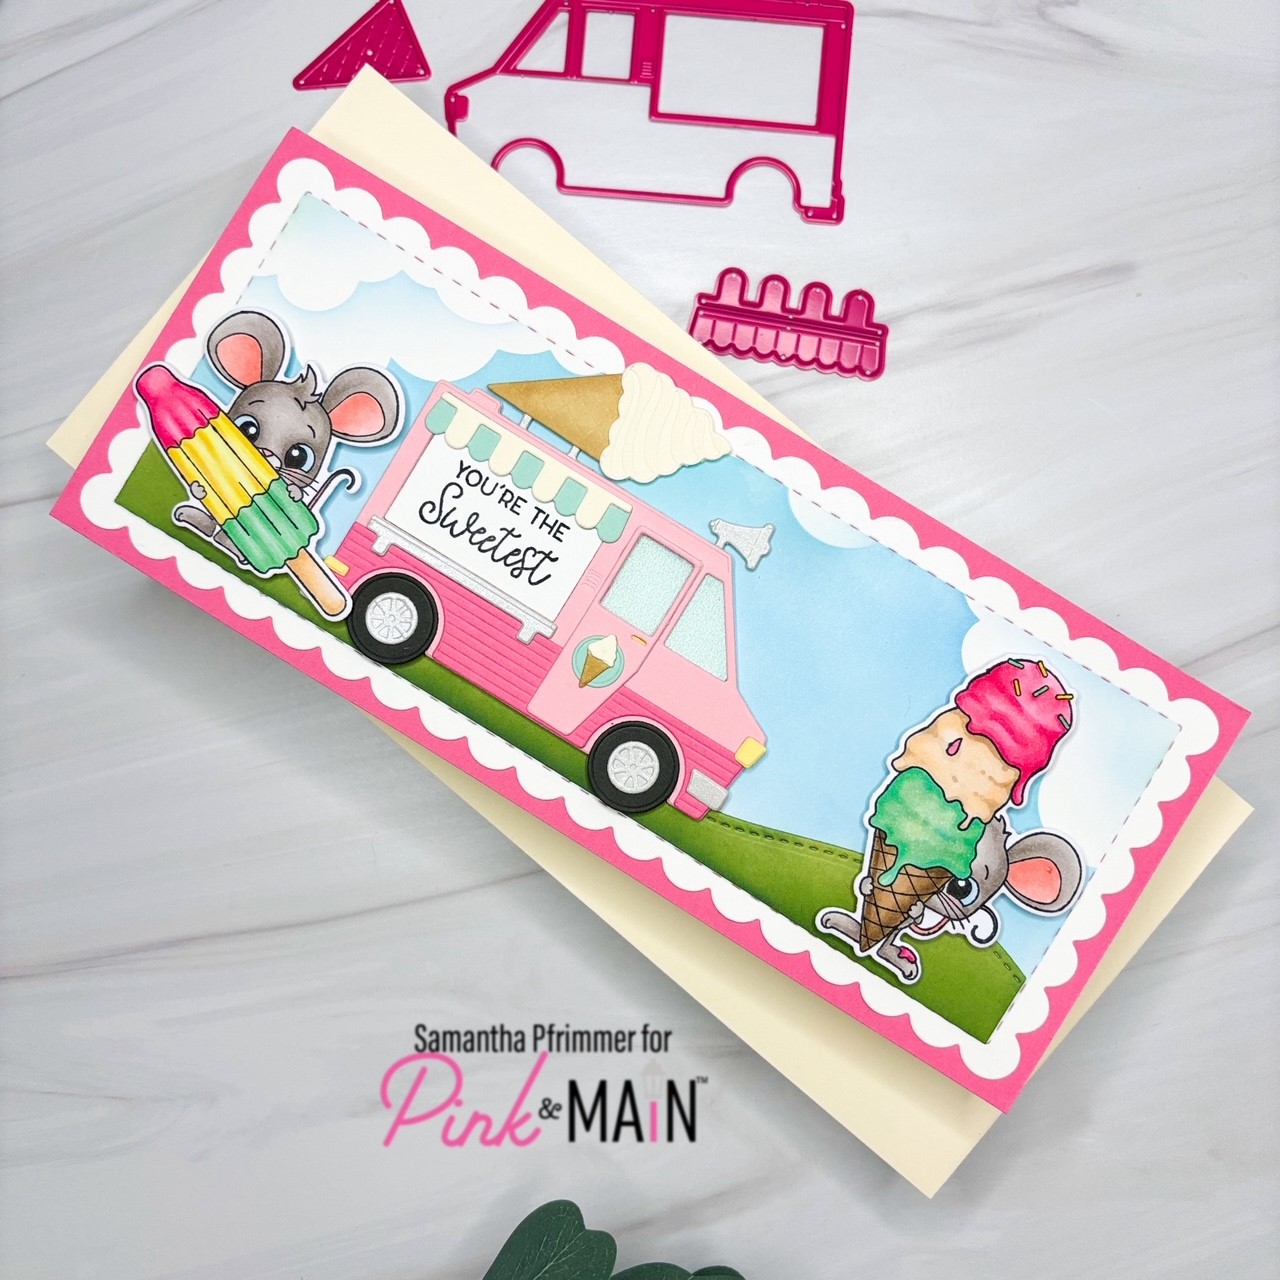
Now for the final step… my mice! I stamped two of the mice images from the Mice Cream Stamp Set onto Xpress-It Blending Paper using black ink. Next I colored both images with Copic markers before cutting them with the coordinating Mice Cream Dies. All that was left was to adhere them to my card using foam tape, and attach my scalloped panel to a matching pink 8.5″ x 3.5″ card panel. I then attached everything folding slimeline cardbase and my design was complete.
Thanks for reading!