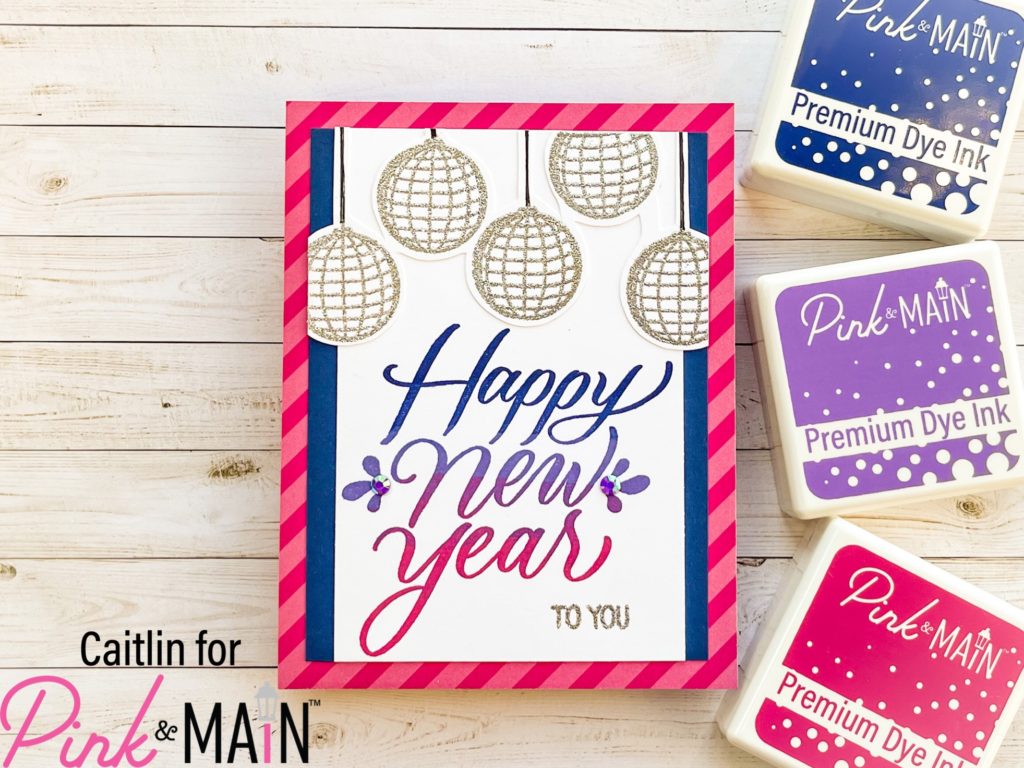
Hi friends! This is Caitlin from CaitlinAnnaleeCards and I am sharing a super fun and simple New Years card with you today. This card came together pretty quickly and I could have definitely made a few at one time pretty easily. I have been so exited to pair up the disco ball from the Party Time Stamp Set with the Sterling Embossing Powder and it was finally the perfect time. I started out the whole project with these disco balls and built the rest of the card from there. I used the Watermark and Embossing ink to free hand stamp the disco ball in a staggered layout across the top of a scrap piece of white card stock. I tried to avoid the sting and just get the ink on the ball part so that when I added the Sterling powder to it, only the disco balls were shiny. I did 1-2 disco balls at a time, just working my way across the card stock and heat setting the powder as I went. Then I went in with a fine point black pen and a ruler to add my own strings to the top of each disco ball up to the edge of the paper. The last step for this element was to fussy cut the disco balls out, leaving a small boarder and as little card stock as possible between each one. In hindsight, I could have just cut them all apart but at the time, I wasn’t sure how I was going to use them so I just left them as one piece.

The next step was to prep a card base for this disco party to go on. I started out with a side folding A2 sized card base and added a panel of the hot pink stripe from the Year Round Dots and Stripes paper pack measuring the full 5.5 in x 4.25 in. I wanted to add in a darker color to help frame up the sentiment I wanted to use so I trimmed down a piece of Barbershop Card Stock to 5 in x 3.75 in and added that to the card with liquid glue. For my sentiment, I wanted to use the large Happy New Year stamp from the Happy New Year Stamp Set so I grabbed a fresh piece of white card stock and three of the new inks to play with.

The inks that I wanted to stamp with were Barbershop, Night Sky and Dress Shop to create an ombre blend. I used a MISTI stamping platform and the disco balls to help me place the sentiment in the right area and I started out by inking up the Happy part of the sentiment with the Barbershop blue ink. I used one of the Mini Ergonomic blending brushes to tap off some of the ink from the very bottom of the letters. I stamped the image and then inked the middle Year section with the purple ink and used the brush to tap the top and bottom so that the colors would overlap well. I did the same thing with the pink ink at the bottom of the stamp. The last step was to stamp the smaller “to you” under the large sentiment with the embossing ink and adding more Sterling embossing powder to it. I trimmed down the sides of the white panel only and add it to the card. Then I glued the disco balls across the top. I couldn’t stop myself from adding another little touch of sparkle so I grabbed the Cool Jellies Gems and added two of the darker purple gems to the flourishes on the sides of the sentiment. This card is so fun and different for me and I hope it makes you smile! Happy 2023 to you!

