
Hi, everyone! Samantha here today out on the Pink and Main Blog and so excited to share a fun new thank you card featuring some amazing new die sets out with the June release.
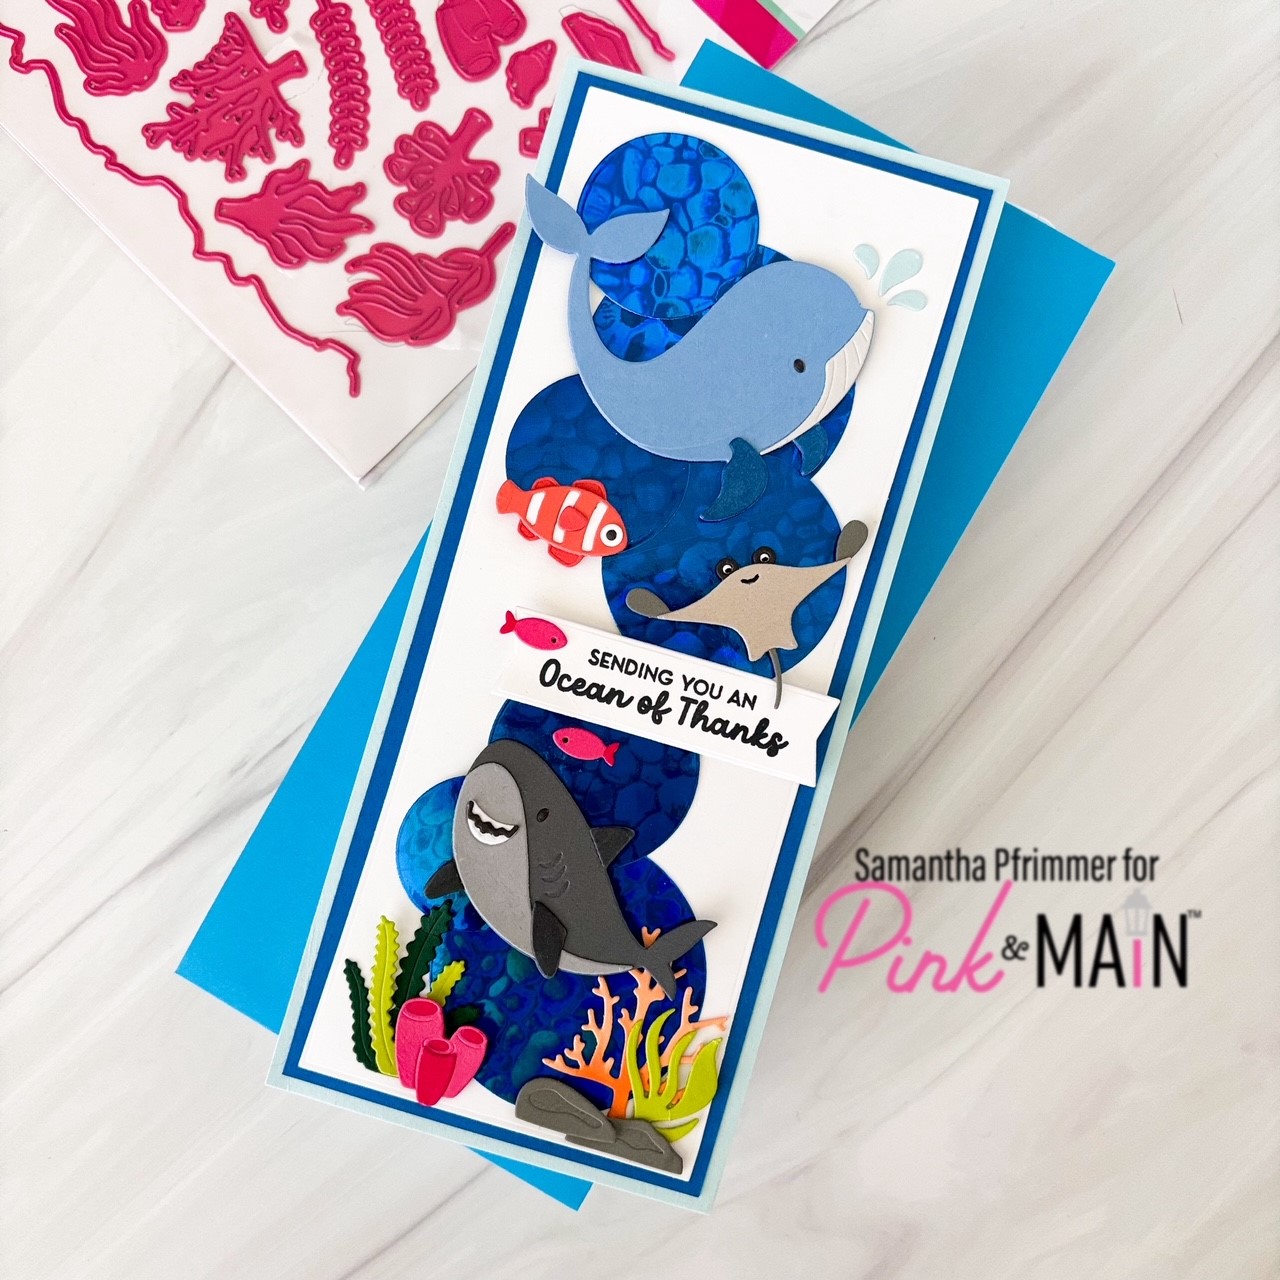
No one loves a slimline more than I do, and I decided this would be the perfect size to showcase all of the fun new ocean dies. I chose to go with a larger slimline size and, to start, I cut a white cardstock panel 8.25″ x 3.25 using my paper trimmer. This panel will later be matted to a final card size of 8.75″ x 3.75.”
Next, time to create my ocean background…
This release showcases some gorgeous blue Cheerfoil with a water texture that I knew would be a perfect backdrop. I wanted as much of the watery shimmer to show, so using White Toner Sheets and my Mini Minc Foiling Machine, I added the the Cheerfoil shiny side up along the top of the toner sheets and the result was a beautiful panel of shimmery blue water. Next I grabbed my Layered Circle Dies set and cut out circles in a variety of sizes from the foiled toner sheet and arranged them along my panel to resemble bubbles. I did use some extra scrap cardstock and thin foam tape in places to create added dimension with my circles.
With my background now assembled, it was time to start on the images.
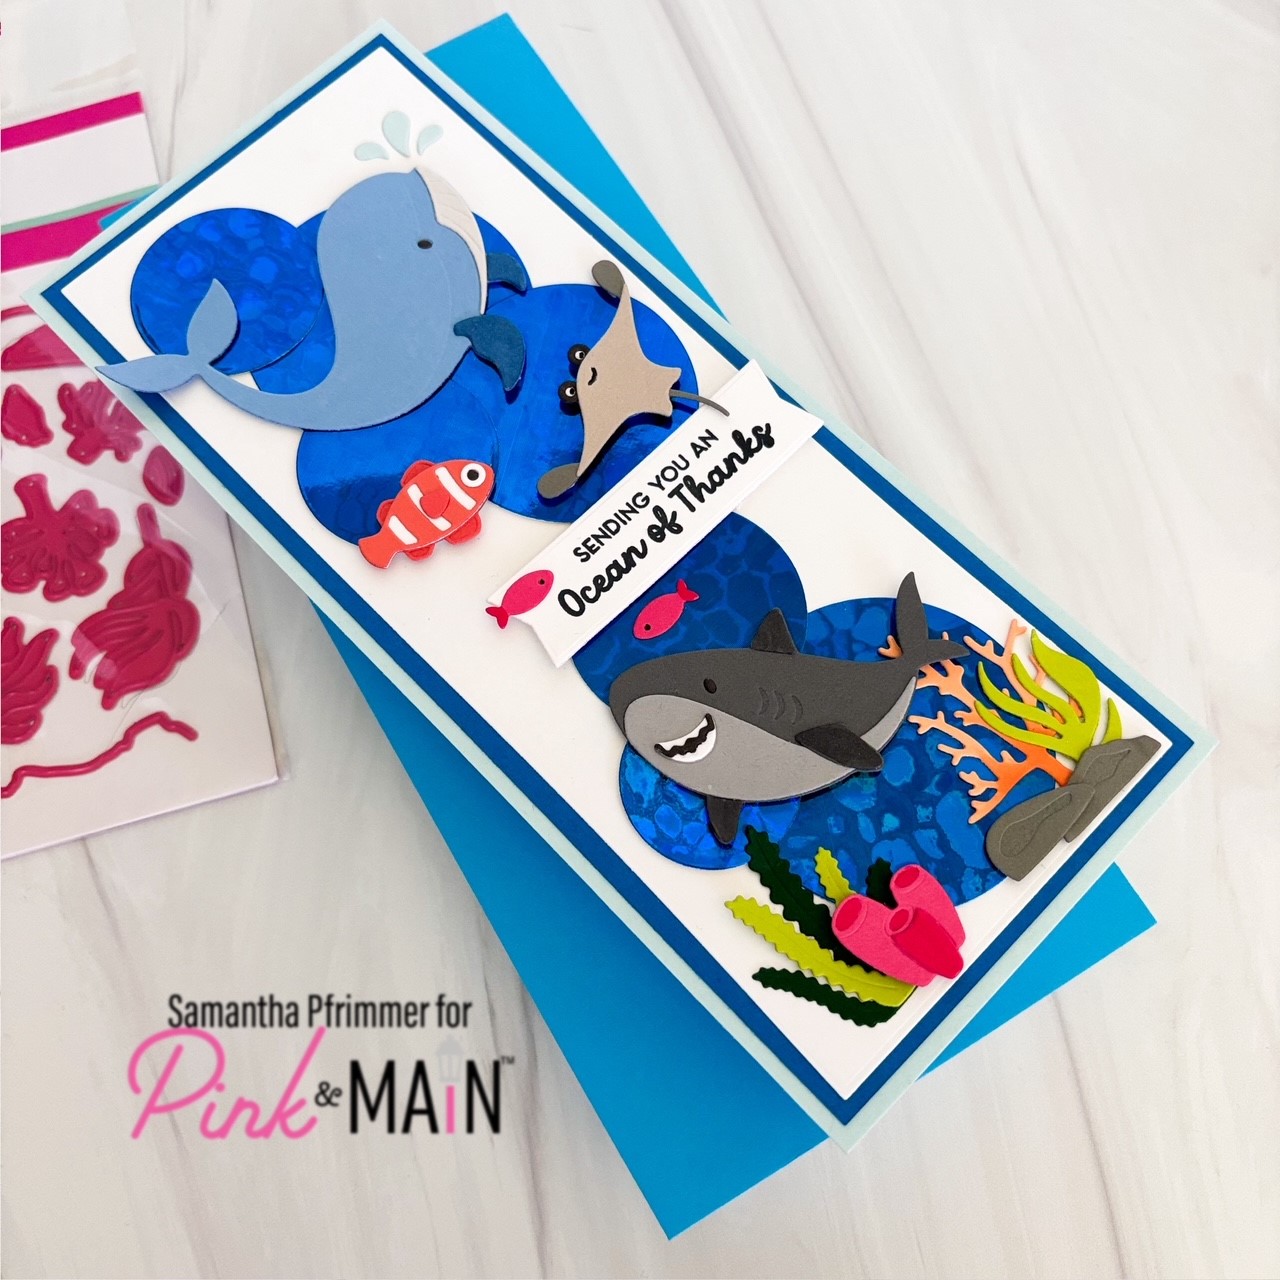
I grabbed the Coral Reef Dies, Ocean Animals Dies, and the School of Fish Dies to create my scene. I knew I wanted to feature both the shark and the whale, because they were too cute to resist, and the rest of my scene included additional elements to add color and movement.
I started by die-cutting my Ocean Animals using various shades of warm and cool gray colored cardstocks with a touch of blue for the whale. I then assembled each animal using the photo guide found on the back of the packaging. I used Copic Markers to add a small about of shading in places, but in most cases, worked just with colored cardstock. Once I had my main elements assembled I was better able to determine my final arrangement. Using the new Ocean Life Stamp Set, I stamped a sentiment onto white cardstock and die-cut it out using an Extra Large Sentiment Strip Die, which also helped me determine placement.
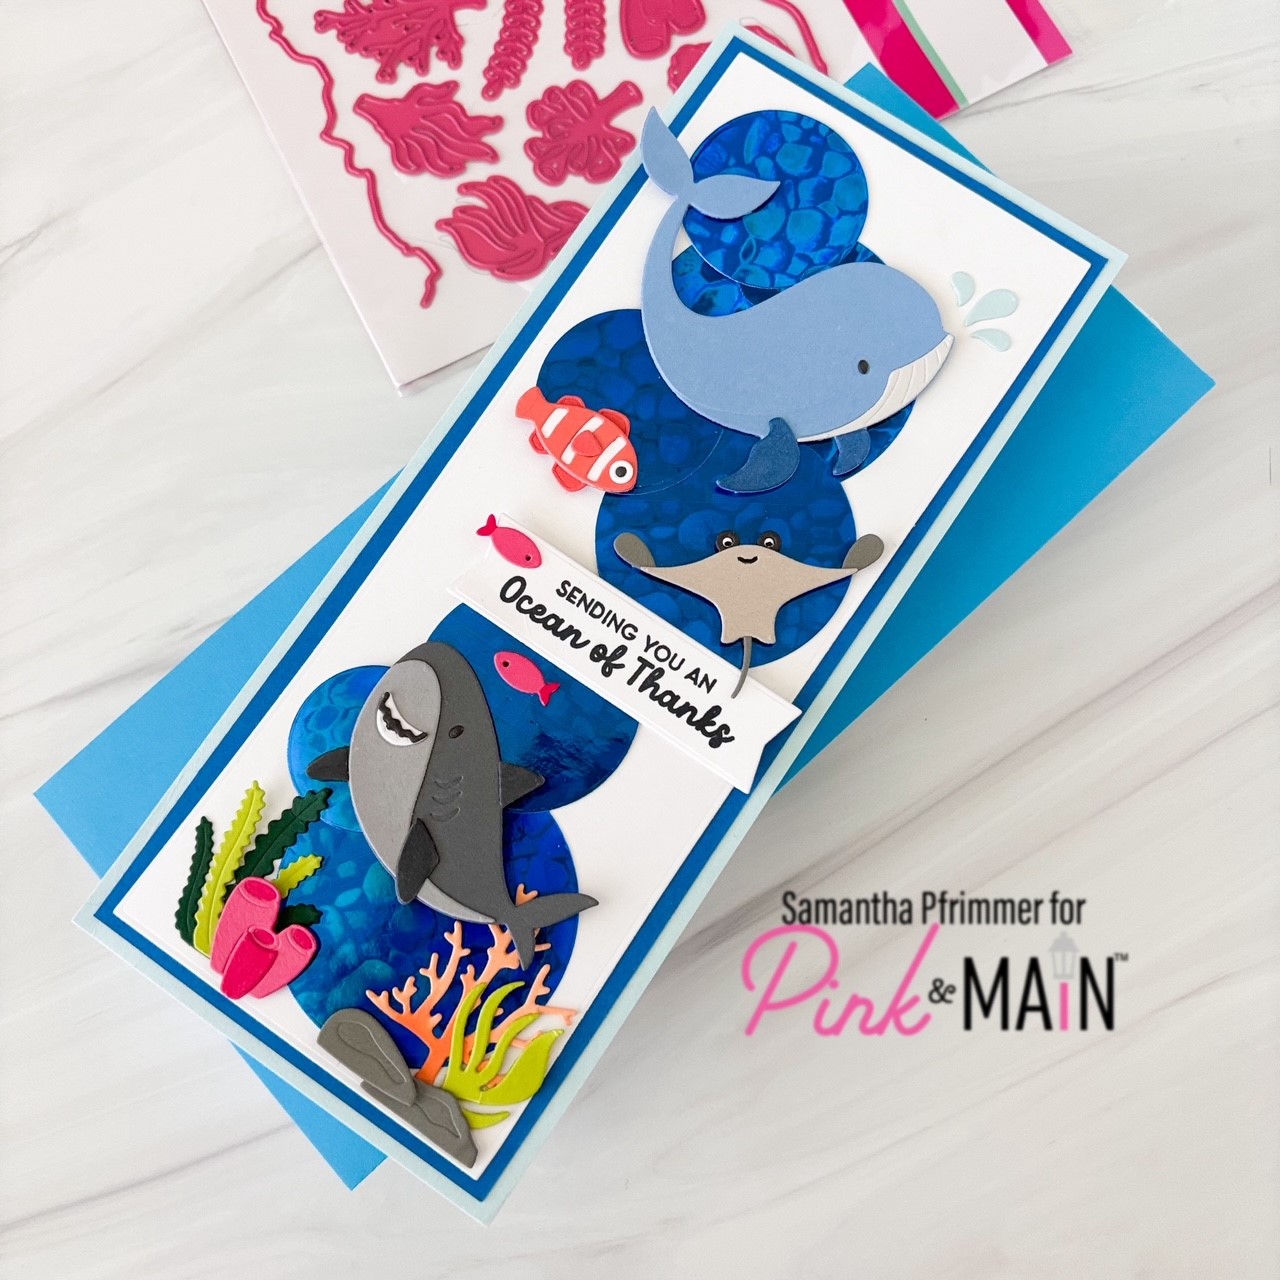
To finish out my scene, I die cut some rocks, seaweed and coral in greens, pinks, and oranges from the Coral Reef Dies along with a few fish from the School of Fish Dies, also in oranges and pinks. Again, I assembled each according to the helpful guide on the back of the packaging.
Once everything was cut and assembled, I arranged all of the images one last time on my background panel before adhering. Both glue and foam tape were used to create layers and dimension before adhering the entire panel to a dark blue cardstock mat measuring 8.5″ x 3.5.” I then added a final light blue mat measuring 8.75″ x 3.75″ before gluing to a matching folding white slimline cardbase.
My sweet card is now complete and is both an ocean of fun and an ocean of thanks!