
Hey everyone. It’s Dana here with you today. I’m so excited to be sharing a card I made with the new Holiday Scene dies. They are the perfect way to add a 3d effect to your cards while still shipping them flat in an envelope. Let’s get started.
To create this card I decided which pieces I wanted to have a design on and which ones would be solid. Once I had that figured out I ran the base die for the card with solid paper through my die cutting machine. The base is the part that makes the card. Then I ran the other elements that would be a solid color through my machine such as the snowy hills, houses, trees, reindeer and the large sentiment. For the houses, sentiment, snowy hills and trees, I used paper from the Christmas box that was released last month. To finish up the die cutting I ran the pieces that would be used for accents (the background of the base, the front of the card and the sides) through the machine with a piece of snow flake designer paper from the Be Merry 6×6 paper pad.
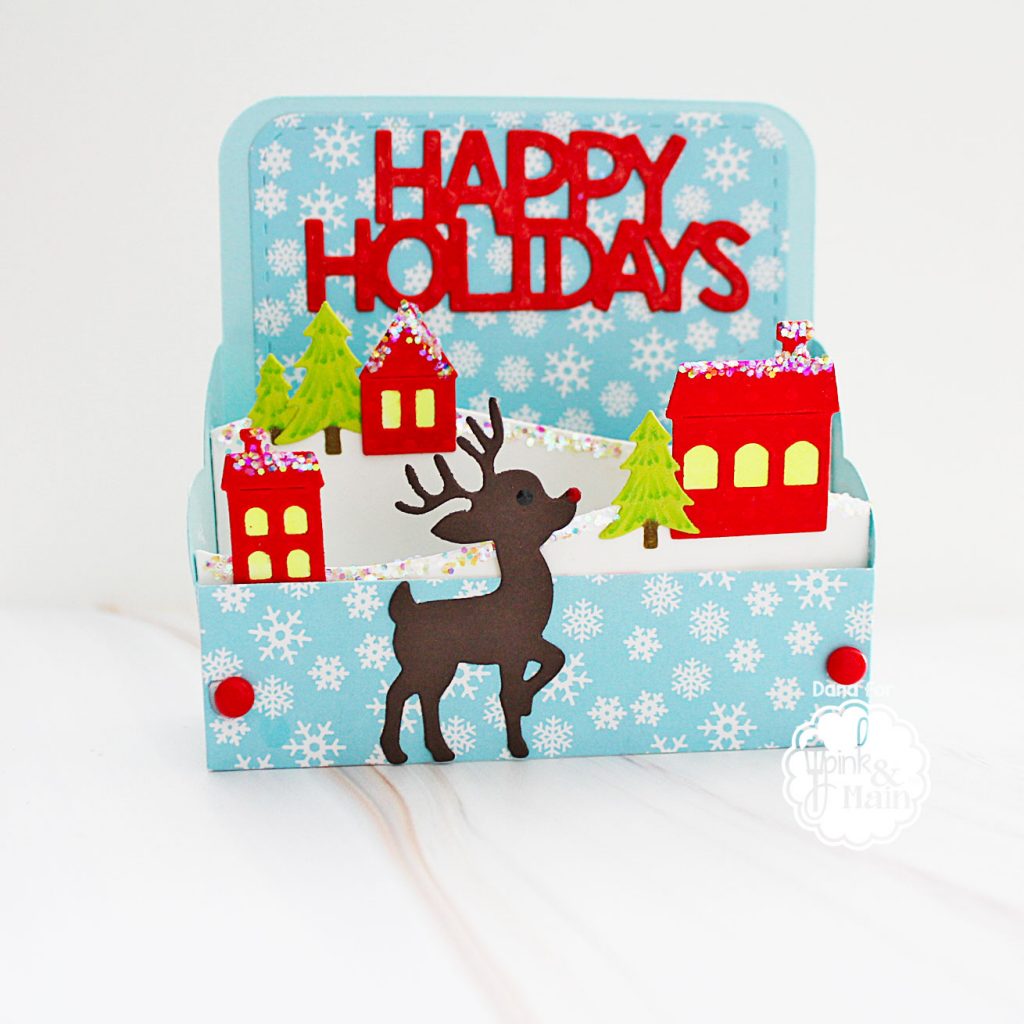
Now it was time to add some glitter. I added liquid glue to the tops of the snowy hills and houses then dipped them into chunky glitter and set them aside to dry. Next I used Nuvo drops to add the reindeer’s nose and eye. Once the glitter was dry on the houses, I cut a white piece of paper to fit behind each set of windows and colored it what my fluorescent yellow Copic marker. I adhered this white paper to each house and set them aside to dry. I also added some depth to the trees using a green Copic marker to make branches on the trees and a brown Copic maker to color the trunk of the tree. I adhered the houses and tress to each of the snowy hills.
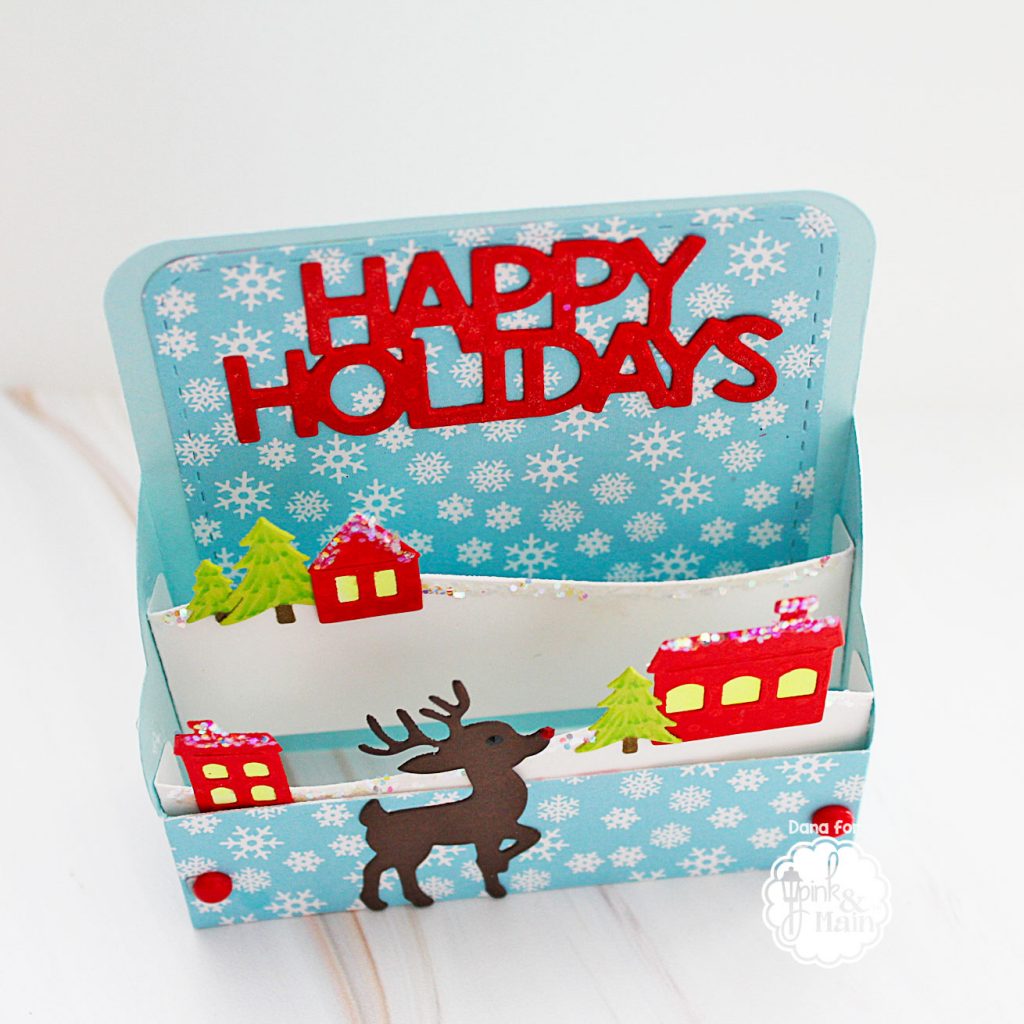
It was now time to assemble. I started first by adhering the snowflake background to the card base and adhering the rectangle piece in the front to hold the card together. I glued the side pieces on and the base of the card and now the base was complete. I glued the sentiment to the background leaving just enough room so that the house would not block it when it was placed onto the card. Then I started with the first hill and place glue along the tabs and placed it inside the card making sure to keep it level. I held it in place for 10 seconds of so then laid the card down and folded it from side to side to make sure the hill was adhered to the card base. Next I placed the other hill in the back of the card base the same way I did the front. (If I have totally confused you, Michelle will have a Youtube video sharing how to put the card together). I added my little reindeer to the front of the card and added some red enamel dots to add just a bit more color to the front panel.
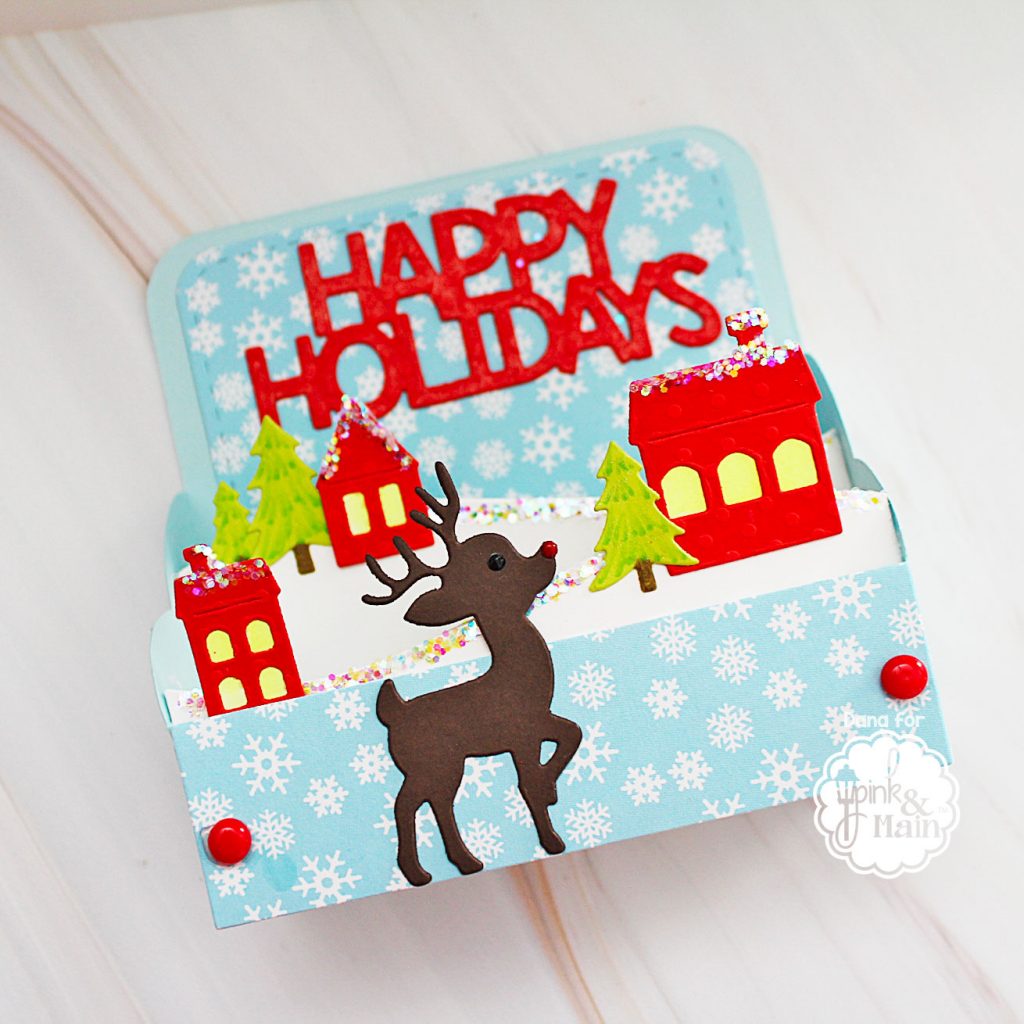
Here is a close up of the card when I lay it down. Look how much dimension you get on this card. And like I said you just need to fold it over to lay flap and place it into a A2 card envelope. I loved creating this this die set. It was so easy to put together and I know the recipient is going to love it. Thanks for stopping by today. I’ll see you back here soon.
Pingback: Pink and Main Holiday Scene Card -
Adorable!
Have a great day!
Marilyn❤
Oh how SWEET!