
Hey everyone. It’s Dana here with you today. So how many stamp sets have you picked up from the release? Did you make sure to grab your Christmas Box? I hope so because I’m inspiring you today with products directly from that box. Let’s get started.
For my card today I used several products from the Christmas box. This box is perfect for quick and easy holiday cards. Mass producing cards is something I do a lot during the holidays. So for my card today I used the Darcie presents embossing folder that come in the box, the Be Merry 6×6 paper pad and stamp set.
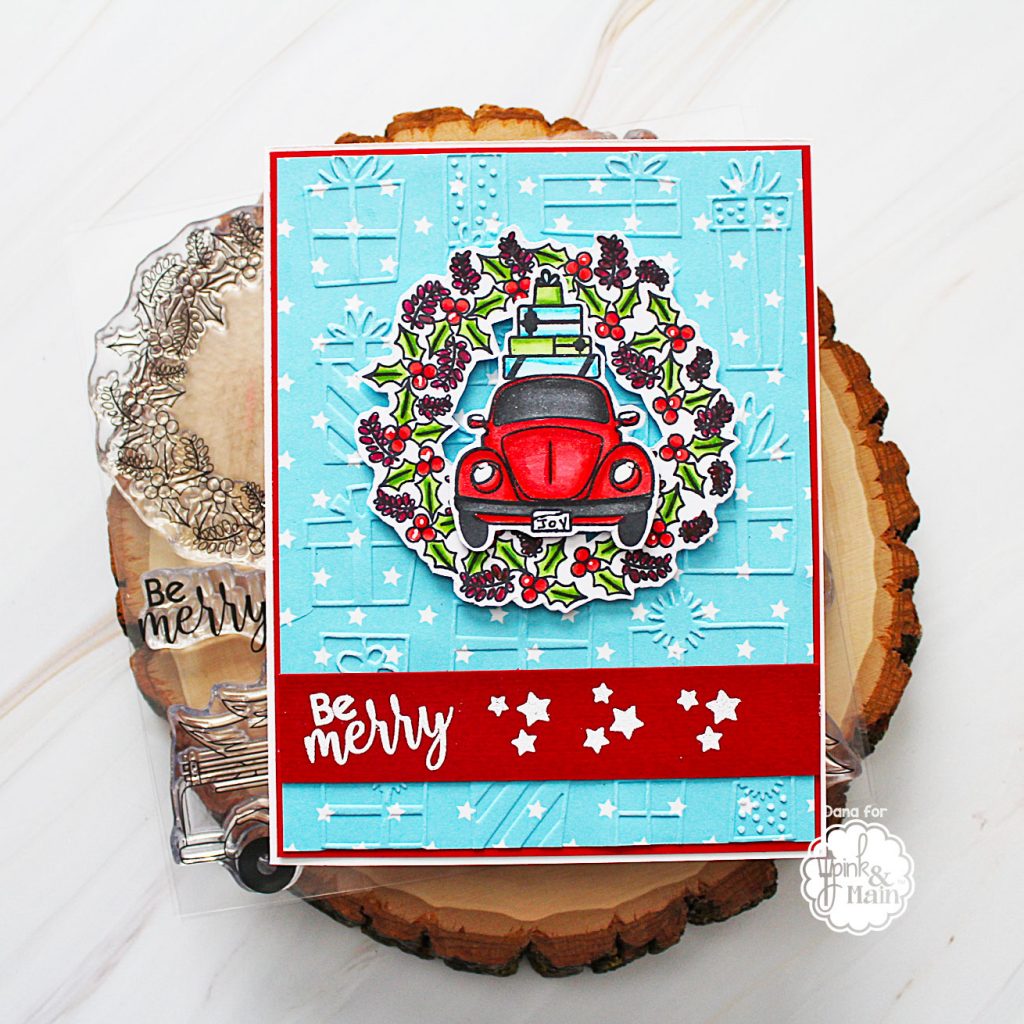
This card was super easy to put together. Coloring the images was the longer part of making this card. I started off by running a piece of starry paper from the Be Merry 6×6 paper pad with the embossing folder through my die cutting machine. I love the texture this embossing folder made on this paper. I adhered this panel onto a red card panel. Next I stamped out the sentiment from the Be Merry stamp set in Versamark ink on a strip of red card stock and heat set it with arctic white embossing powder. I glued this strip towards the bottom of my panel to keep space onto for my colored images.
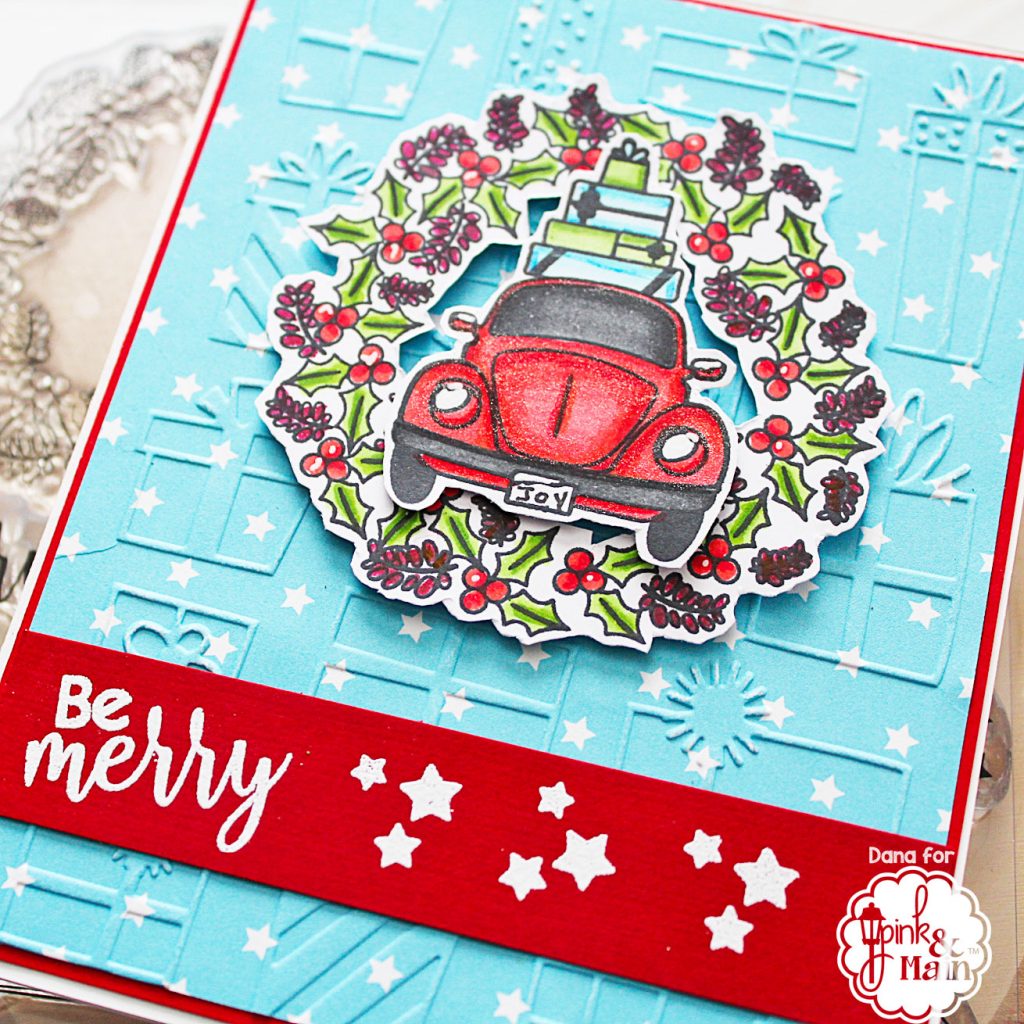
I kept my coloring very simple on this card. I pulled out just a few Copic markers in green, maroon and red. I stamped the wreath and car onto Copic Express It paper with tuxedo black ink. I quickly colored up the wreath with the green, maroon and red Copics and added just a touch of shading with color pencils. Next I moved onto my little car and colored it red and added depth with a color pencil. I colored the bumper and windshield with dark gray markers and again added depth with a color pencil. The little license plate on the front is empty so I added in my last name with a fine tip black pen. (All the cars I have owned over the last ten years have had a personal plate with the word JOY on them in some form or fashion 😉). Now it was time to fussy cut out the wreath and car.
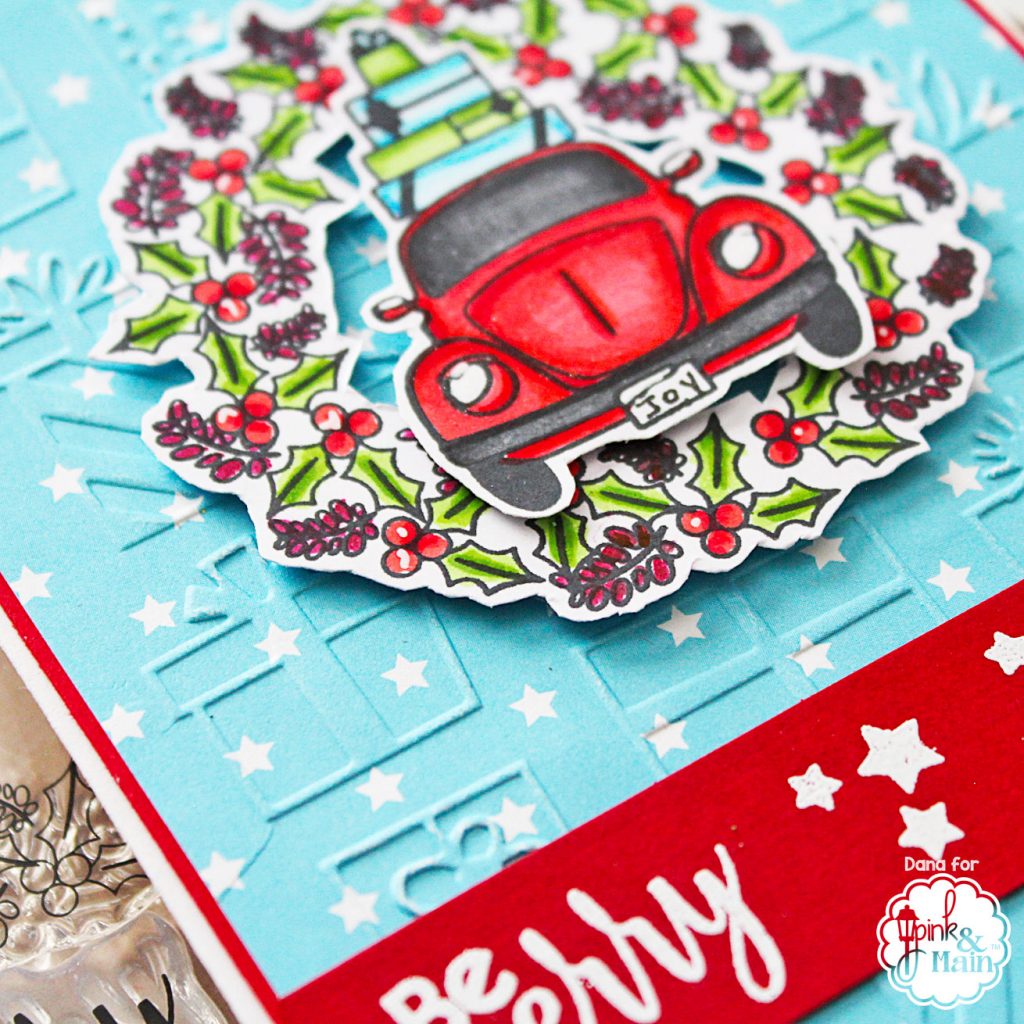
Using a sharp pair of scissors I cut around the car and wreath. I wanted to remove the white section inside the wreath so I grabbed my blade pen and carefully removed the white section making sure not to cut the wreath. I first popped the wreath onto the card base with foam tape and then popped the car inside the wreath just placing foam tape behind the part that sat inside the wreath. I adhered this completed panel onto a white card base made from 110lb Ice Rink card stock from Pink and Main. You can’t tell from the photos but I added just a bit of Wink of Stella onto the red car for a little sparkle.
Thanks so much for stopping by today. Make sure to tag Pink and Main when you are creating your spectacular cards. We want to see what you’re creating. Have a great day everyone.
Pingback: Be Merry With Pink and Main -