
Hello there! Have you checked out the new release? It is amazing – so many cute stamps and fun dies! I’m definitely ready for fall and cooler temperatures now!
Did you see the gorgeous card by my teamie Ksenija? I mean, wow! Well, I was also inspired by Jennifer McGuire, following her tutorial to make an inside shadow box card. You can check out her video here, but the pictures below illustrate the basic pieces needed to create the card.
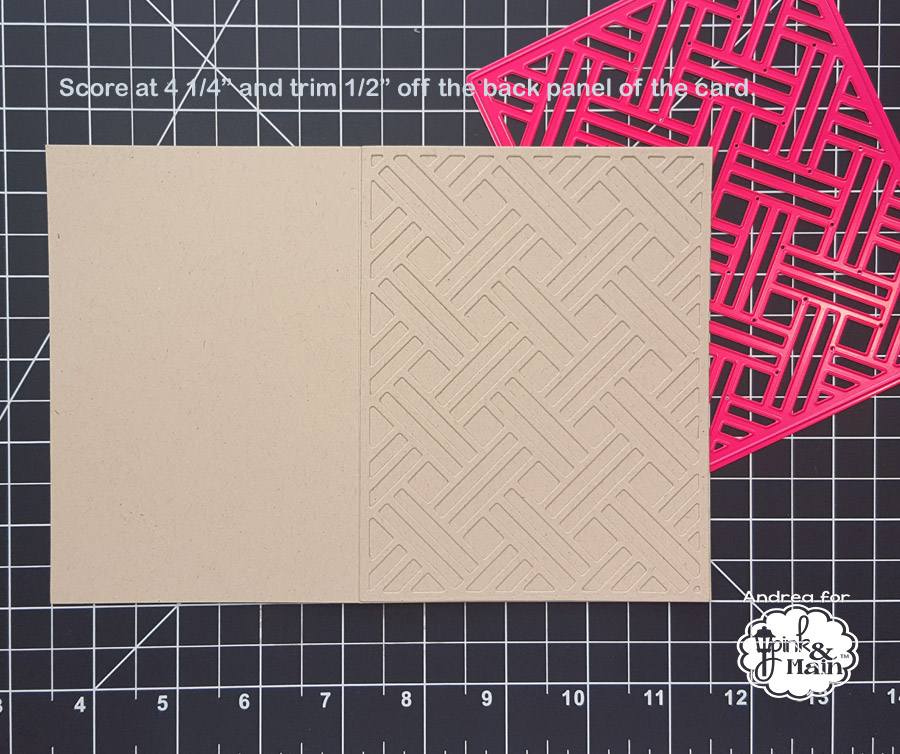
I cut an 8 1/2″ x 11″ rectangle of kraft cardstock at 5 1/2″, creating two cardbases measuring 5 1/2″ x 8 1/4″. I scored one of those at 4 1/4″ and trimmed 1/2″ off the back of the card. To the front of the card, I adhered a kraft panel die-cut with the Basket Cover Die.
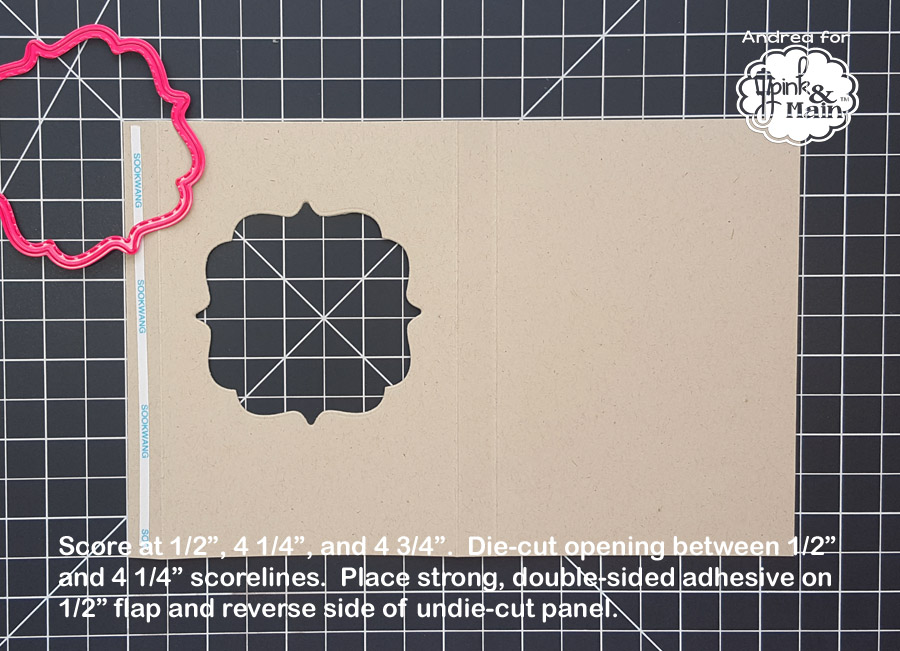
Taking the other kraft cardbase, I scored it at 1/2″, 4 1/4″, and 4 3/4″. From the panel between the 1/2″ and 4 1/4″ marks, I die-cut an opening with the Stitched Top Note Dies. I placed some strong, double-sided adhesive along the 1/2″ flap and on the back side of the uncut panel. To help the card fit together more easily, I trimmed a sliver off the 1/2″ flap. The 1/2″ flap was adhered to the inside flap of the first cardbase. The back panel of the second cardbase was wrapped around and attached to the back of the first card, creating the box.
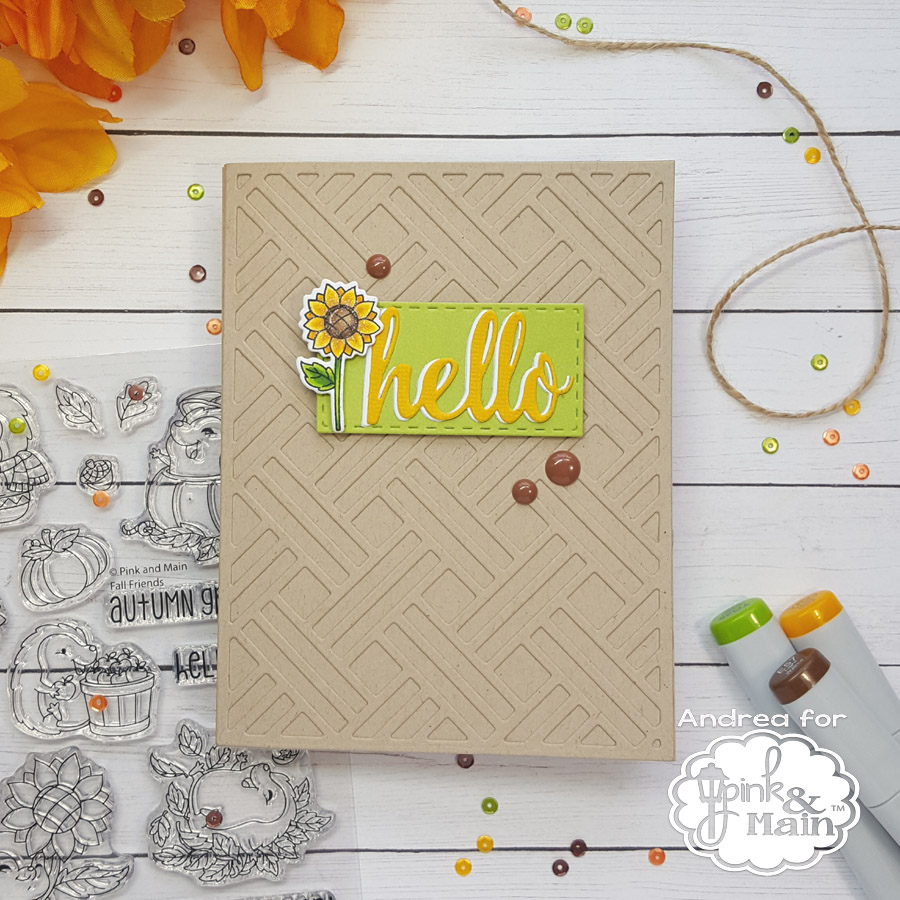
The “hello” on the front of my card is from the Wreath Base Dies. I die-cut the word twice and offset the two to create a drop shadow and help the sentiment stand out. That beautiful sunflower is from the Fall Friends stamp set and was colored with Copics. The green rectangle was die-cut with the Stitched Rectangles Set 1 Dies and adhered with foam tape. I also popped up the sunflower and gave it some sparkle.

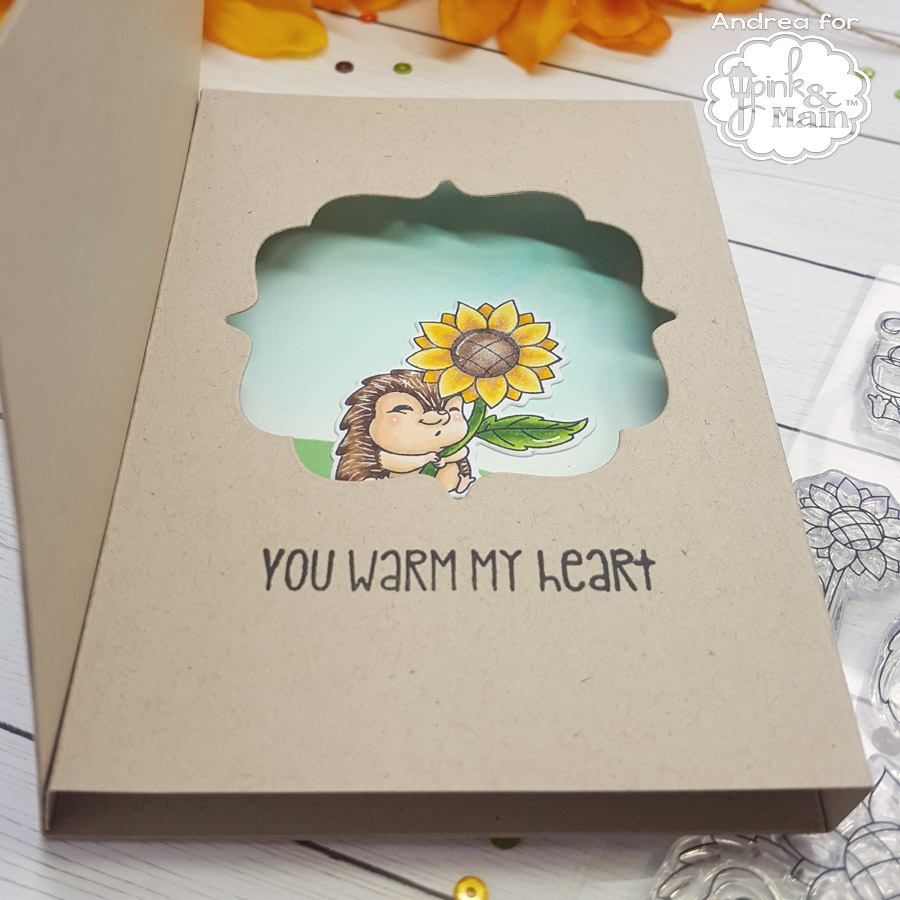
Isn’t that little hedgehog adorable?! He’s also from the Fall Friends stamp set and was colored with Copics. The background was created by ink-blending Riverwalk for the sky and mixing Street Light and Riverwalk for the grass. I used a mask die-cut with the Scallop Waves Dies to create my hill. Before attaching the two cardbases together, I stamped a sentiment from Fall Friends below the die-cut opening in my second cardbase and adhered my ink-blended panel to the inside of the first card.
Thanks for stopping by!
Hugs, Andrea
Adorable!!
Have a great day!
Marilyn❤️