
Sentiment die cuts are popular now and there are various ways to add them to a card. Today I am demonstrating a simple way how to make it look like floating over a card.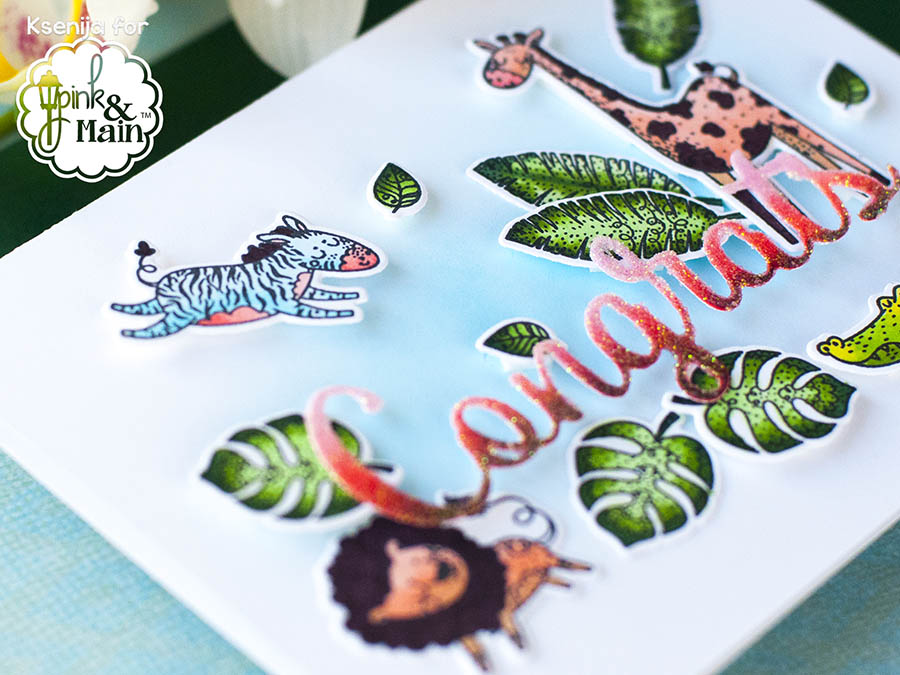
Hello, Everybody!
It’s my, Ksenija’s turn to feature more stamps from the latest release by Pink And Main.
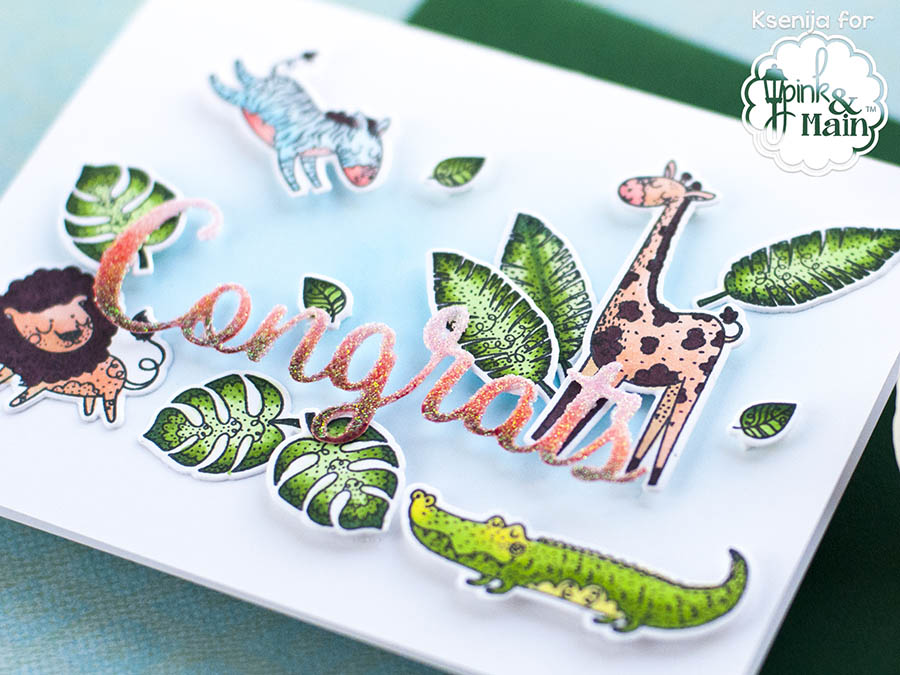
Today I will share a new card made with the Wild Thing stamps and co-ordinating dies in combination with a sentiment die cut and explain how to make it floating.

To begin with my card I die cut and stamped several animal images from the Wild Thing set as well as tropical leaves, and coloured them with alcohol markers.
Then I blended several shades of dye ink onto a piece of a white card stock and die cut Congrats word. This steel die is a staple piece for your stash.
I have not pushed the die cut out until I blended darker ink shades to the lower part of the word. Having applied a glimmer paste over this piece, I pushed the die cut gently out of the negative and set it aside to air dry.
I lightly inked the center of the card note with a light blue dye ink and started assembling the card. There are basically three levels – some of the elements are glued directly to the card note, some are popped up with a foam tape.
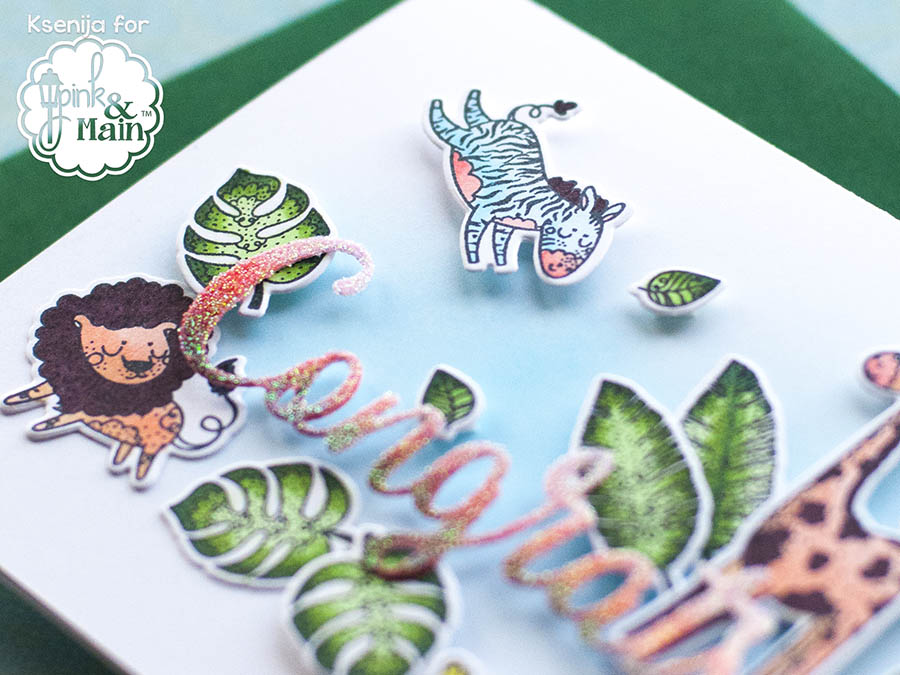
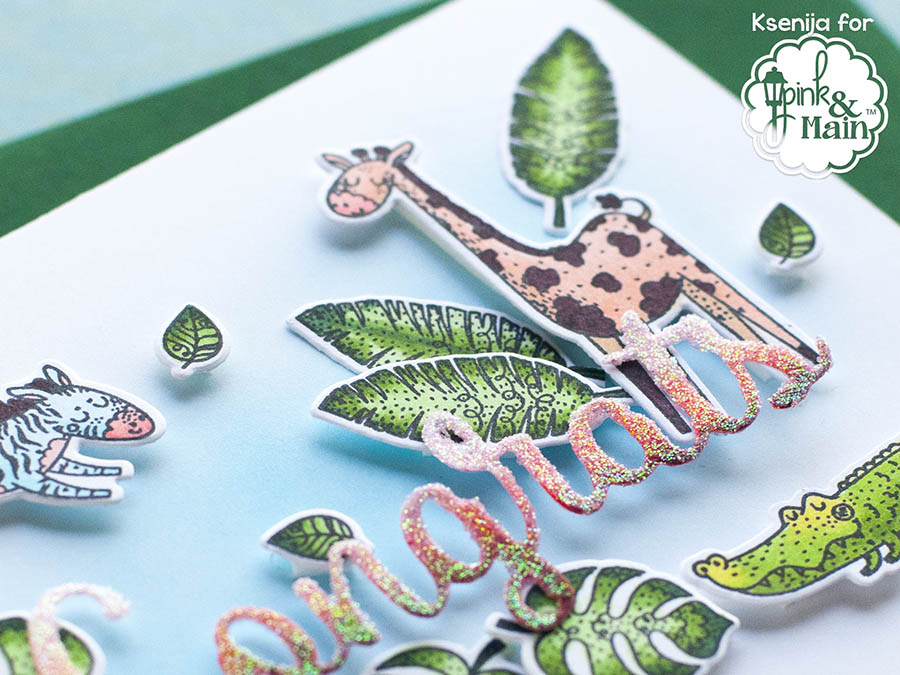
When I have adhered all the animals and big leaves I glue dotted the Congrats word to the high elements. The sentiment is like a bridge flying over the card supported by the popped up details.
Tell me what do you think about this way of adding a die cut sentiment to a card. Do you find it attractive? Would you give it a try?
Don’t miss your chance to order the newly released stamps and dies with 30% discount! The sale ends tonight. Shop HERE.
Thank you so much for stopping by today. Have a nice evening!
Beautiful!
Have a great day!
Marilyn❤️
The floating sentiment adds lots of interest to the card design ! Loved it 🙂 Thank you for sharing how to achieve this look 🙂