
Hello, Pink&Main fans and welcome back!! Laurie here to share a fun, decorated treat bag using goodies from the latest release!
I’ve had kraft bags in my stash for so long and decided to break them out for this project. I got 25 of them for $2 from Dollarama. They are smaller than a standard brown lunch bag but I think those would work just as well!! I stamped some adorable images from the Season of Change Stamp Set directly onto the bag. I did a bit of simple masking to make the pumpkins appear behind the bear.
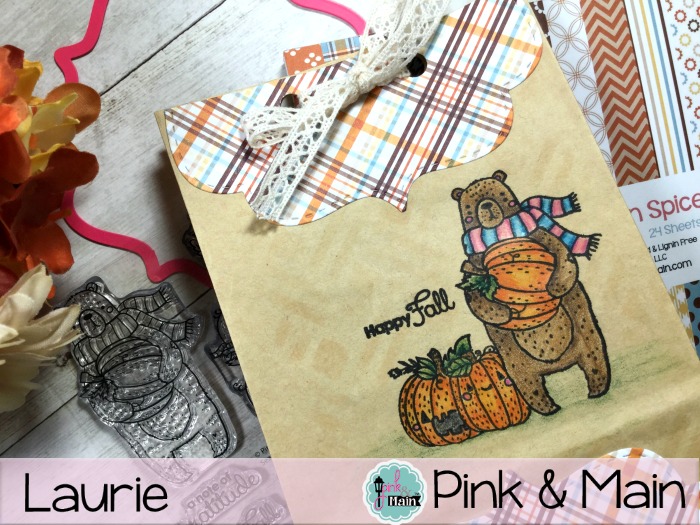
I used coloured pencils to do some real simple colouring. I was surprised at how easily the pencils blended on this paper! I did notice that the ink started to feather in places so I’m glad I didn’t use alcohol markers! To give a bit of texture to the bag, I die cut the new Basket Cover Die from printer paper to create a stencil. I used a very light hand with some very light ink to add the colour.
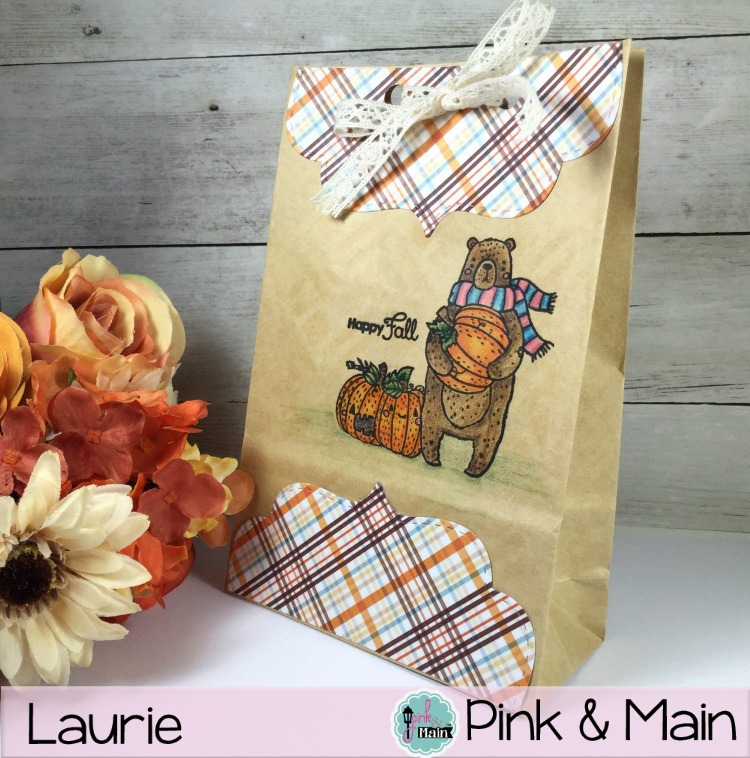
I thought it would be really cute to add some “faux flaps” to the bag. I used the largest die in the Stitched Top Note Die Set to cut out a piece of patterned paper from the Pumpkin Spice 6X6 Paper Pad. ( I cannot recommend P&M paper enough!! It has the best designs and is super high quality!) I cut the die cut paper in half and then trimmed each piece down so it would fit on the bag without covering up any of the coloured scene.
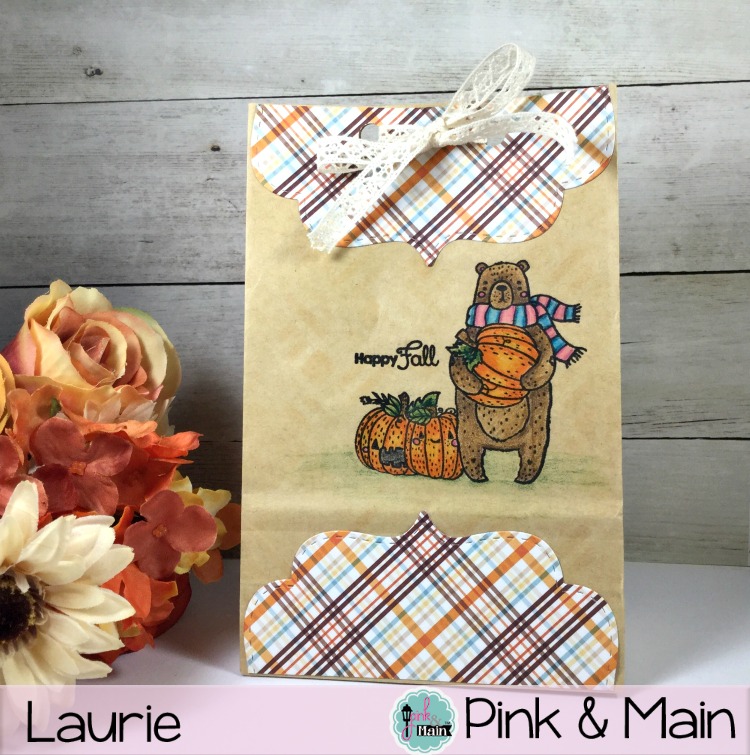
To finish the bag off, I used a hole punch to place two holes at the top and tied a piece of crocheted ribbon through. This was a really fun project. Sometimes it’s nice to create something other than a card!
Thank you so much for visiting today!
Cute bag!!
Have a great day!
Marilyn❤️