
Die cutting on the edge is a fun and simple technique for card making. Today I am sharing several helpful tips on making it easily.
Hello, Everybody!
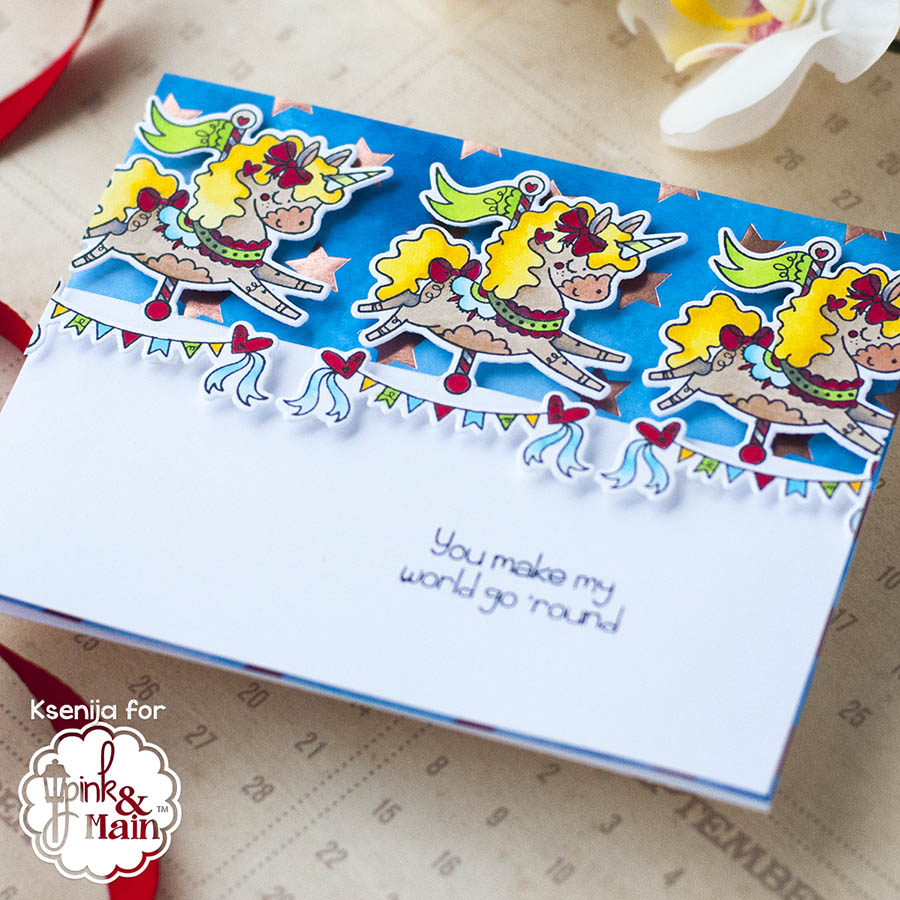
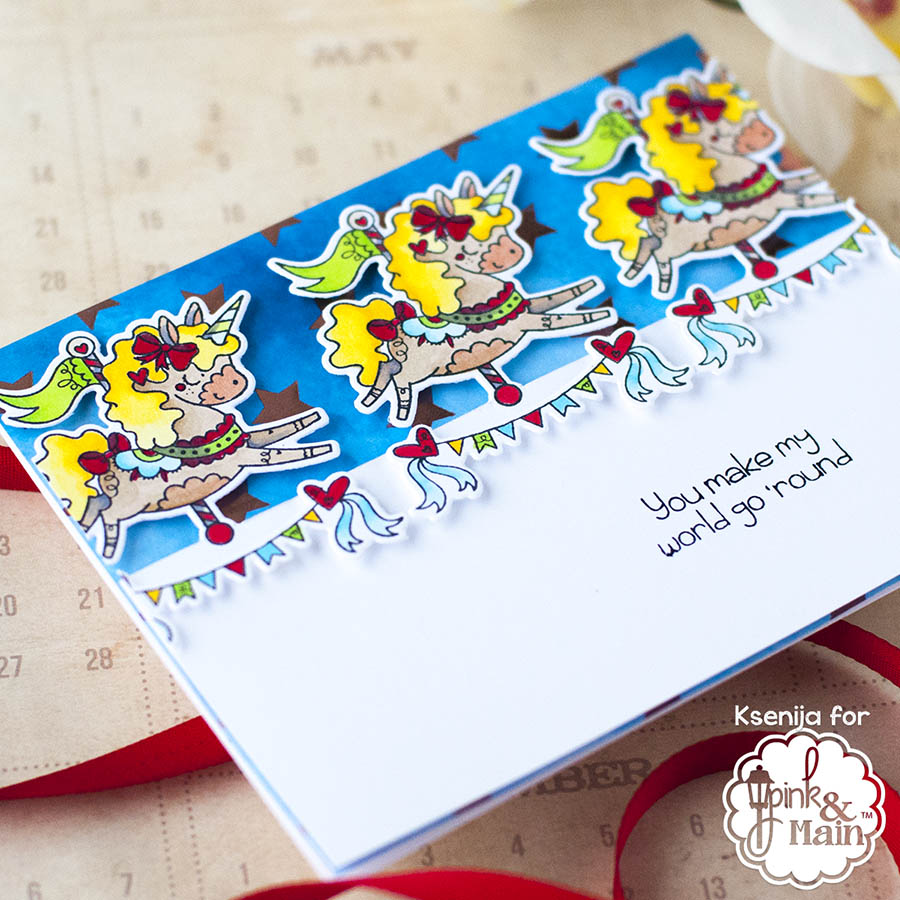
It’s Ksenija here today and I am sharing quick tips for adding dimension to a card and using Die Cutting on The Edge Technique.
Launched only a few days ago, Pink And Main unveiled one of the best patterned papers in the market – Watercolor Foil Paper.
Being a fan of shiny embellishments I have been considering stashing with foils and a laminator. But this idea did not “spark joy”. I am happy to have a pad of 24 watercolor washed sheets with 12 patterns.

To make this card I used the Sweet Carousel stamps and coordinating dies and a sheet of sky blue paper with golden stars from the pad.
Tips on Making This Card:
- Start with tracing a horizontal line with a pencil to align the sandwich platforms later.
- If you plan to die cut repeatedly one shape, start from the central one.
- Make a sandwich with the card stock panel and a die, squeeze it between the platforms only above the pencil line and run through a die cutting machine.
- Repeat this step twice for the image to the left and to right.
- Trim the upper part of the panel along the pencil line with a crafter’s knife.
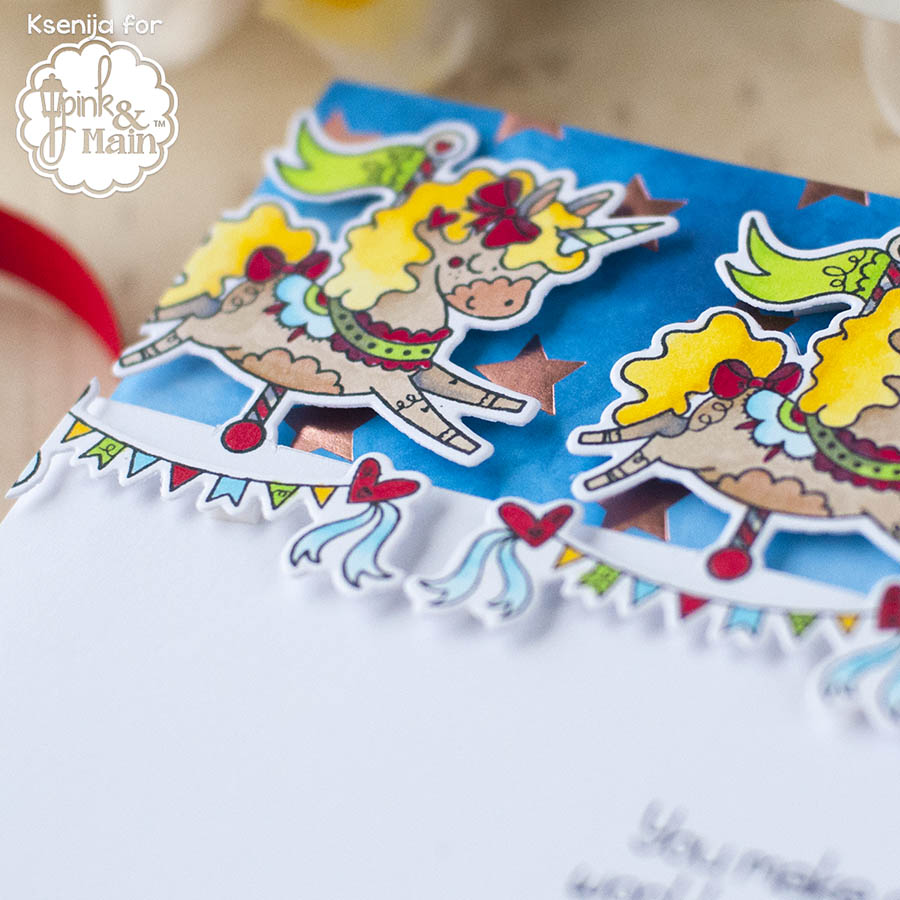
To add extra dimension die cut, stamp and colour three banners from the Sweet Carousel set.
To finish off the card trim the patterned paper down to 5 1/2″ by 4 1/4″ and adhere it to a card note.
Foam mount the die cut panel and pop the flag banners up with a foam tape for extra dimension.
Do you find these tips on die cutting on the edge helpful? I will be very glad if I inspired you to play with the new release from Pink And Main.
Thank you for stopping by. Have a beautiful day!